
Table of Contents
Migrate Mailboxes Data Between Office 365 Tenants
No matter what the reason behind to migrate mailboxes data between Office 365 tenants.
However, in most cases, migration needs arise when organizations face mergers, acquisitions scenarios.
There are many organizations that are frequently searching for a reliable solution to migrate mailboxes, emails, and data between Office 365 tenants.
So, this blog will describe the method to do this migration task.
First, you have to know this migration is not an easy task, without using an automated tool.
Therefore, to accomplish this task we have to use a third-party migration tool.
Microsoft also suggests using an automated tool to migrate emails between Office 365 tenant.
So, Let’s start the procedure to do this migration task.
How to migrate data between Office 365 Tenants
As we know there is no solution or method provided by Microsoft to perform a migration between Office 365 tenants.
So, we would like to suggest you SysTools tool for Office 365 to Office 365 migration to perform this task.
Therefore, this tool provides multiple advanced features that will help users to easily migrate mailboxes between Office 365 tenants.
Some highlighted features are given below –
- 1: Tool migrates emails, contacts, calendars, documents between Office 365 tenants.
- 2: Provides import CSV option to create a mapping between source & destination Office 365 tenants.
- 3: Date-based filter option to migrate selective data from source Office 365 tenant to destination tenant.
- 4: Allow to migrate selective or entire user’s mailbox.
- 5: Delta migration option to migrate newly arrived items between Office 365 tenants.
- 6: Full re-run migration to perform full re-run migration without duplicate items.
- 7: Retry failed migration option to move data which is skipped in the initial migration process.
- 8: Account-based priority migration to set the priority of account to migrate first.
- 9: Admin account is required to perform a migration between Office 365 tenants.
Now, in this upcoming section, we will know how to migrate data between Office 365 tenants by using this migration tool.
To successfully move entire data you have to follow all given steps.
Working Steps to Migrate Data between Office 365 Tenants
1: Download, install & run the software on your machine and select Office 365 as a source & destination.
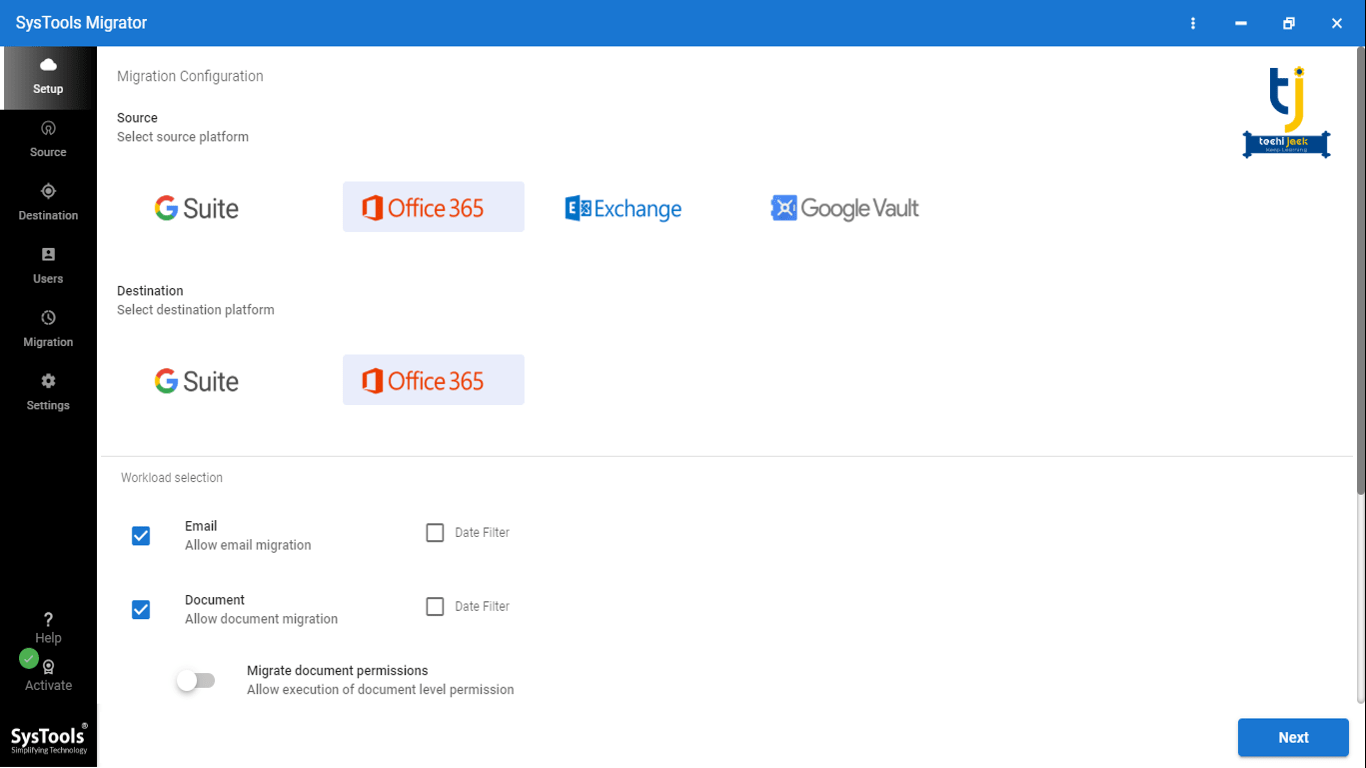
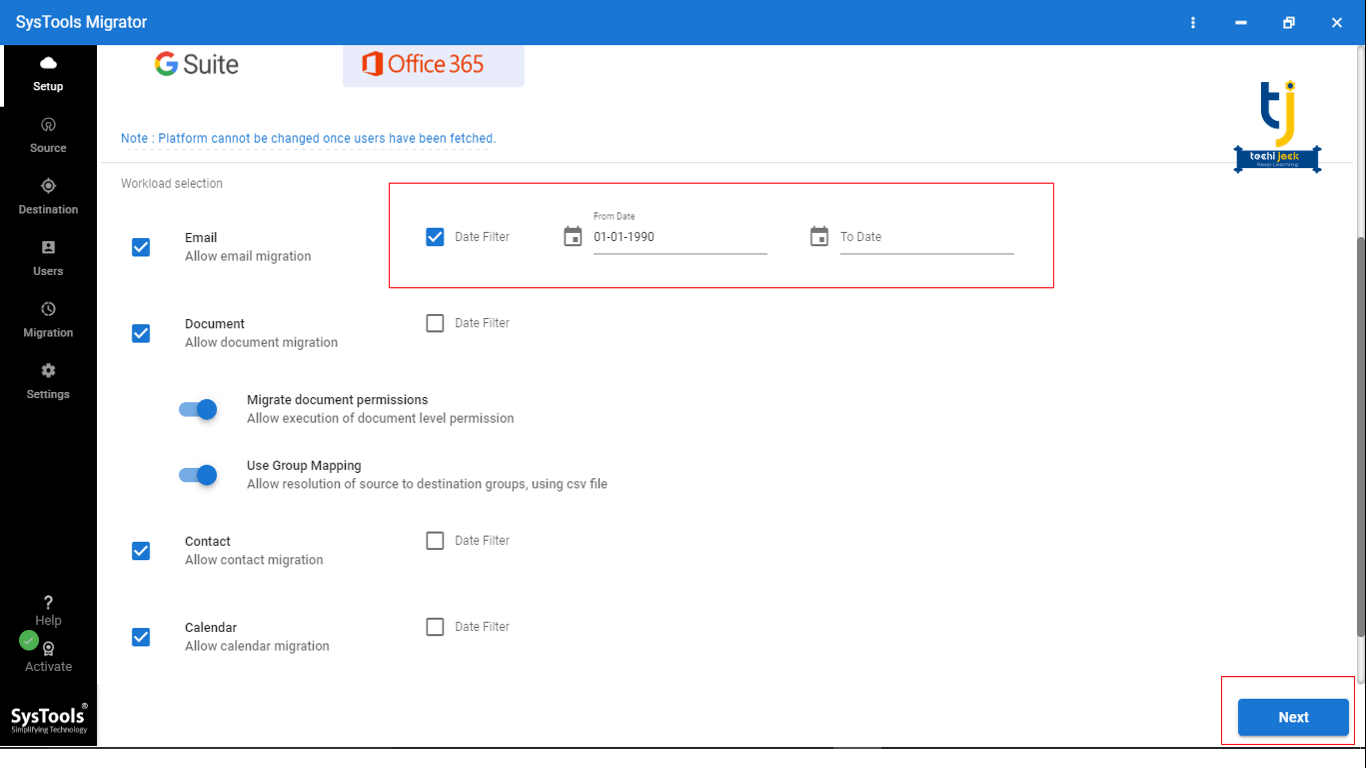
2: On this same screen you can select items (emails, contacts, calendar, documents) which you want to migrate.
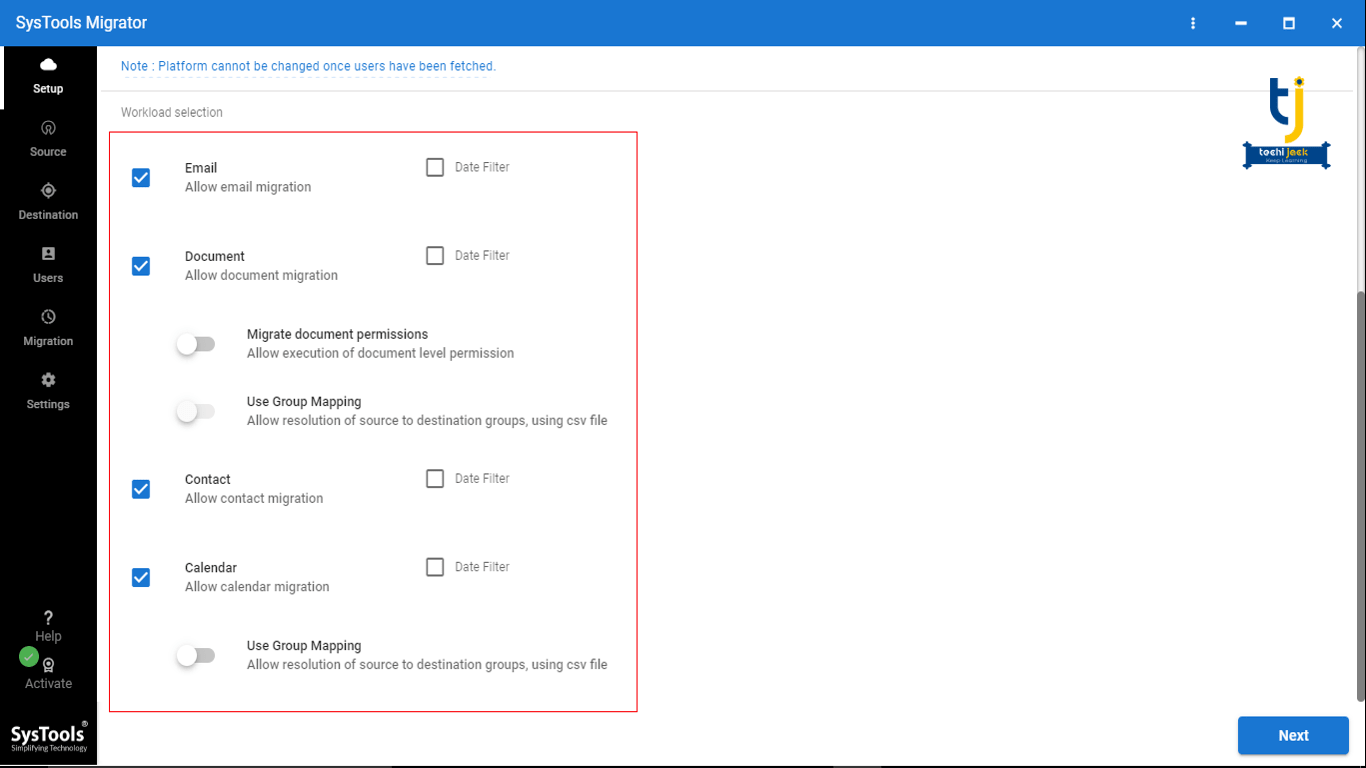
3: You can also apply Migrate Document Permissions and Use Groups Mapping & Date Filter option.
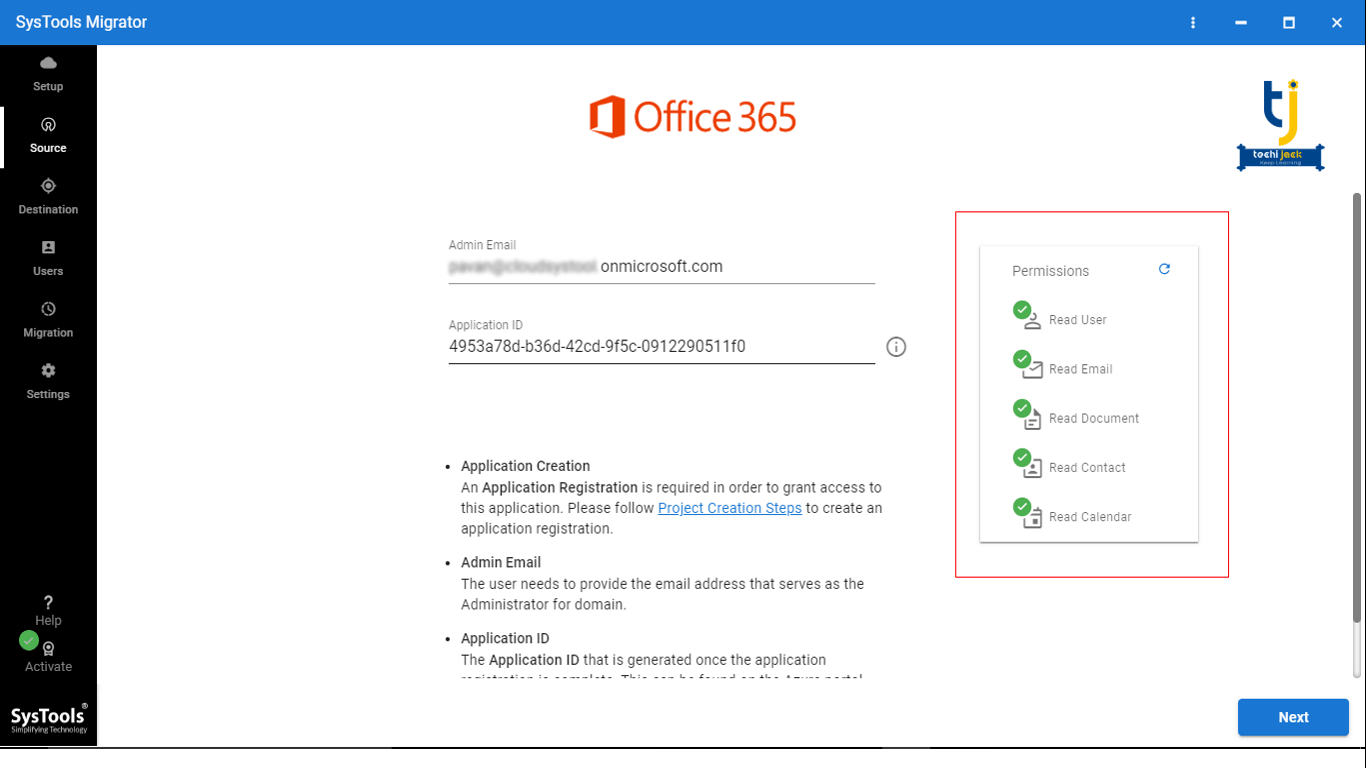
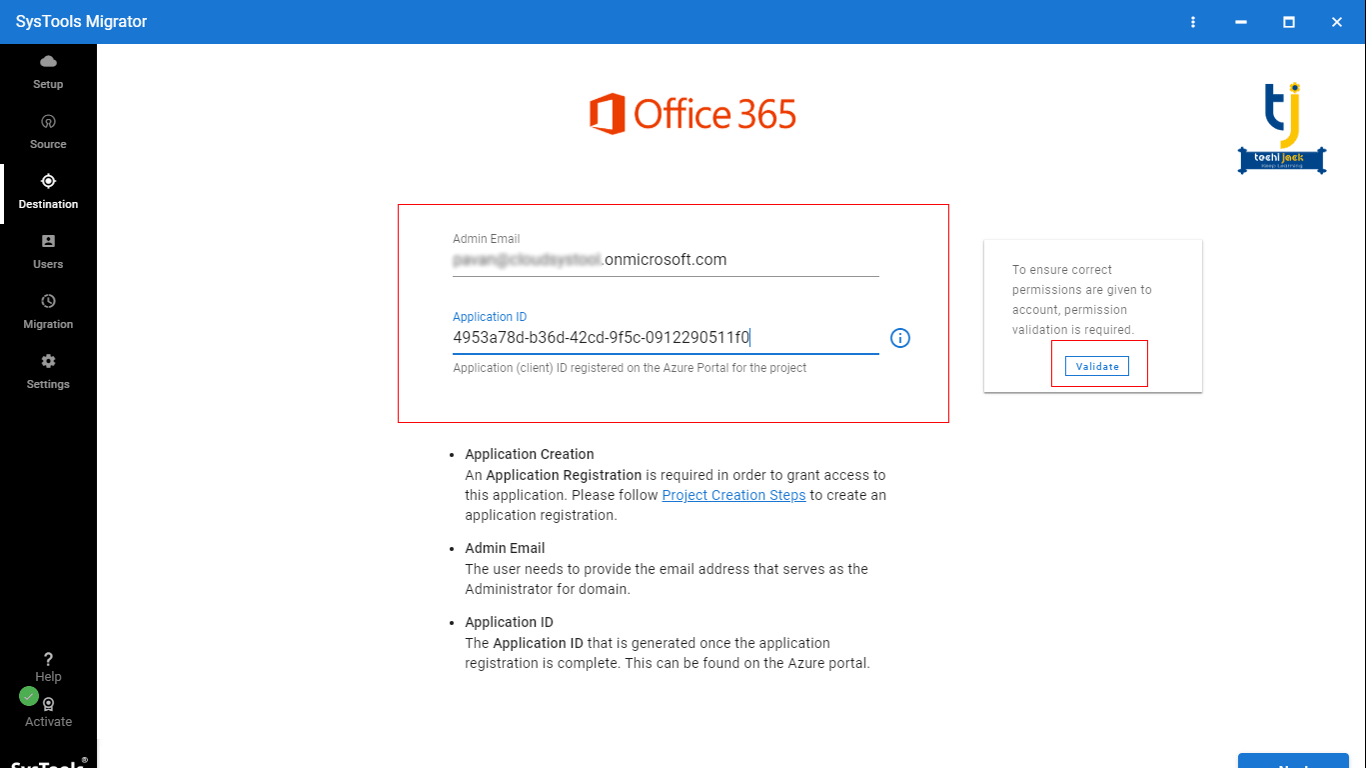
4: After that login in Office 365 source tenant with Admin ID & Application ID.
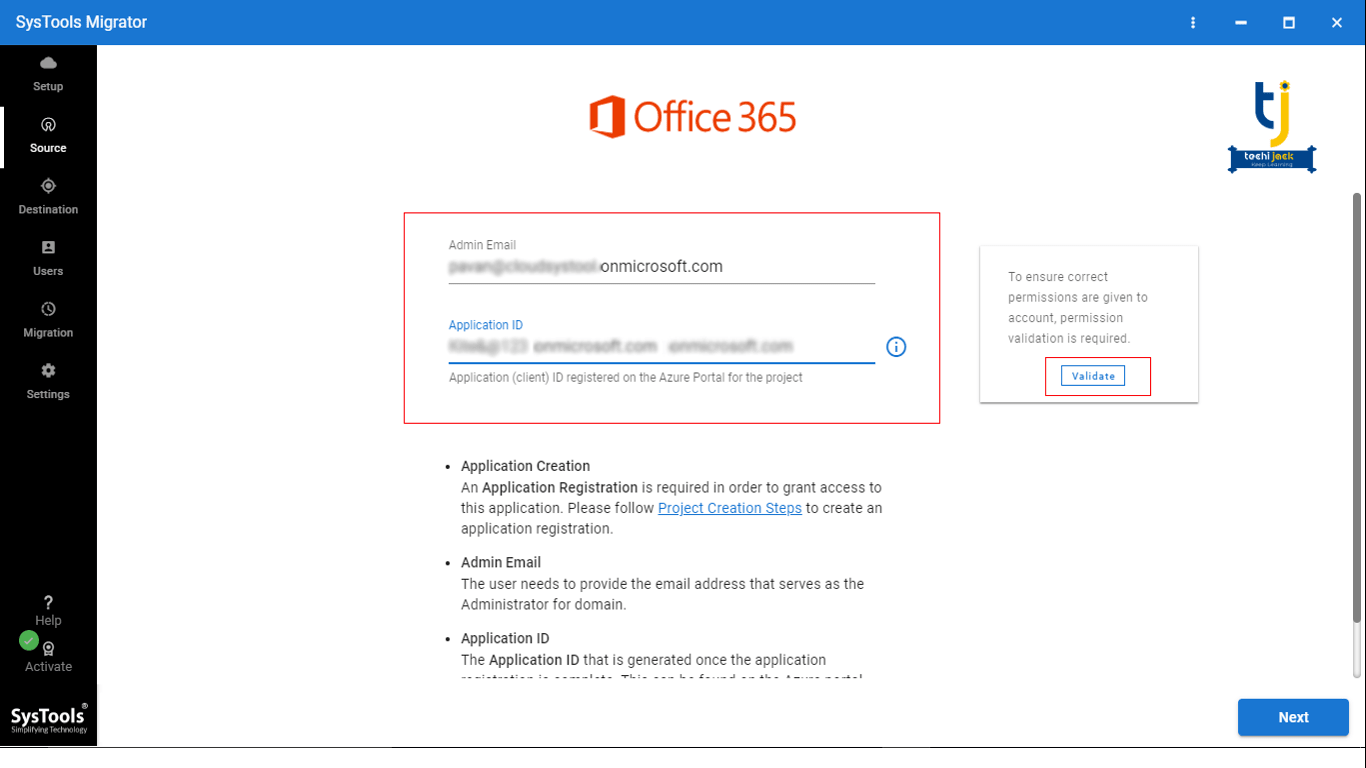
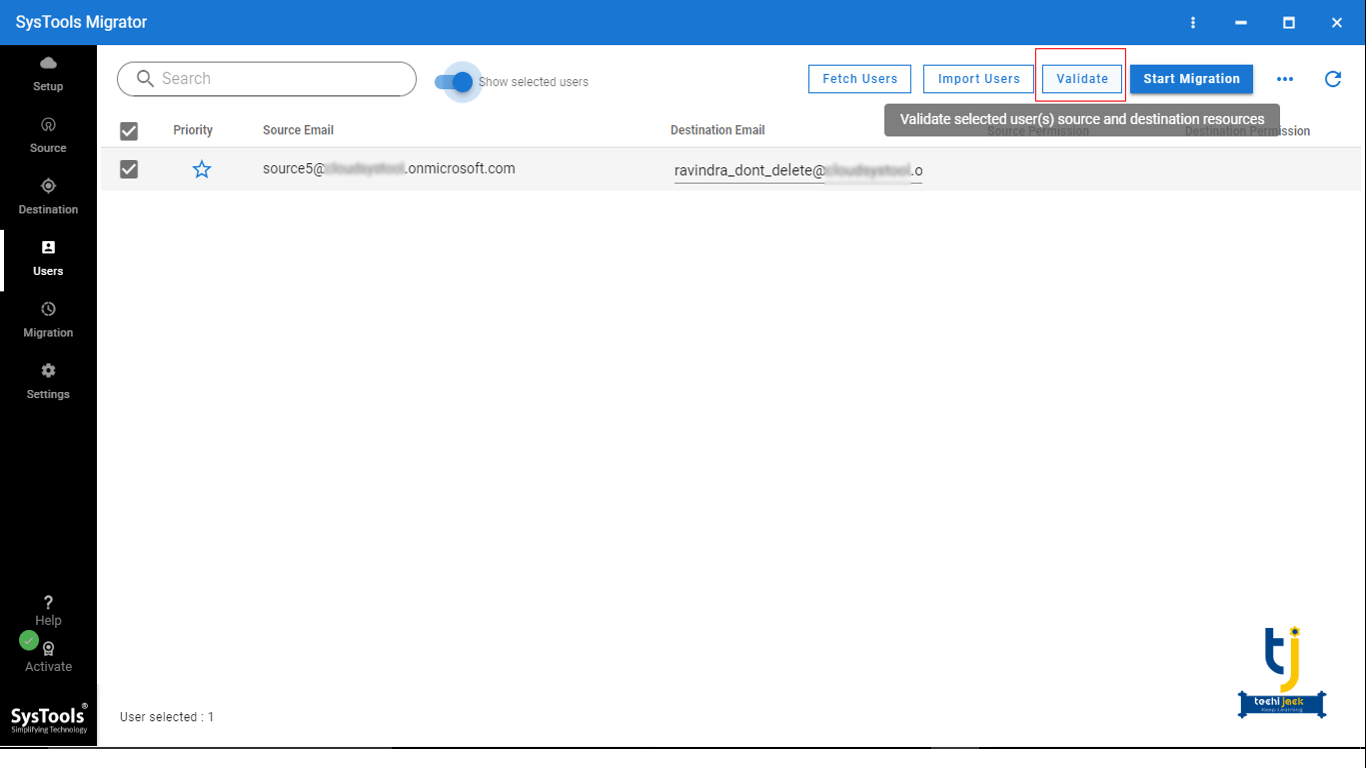
5: Click on the Validate button to validate permissions. After validating permissions click on Next.
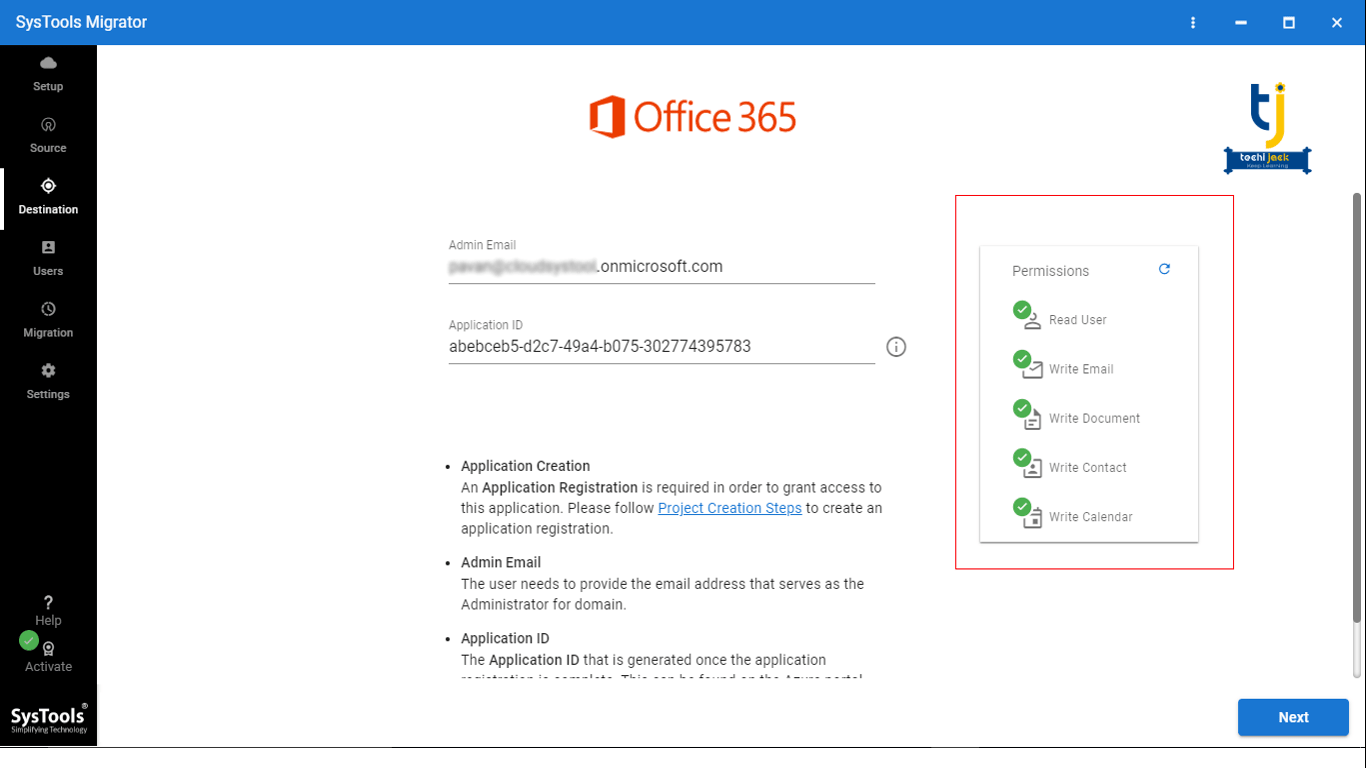
6: Now, login destination tenant with Admin ID and Application ID.
7: Then, click on the Validate button. Click on Next.
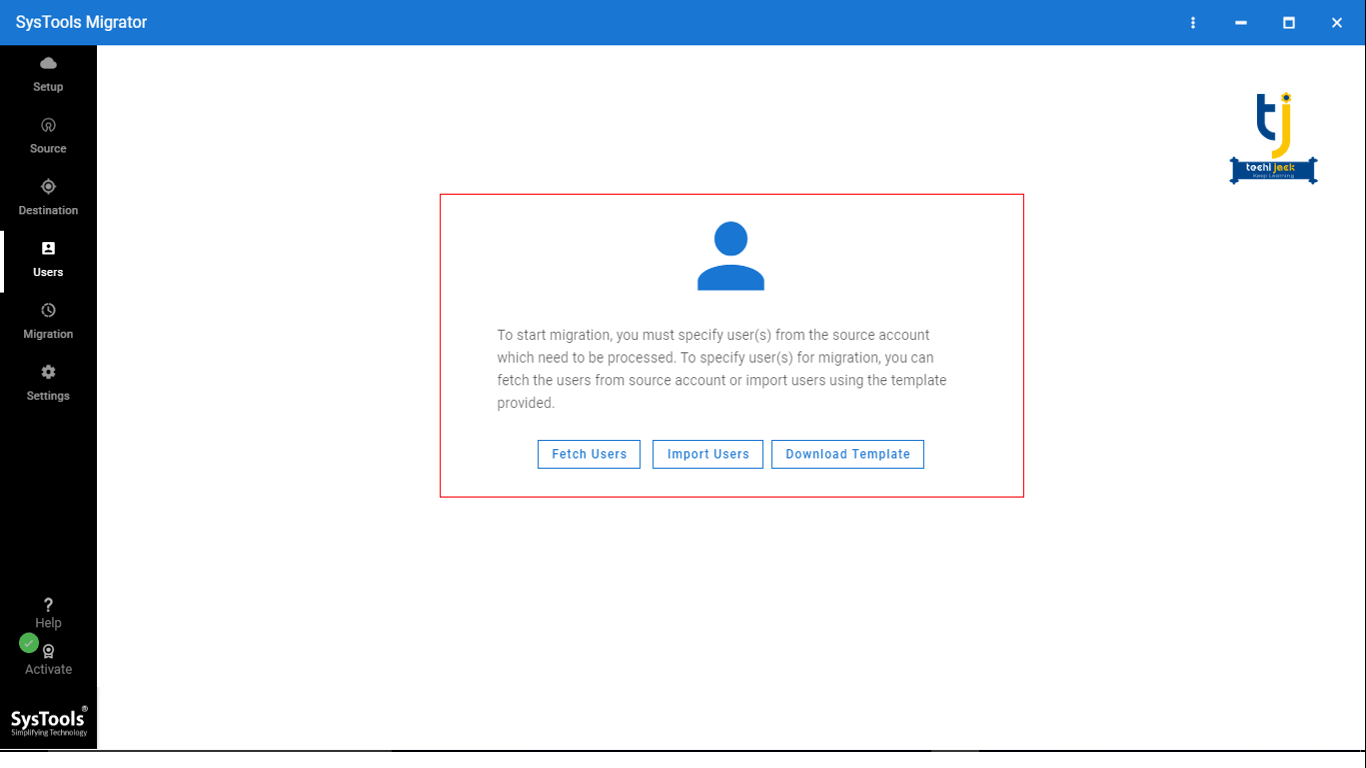
8: Now, import a CSV file to create a mapping between source Office 365 tenant & destination Office 365 tenant.
The tool provides three ways for this – Fetch Users, Import Users, and Download Template. Choose any one option to create a mapping.
Now, you can see mapping is created, click on Validate.
9: Therefore, after validating permissions, click on Start Migration.
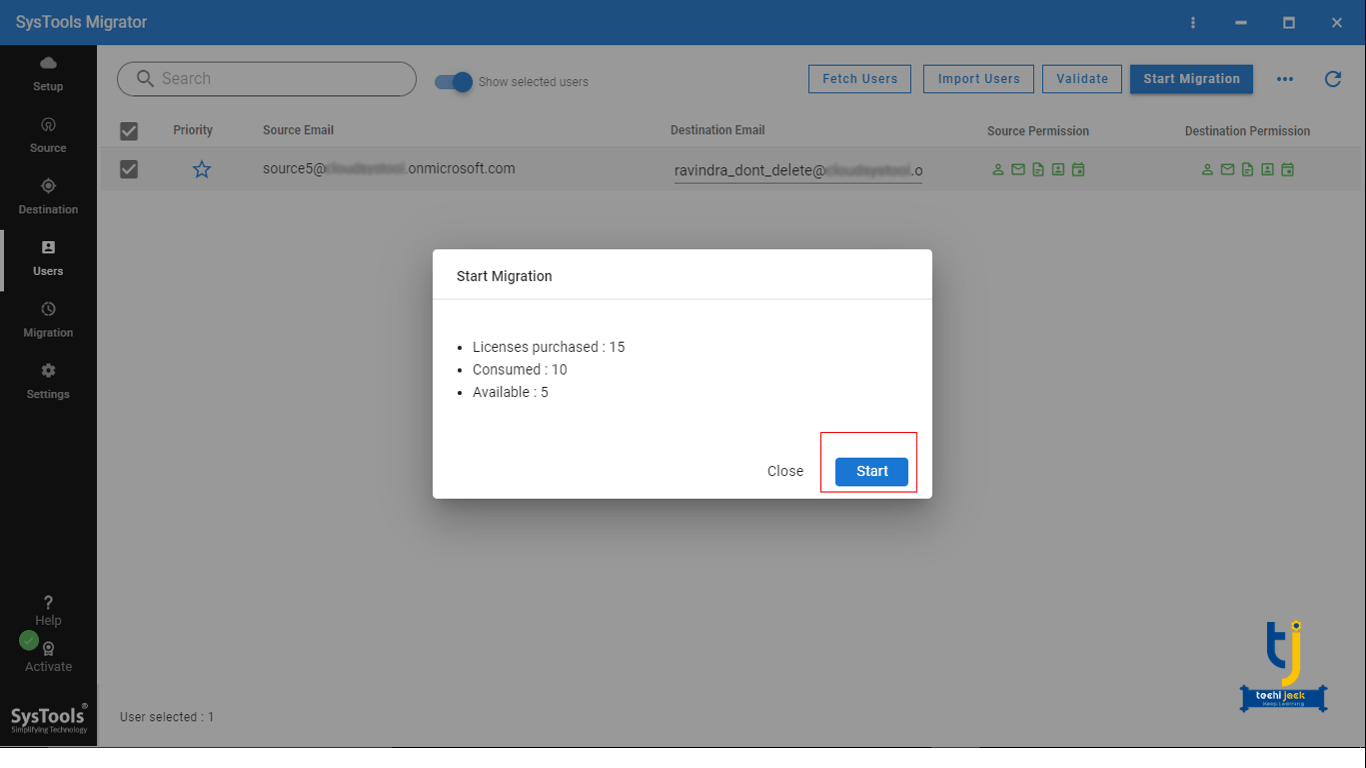
10: Finally, now the software starts migrating mailboxes between Office 365 tenants.
Conclusion
The automated migration tool is only the solution to migrate mailboxes between Office 365 tenants.
However, users have to select the right software to do this task.
Therefore, in this solution-based blog, we suggest a reliable solution that will help you to migrate data.
Such as contacts, calendars, documents data between Office 365 tenant without any complication.