Exchange Server 2016 Migration to Exchange 2019 Steps
Easy Step by Step Guide to Migrate Exchange 2016 to Exchange 2019
Table of Contents
Exchange Server 2016 Migration to Exchange 2019
In this article of Exchange Server 2016 Migration to Exchange 2019 by “Techijack”
We will dig deep into every important step that is mandatory for the migration process to avoid errors
Therefore, Migrating Exchange 2016 to Microsoft Exchange 2019
We have to create a co-existing environment between Exchange 2016 and 2019
So, we will install Exchange Server 2019 to our existing organization and then we will start the migration process to move all the configurations, certificates, and Mailboxes to our new Mailbox Server
Once we complete all the configuration settings on a new Microsoft Exchange Server 2019
We will then decommission our old Exchange Server 2016 and will check the mail flow functionality with the new Server
Before we start our migration of Exchange 2016 to 2019
Let’s get familiar with the existing scenario of the Techijack organization
Current Exchange 2016 Environment For Techijack Organization
Techijack Organization has a single Active Directory Server on Windows Server 2016 with a single Exchange Server 2016 CU 22
Forest and Domain functional level is Windows Server 2016
The current Server is fully functional with a perfect mail flow internal and external
Also, Public DNS for the old Exchange is configured and working properly.
Exchange Server 2016 is installed on a Hyper V with proper hardware configuration
DC Name = DC01, Exchange 2016 Name = EX01, Exchange 2016 Database Name = DB01
Namespace we are using for the Techijack organization is mail.techijack.live
Microsoft Exchange Server Migration from 2016 to 2019
As we already have a working Exchange Server, so let’s begin with Migration
So, we will create a new virtual machine and will install a new windows server 2019 on it
We will rename a new windows server 2019 as EX02-2019 and will provide the IP Address and DNS settings.
Also, we will update the new server with windows server updates
So, Now its time to install the Exchange 2019 prerequisites on the new EX02-2019 & Active Directory Server
Following software is required to install on AD server as well
- Net Framework 4.8
- Visual c++ Redistributable Package for Visual Studio 2012
- Visual c++ Redistributable Package for Visual Studio 2013
- Remote Tool Administration Pack
- Powershell Cmdlet to install Remote Tool AD is: Install-WindowsFeature RSAT-ADDS
Exchange 2019 Prerequisites
- .Net Framework 4.8
- Visual C++ Redistributable Package for Visual Studio 2012
- Visual C++ Redistributable Package for Visual Studio 2013
- Microsoft Unified Communications Managed API 4.0
- URL Rewrite 2.1
- Also, you need to install Lync and Skype for business components (below is a cmdlet to install this component)
- Powershell Cmdlet: Install-WindowsFeature Server Media-Foundation
-
Install-WindowsFeature Server-Media-Foundation, NET-Framework-45-Features, RPC-over-HTTP-proxy, RSAT-Clustering, RSAT-Clustering-CmdInterface, RSAT-Clustering-Mgmt, RSAT-Clustering-PowerShell, WAS-Process-Model, Web-Asp-Net45, Web-Basic-Auth, Web-Client-Auth, Web-Digest-Auth, Web-Dir-Browsing, Web-Dyn-Compression, Web-Http-Errors, Web-Http-Logging, Web-Http-Redirect, Web-Http-Tracing, Web-ISAPI-Ext, Web-ISAPI-Filter, Web-Lgcy-Mgmt-Console, Web-Metabase, Web-Mgmt-Console, Web-Mgmt-Service, Web-Net-Ext45, Web-Request-Monitor, Web-Server, Web-Stat-Compression, Web-Static-Content, Web-Windows-Auth, Web-WMI, Windows-Identity-Foundation, RSAT-ADDS
After completing the above prerequisites for Exchange 2019, we are now good to install the latest Exchange 2019
Moreover, we have to extend the Schema, and prepare AD and Domain before we run the Exchange Server 2019 setup
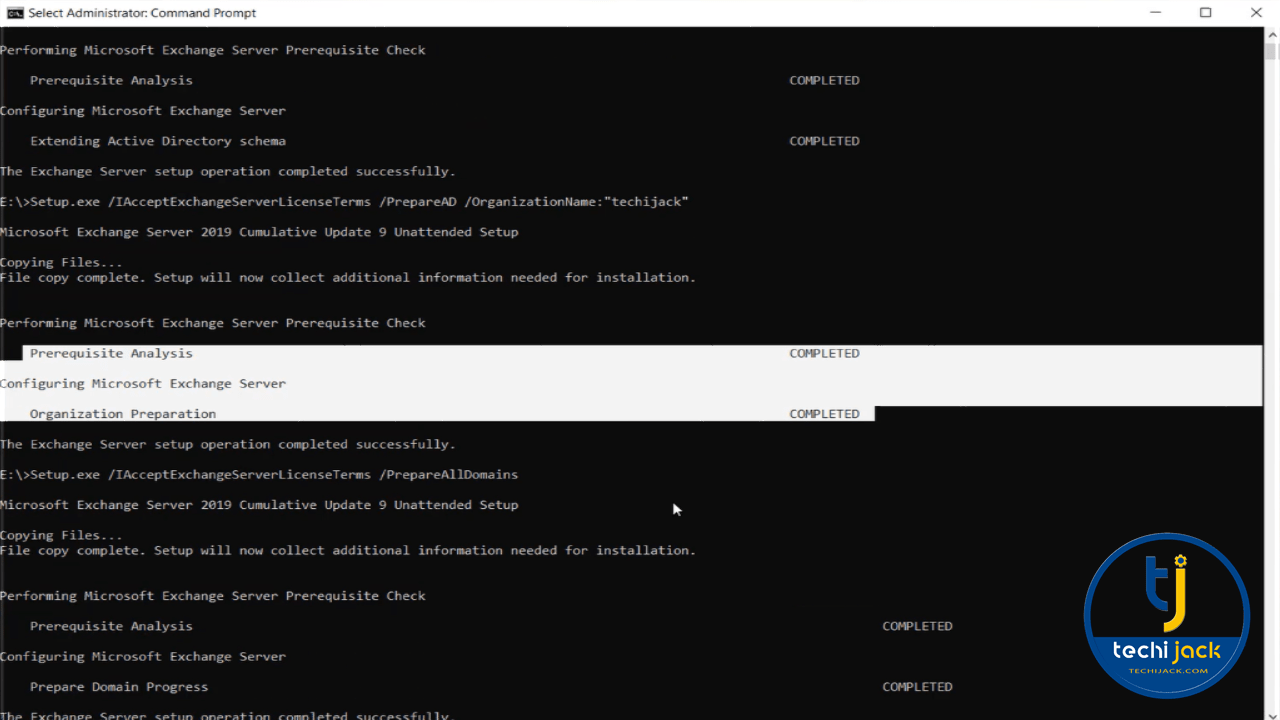
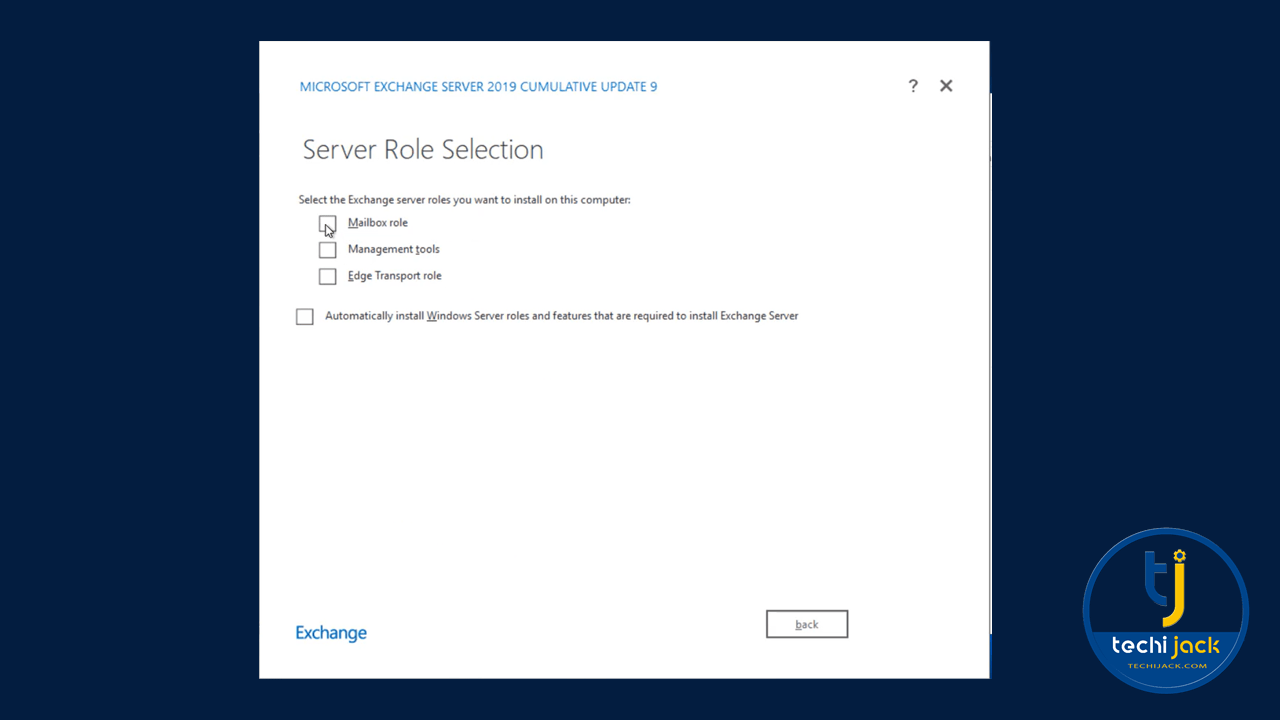
Now install Microsoft Exchange Server 2019 and select Mailbox Role
Complete the Installation on New Exchange Server 2019 (EX02-2019)
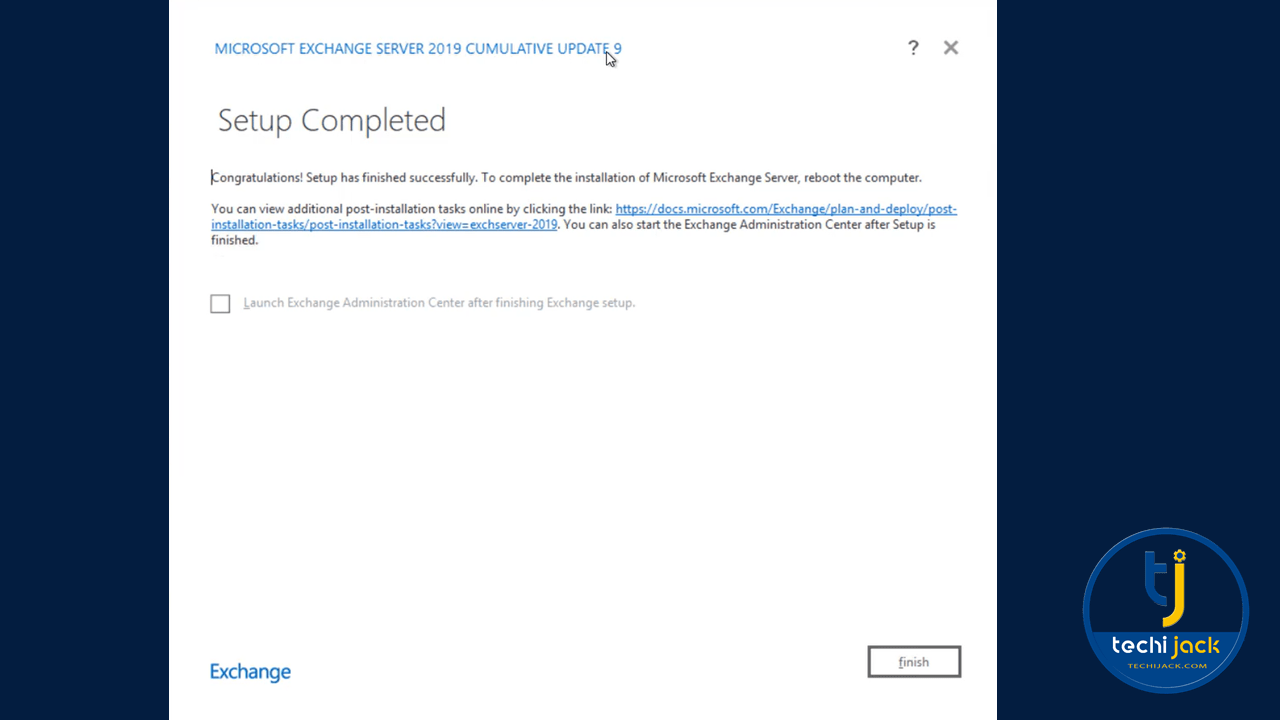
After installing the Exchange 2019 on Ex02-2019 restart the server and open Exchange Admin Center to confirm the Installation
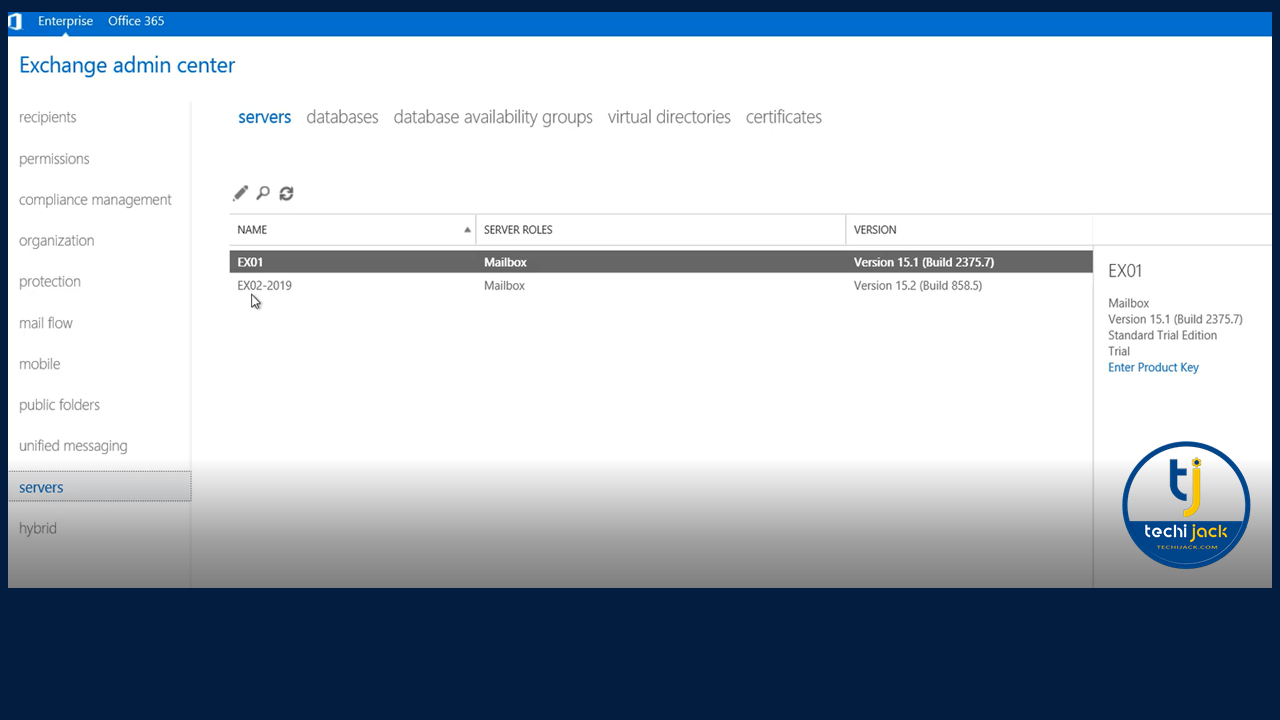
Now we have New Exchange Server EX02-2019 in Exchange Admin Center as a co-exist Exchange
Configuring New Exchange 2019 as a Co-Exist Exchange Environment
As it, a fresh server and virtual directories are pointing to the same server name
Therefore, we have to configure the virtual directories, Outlook Anywhere and Autodiscover scope first
- Configure Outlook Anywhere
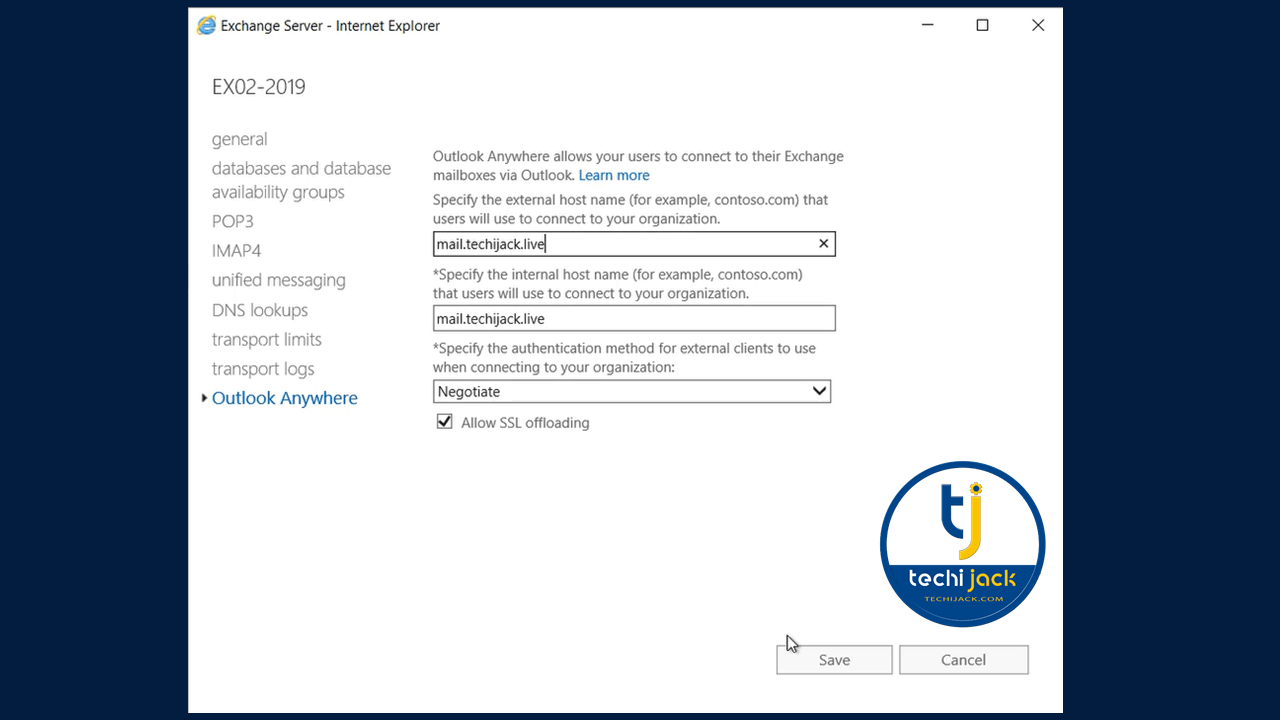
2. Now configure all virtual directories (except the Powershell virtual directory) as the old Exchange2016
As we are using Namespace as mail.techijack.live, (you have to set your namespace)
So, let’s run the following cmdlet to quickly set all the virtual directories in one go, except PowerShell VD
$Server_name = "EX02-2019"

$FQDN = "mail.techijack.live"

Get-OWAVirtualDirectory -Server $Server_name | Set-OWAVirtualDirectory -InternalURL "https://$($FQDN)/owa" -ExternalURL "https://$($FQDN)/owa"

Get-ECPVirtualDirectory -Server $Server_name | Set-ECPVirtualDirectory -InternalURL "https://$($FQDN)/ecp" -ExternalURL "https://$($FQDN)/ecp"

Get-OABVirtualDirectory -Server $Server_name | Set-OABVirtualDirectory -InternalURL "https://$($FQDN)/oab" -ExternalURL "https://$($FQDN)/oab"

Get-ActiveSyncVirtualDirectory -Server $Server_name | Set-ActiveSyncVirtualDirectory -InternalURL "https://$($FQDN)/Microsoft-Server-ActiveSync" -ExternalURL "https://$($FQDN)/Microsoft-Server-ActiveSync"

Get-WebServicesVirtualDirectory -Server $Server_name | Set-WebServicesVirtualDirectory -InternalURL "https://$($FQDN)/EWS/Exchange.asmx" -ExternalURL "https://$($FQDN)/EWS/Exchange.asmx"

Get-MapiVirtualDirectory -Server $Server_name | Set-MapiVirtualDirectory -InternalURL "https://$($FQDN)/mapi" -ExternalURL https://$($FQDN)/mapi

Set-ClientAccessService -Identity EX02-2019 -AutodiscoverServiceInternalURI https://mail.techijack.live/Autodiscover/Autodiscover.xml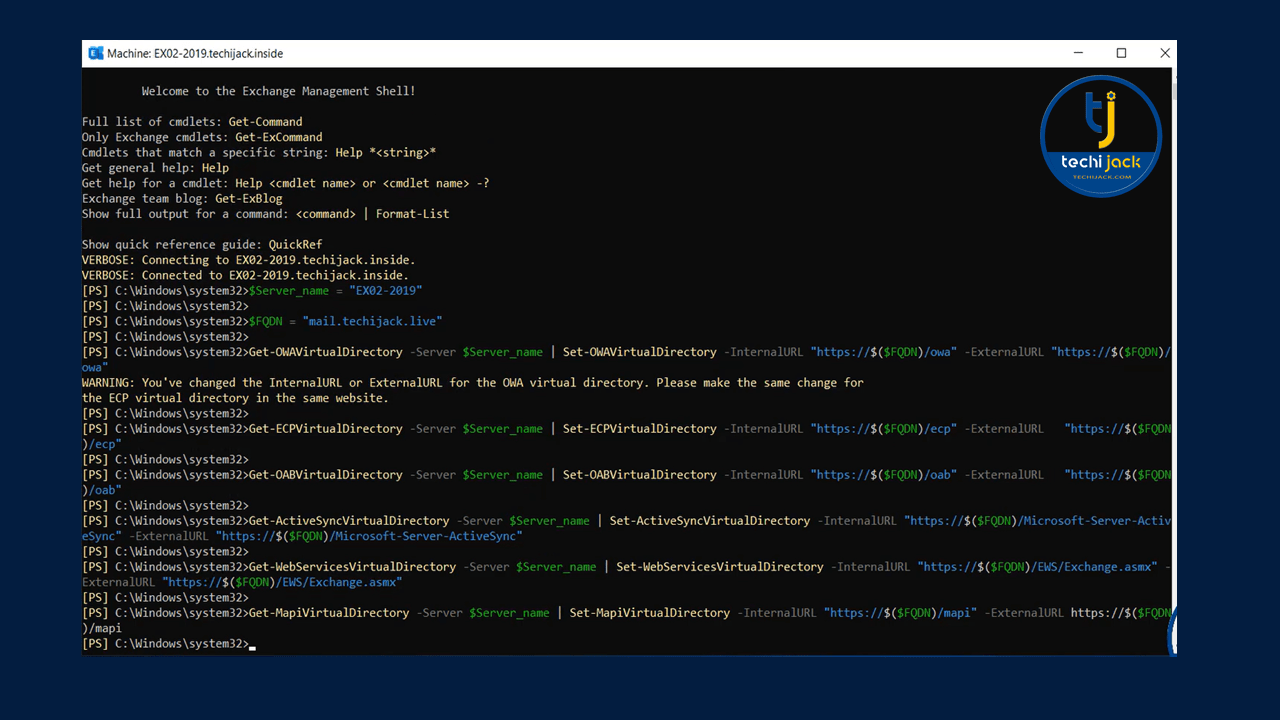
3. Furthermore, we also have to set the Autodiscover scope to mail.techijack.live (your namespace)
Set-ClientAcessService -Identity EX02-2019 -AutodiscoverServiceInternalURI https://mail.techijack.live/Autodiscover/Autodiscover.xml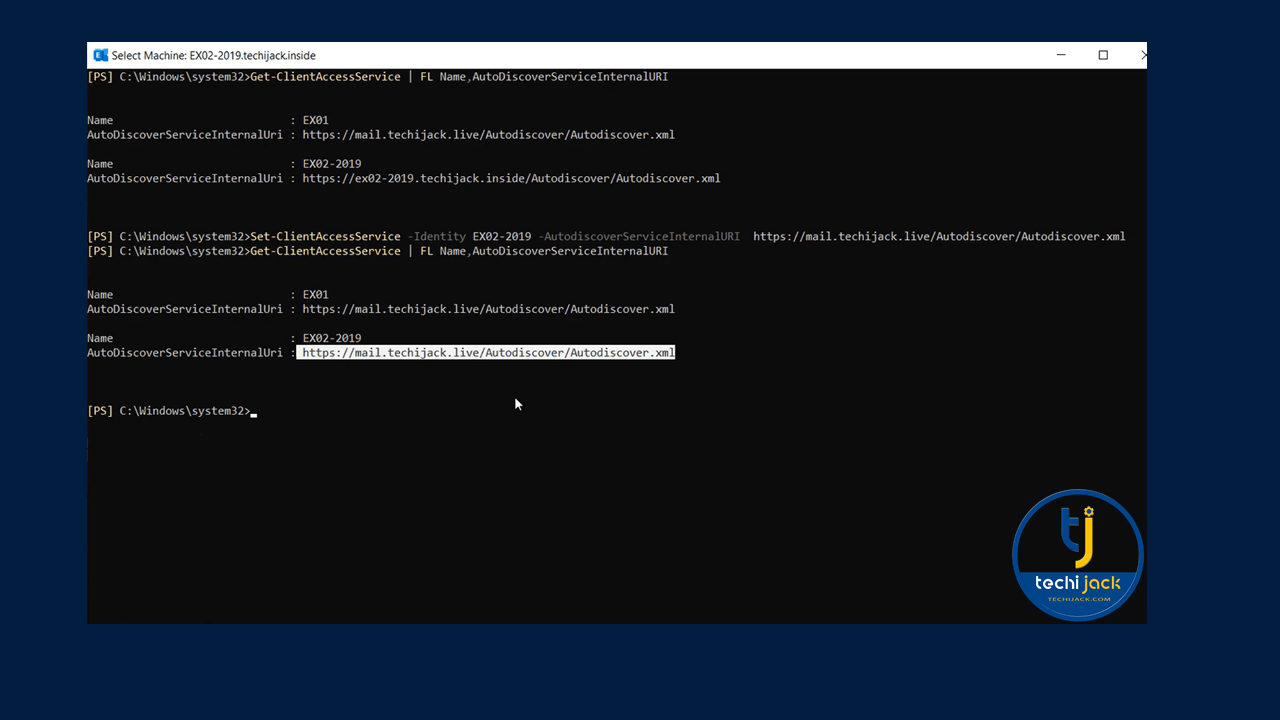
Installing SSL Certificate To Exchange Server 2019
Now export the existing SSL Certificate from Exchange 2016 and import it to the new Exchange Server 2019
Once you import the SSL Certificate, assign it to the IMAP, IIS, and SMTP service
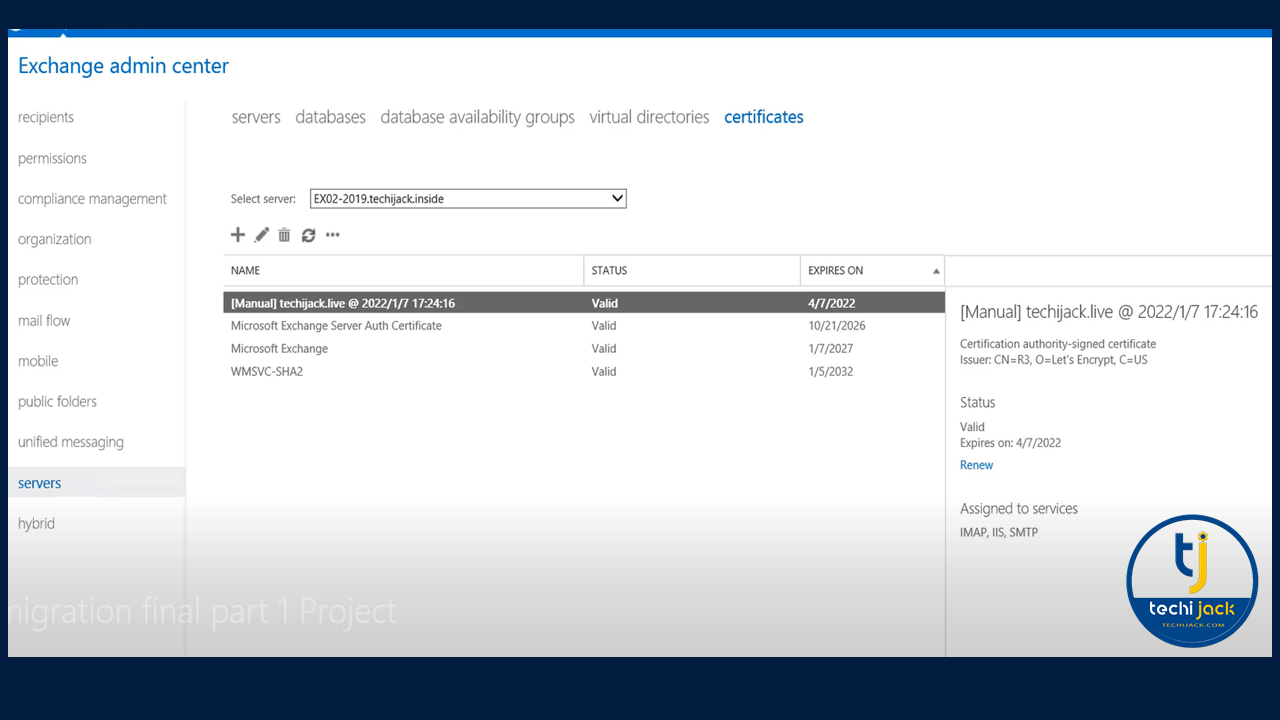
We have set our SSL certificate on Exchange 2019
In our case, we are using let’s Encrypt free SSL, so we installed the pfx on our new Exchange 2019
Though it’s free it works for lab environments and small setups
Your case may be different, so you can just export and import the SSL Certificate on your new server
Let’s continue Migrate Exchange 2016 to 2019 in part -2
Moreover, if you want to see the complete migration process or become an Exchange Server Administrator,
Therefore, Feel free to register for the Exchange Server Administration course at https://app.techijack.com
Furthermore, check the link below for part 2
