Migrate Exchange 2016 to 2019 – Part 2
Upgrade Exchange Server 2016 to 2019

Table of Contents
Migrate Exchange 2016 to 2019 – Part 2
Before proceeding further with this migration process, I am assuming you already followed the instructions mentioned in part 1: Migrate Exchange 2016 to 2019 Step by step
Now after completing the installation and configuring Autodiscover, Outlook Anywhere, and the virtual directory
Now let’s begin to migrate Exchange 2016 to 2019
We have to set the storage as it was on the old Exchange 2016
In the techijack organization, we were using 2 different drives for the database and log folder.
Rename the database on the new Microsoft Exchange Server 2019 according to your choice. In our case it is DB01-2019
Therefore, also move the database edb and log folder path to the different drives you set for the Exchange server database.
In order to rename the current database on the Exchange server, 2019 run the following cmdlet
Set-MailboxDatabase “current database name” –Name “DB01-2019”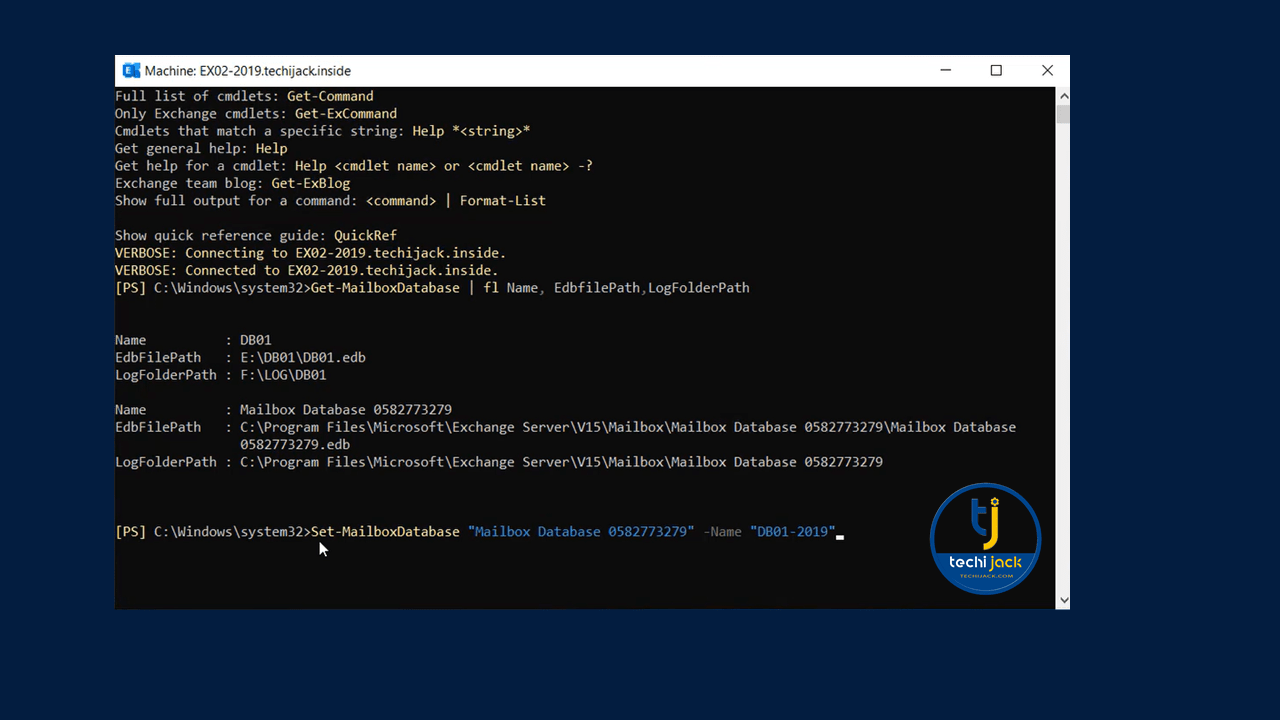
After renaming the Database according to your choice
We have to move the Database and LogFolderPath to the drives we set for the database and logs
In our case, we have E: drive for .edb (E:\DB01-2019\DB01-2019.edb) file and F: drive for LogFolder (F:\LOGS\DB01-2019)
So, run the following cmdlet to move the Exchange Server 2019 Database and LogFolder
Move-Database DB01-2019 -EdbFilePath E:DB01-2019\DB01-2019 –LogFolderPath F:\LOGS\DB01-2019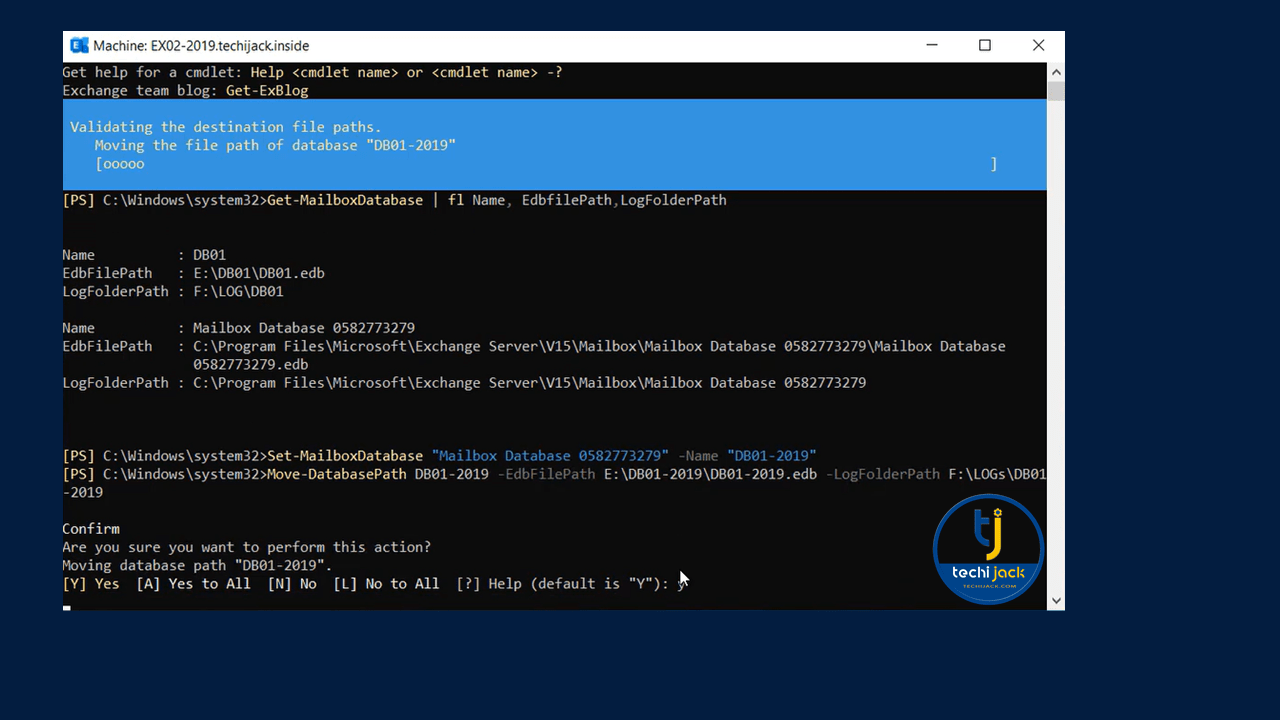
The next step is to create a DNS record for our New Exchange Server 2019
As you already know that we are using Namespace of “mail.techijack.live”
So, now we will create Host A record for Mail and Autodiscover
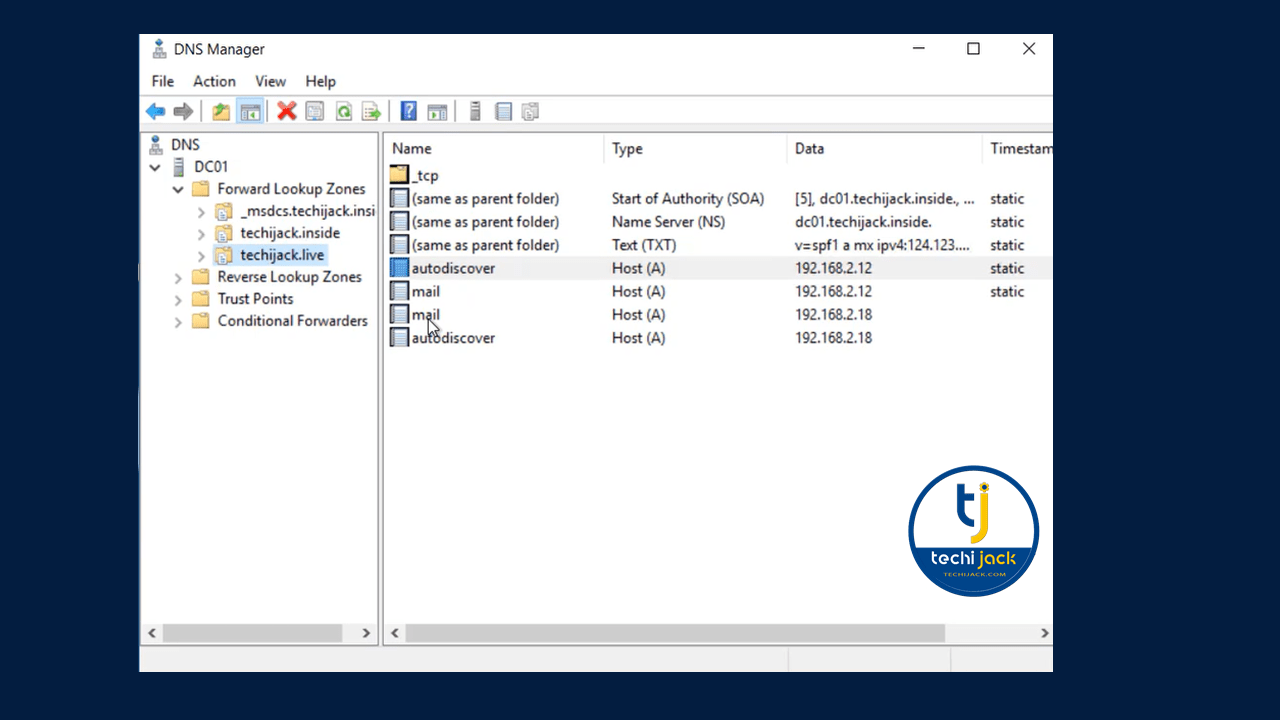
Now the DNS for your new server is set.
Therefore, now we can start to migrate Exchange 2016 to 2019
Exchange Server 2016 Migration to Exchange Server 2019
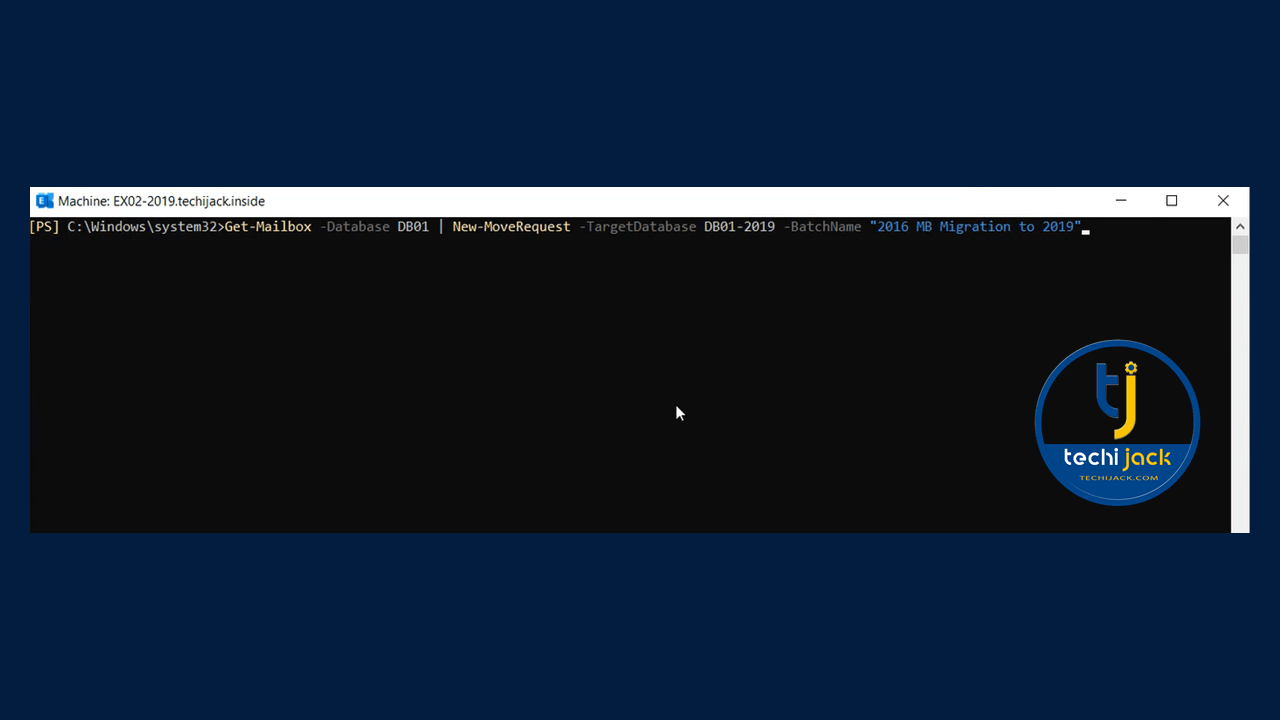
In order to migrate Exchange 2016 to 2019, we have to run the following cmdlet to move all the users in an Exchange 2016 Mailbox Database to the New Database of Exchange 2019.
We have to run the following cmdlet
Note: Our old database on Exchange 2016 is DB01
Get-Mailbox –Database DB01 | New-MoveRequest –TargetDatabase DB01-2019 –BatchName “2016 MB Migration to 2019”
Furthermore, we also have to move the Arbitration Mailboxes to our New Exchange Server 2019
For that, we have to run the following cmdlet
Get-Mailbox –Server EX01 –Arbitration | New-MoveRequest
Note: You may see some errors while doing this on Exchange 2019 CU 15; for that, run the following cmdlet and replace the DB01 with your real Database name.
Get-Mailbox -Arbitration | ForEach-Object {
    New-MoveRequest -Identity $_.Alias -TargetDatabase "DB01"
}
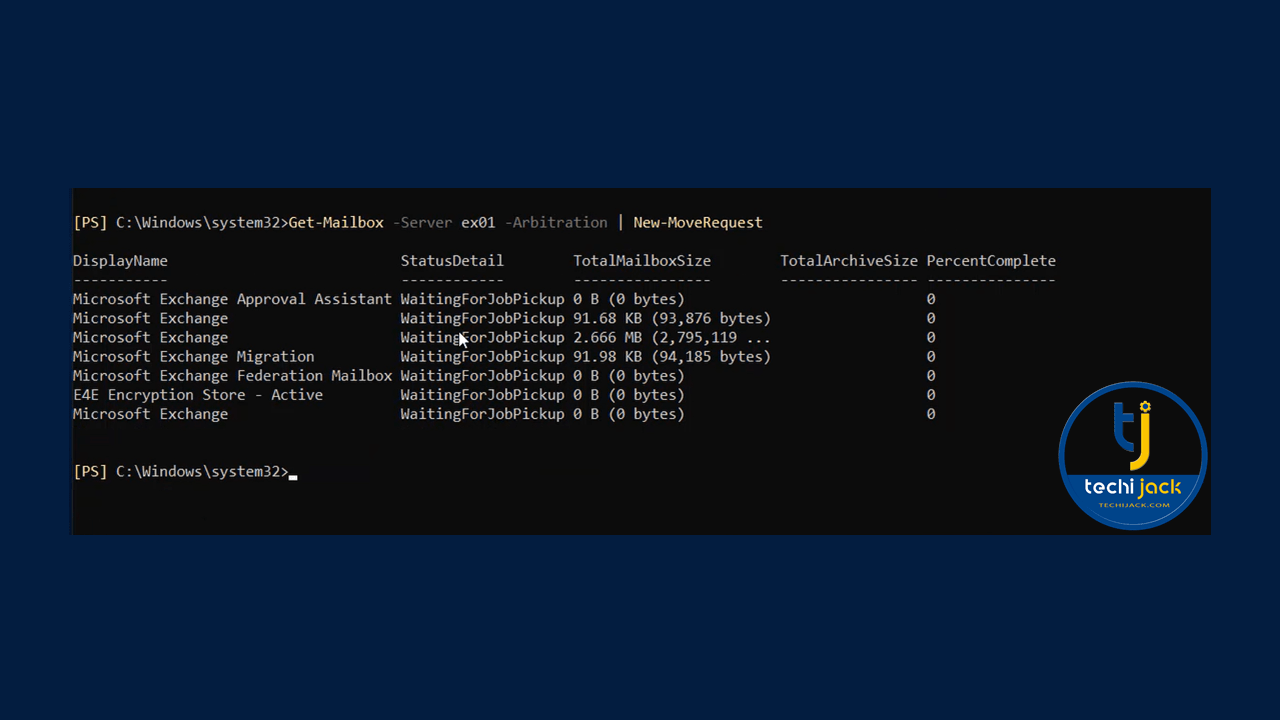
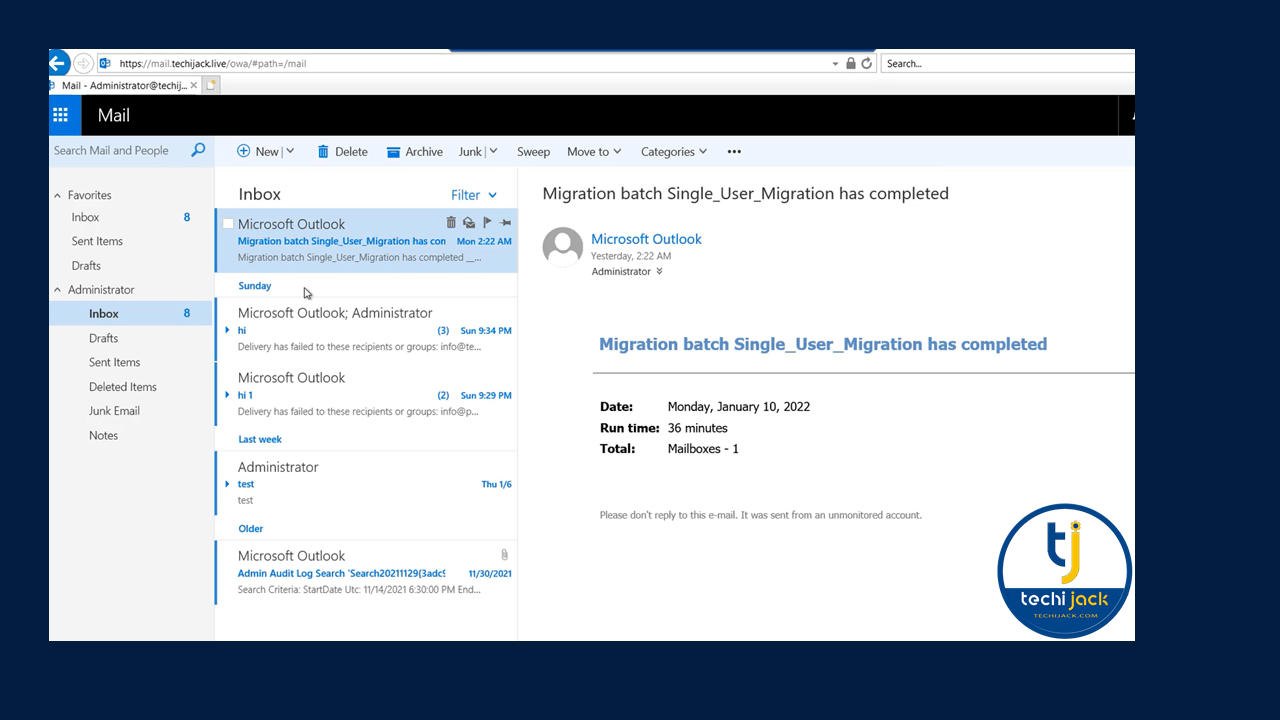
Once the job is waiting for job pickup, it will start the migration in the background.
To see the move request statistics
We have to run the following cmdlet to make sure that all the mailboxes are migrated to Exchange 2019 successfully
Get-MoveRequest | Get-MoveRequestStatistics
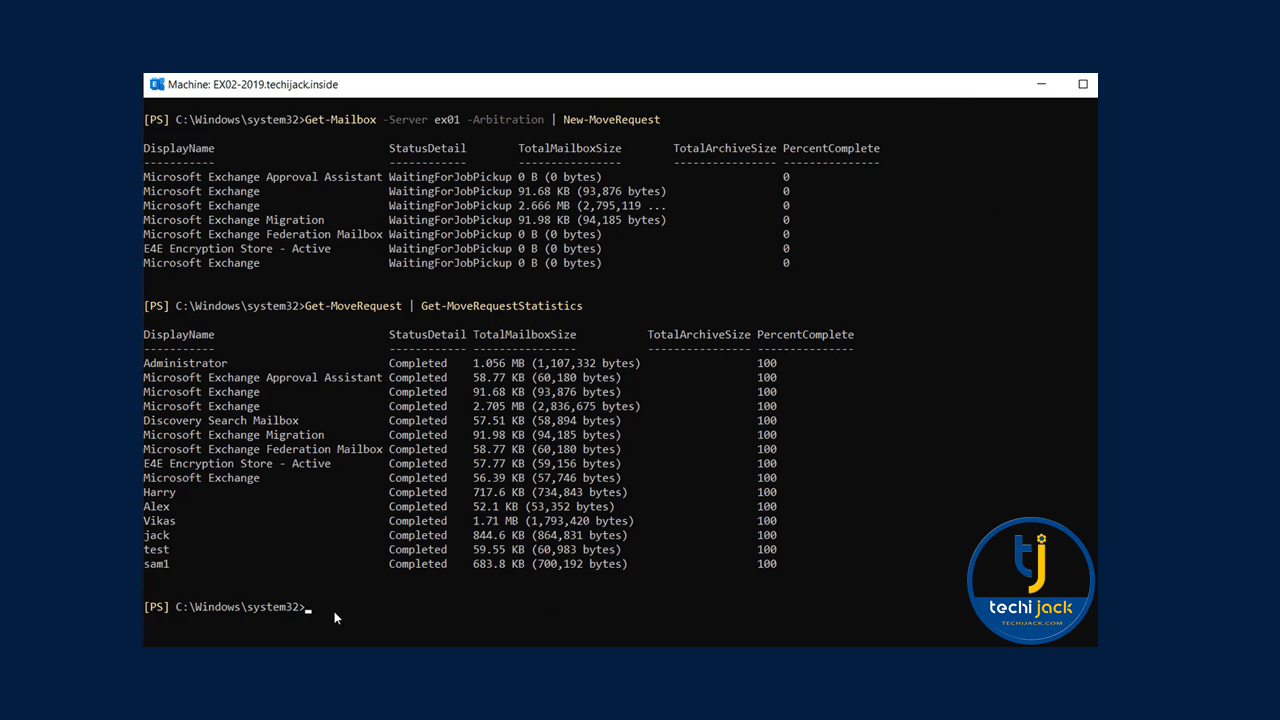
Now you can see that all the user’s mailbox and arbitration mailboxes migration is completed.
Let’s confirm the Arbitration mailbox, now where they are lying.
We will run the following cmdlet to confirm that
Get-Mailbox –Arbitration | Get-MoveRequest
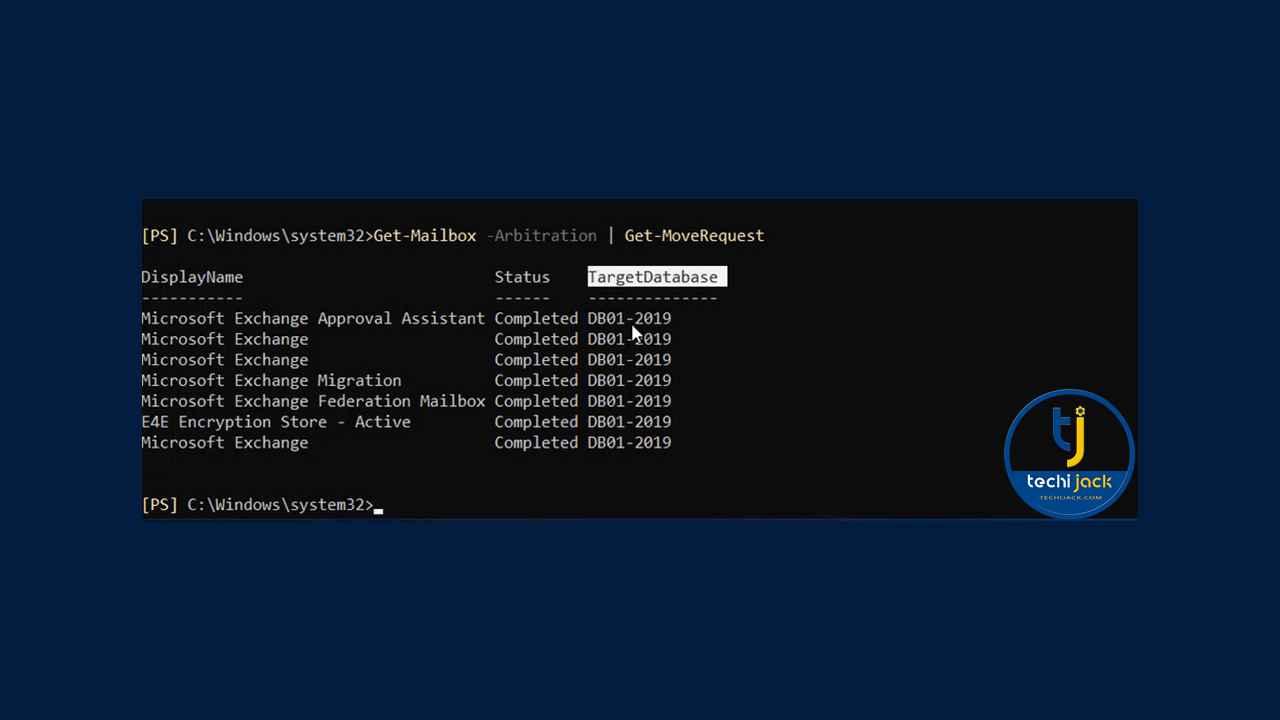
Now you can see that our Arbitration mailboxes are successfully migrated to our new Exchange server 2019 Database.
Now our Mailbox and Artibration mailboxes are on the new Exchange 2019.
Migrating Audit log To New Exchange Server 2019
It is time to move the Audit log as well
To see the audit log server we will run the cmdlet Get-Mailbox –Auditlog
Also, we will try to move the audit log to our Exchange Server 2019
For that, we will run the cmdlet Get-Mailbox –Auditlog | New-MoveRequest
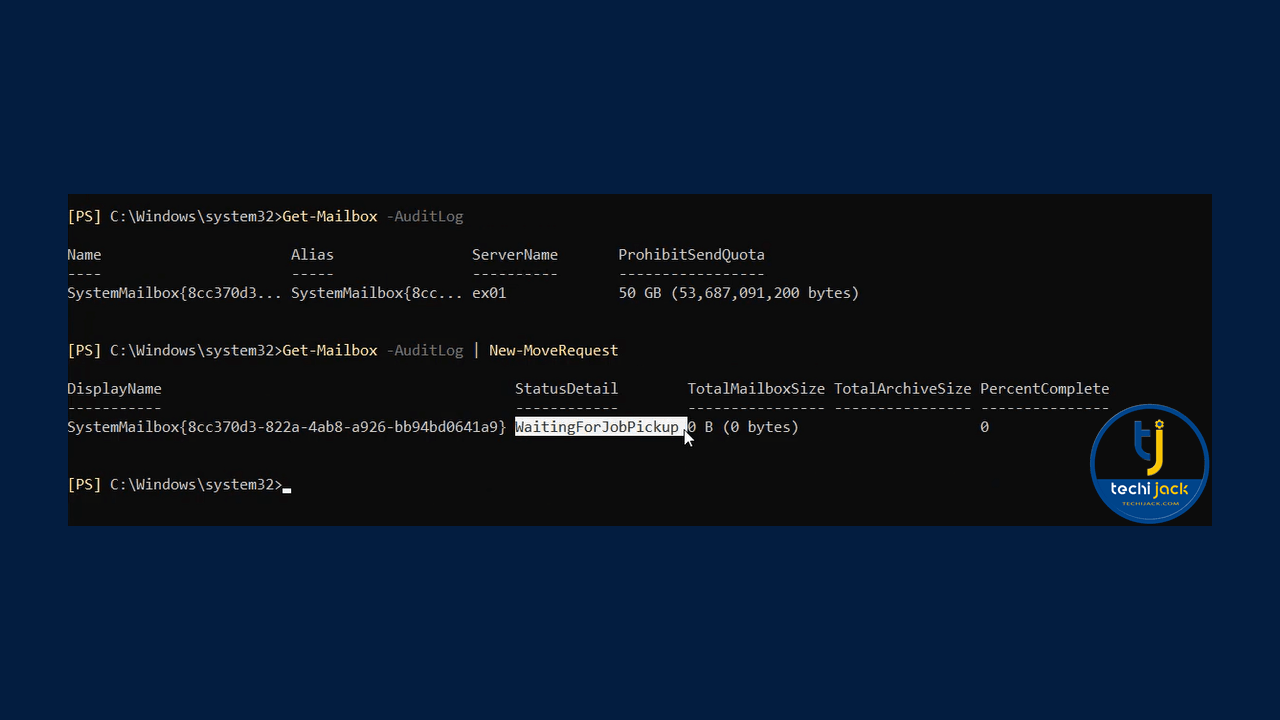
Now you can see that the Audit log is also waiting for job pickup
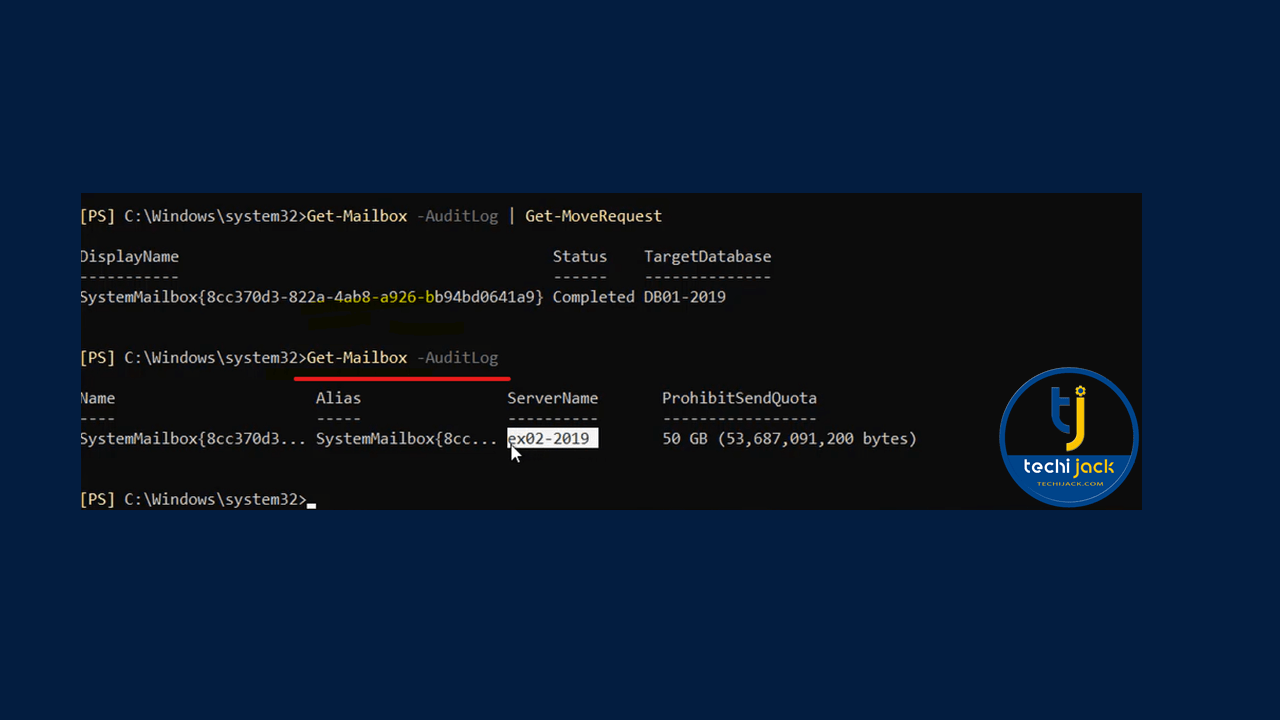
Make sure that the Audit log move request is completed and now it is on the new server i.e EX02-2019
Run the following cmdlet to confirm and check the Audit Log
To check the move request cmdlet is Get-Mailbox –Auditlog | Get-MoveRequest
To cross-check that, now they are on a new server run the cmdlet again Get-Mailbox –Auditlog
We have now successfully migrated all the Mailboxes, Arbitration Mailboxes, and Audit logs to the new exchange server 2019
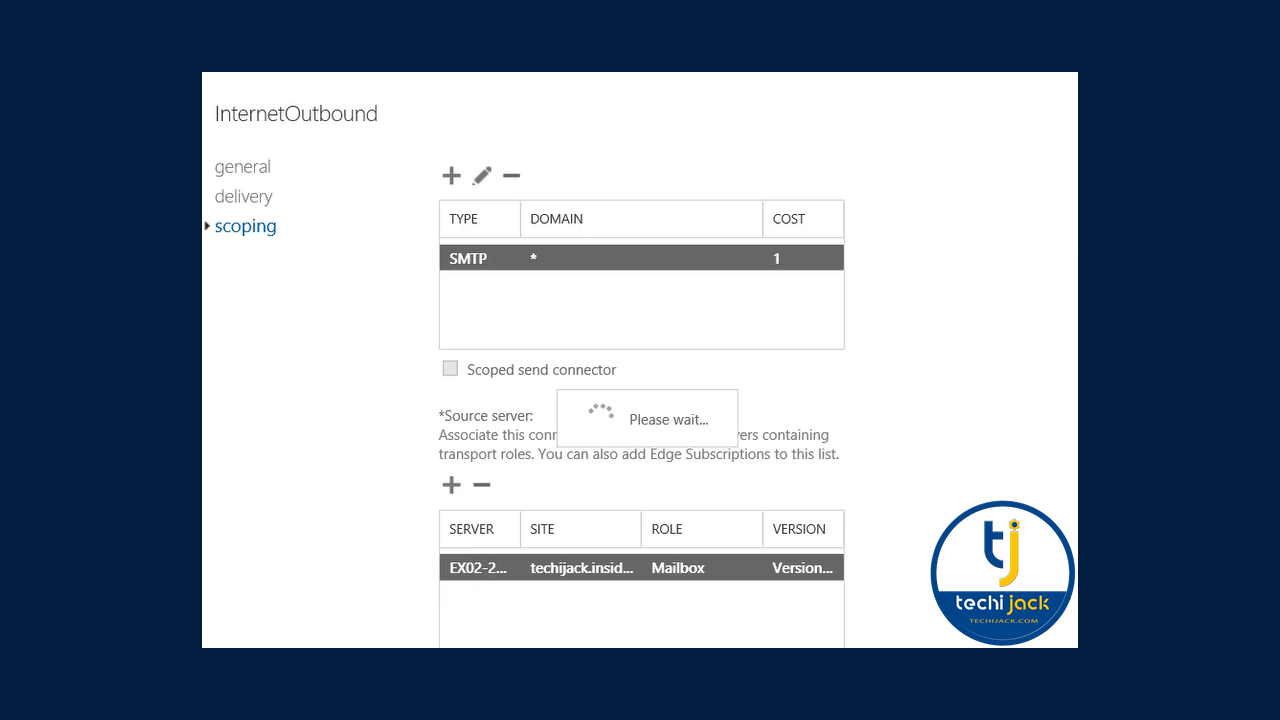
Moreover, we also have to add our new exchange server to the send connector as well
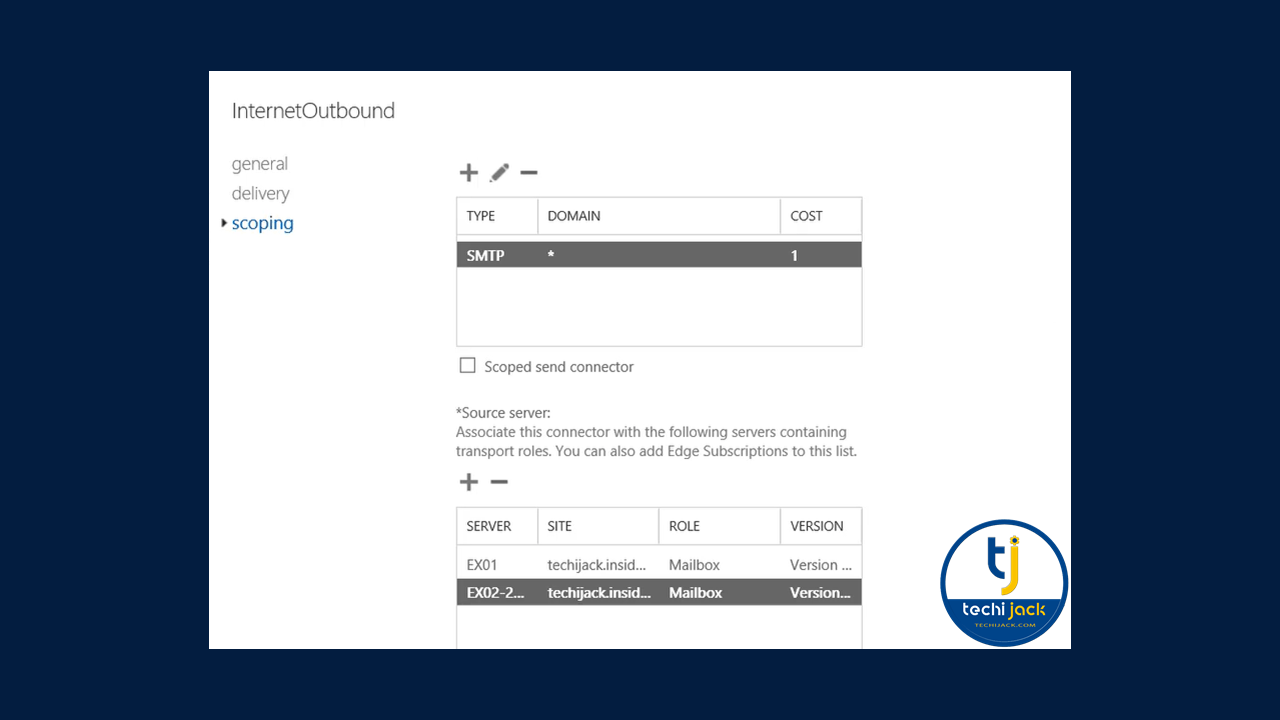
Once you add the new exchange server to the send connector
Therefore, you can now remove the old exchange server 2016 from the send connector
Removing Old Database From Exchange 2016
Now we have set most of the configuration to our new server.
Therefore, the old database is still lying on the old exchange server in 2016
We have to remove the old database from Exchange 2016 so that we can decommission the old Exchange 2016 from our organization Techijack
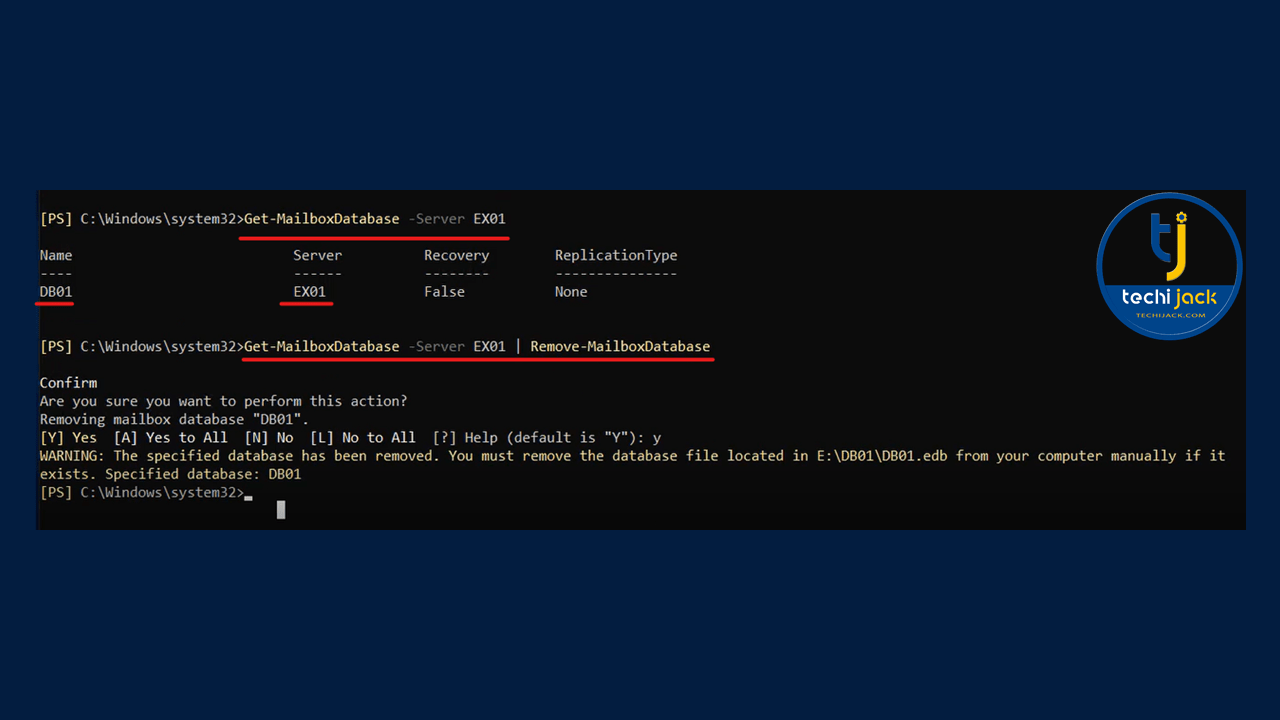
Check the database by running the cmdlet Get-MailboxDatabase –Server EX01
You will see the old database will be there in Exchange 2016
Run the following cmdlet to remove the Database from Exchange 2016
Get-MailboxDatabase –Server EX01 | Remove-MailboxDatabase
It will prompt you for the confirmation, press y to confirm the action to delete the database from the old exchange server
Decommissioning Exchange 2016
Our task to migrate exchange 2016 to 2019 is now completed and it’s time to decommission the exchange 2016 from our organization
Open the run box and type appwiz.cpl
You will see the add-remove programs
Just select the Microsoft Exchange Server 2016 and uninstall it
In our case, it is Microsoft Exchange Server 2016 Cumulative Update 22 so let’s remove the Exchange Server 2016
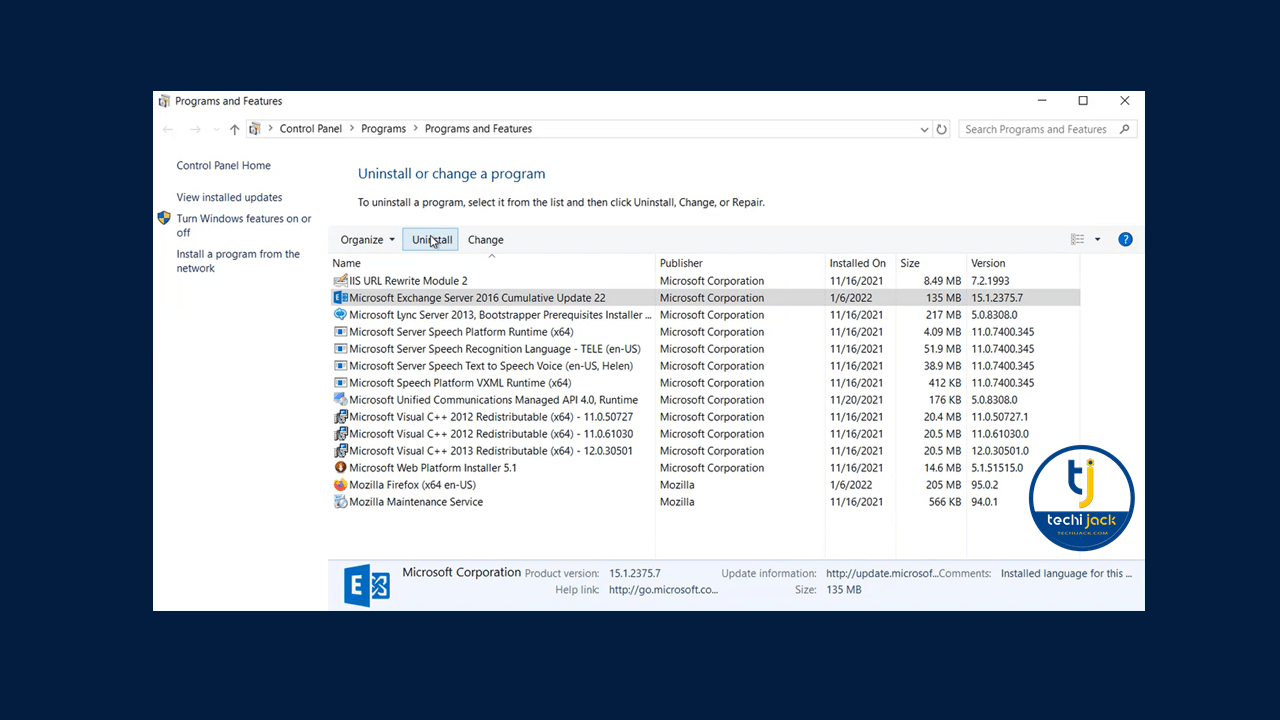
Once the removal is complete, just click on finish and reboot the computer.
We have successfully migrated Exchange 2016 to 2019
Finally, it’s time to test the internal and external email flow on the new server, whether it’s working fine or not.
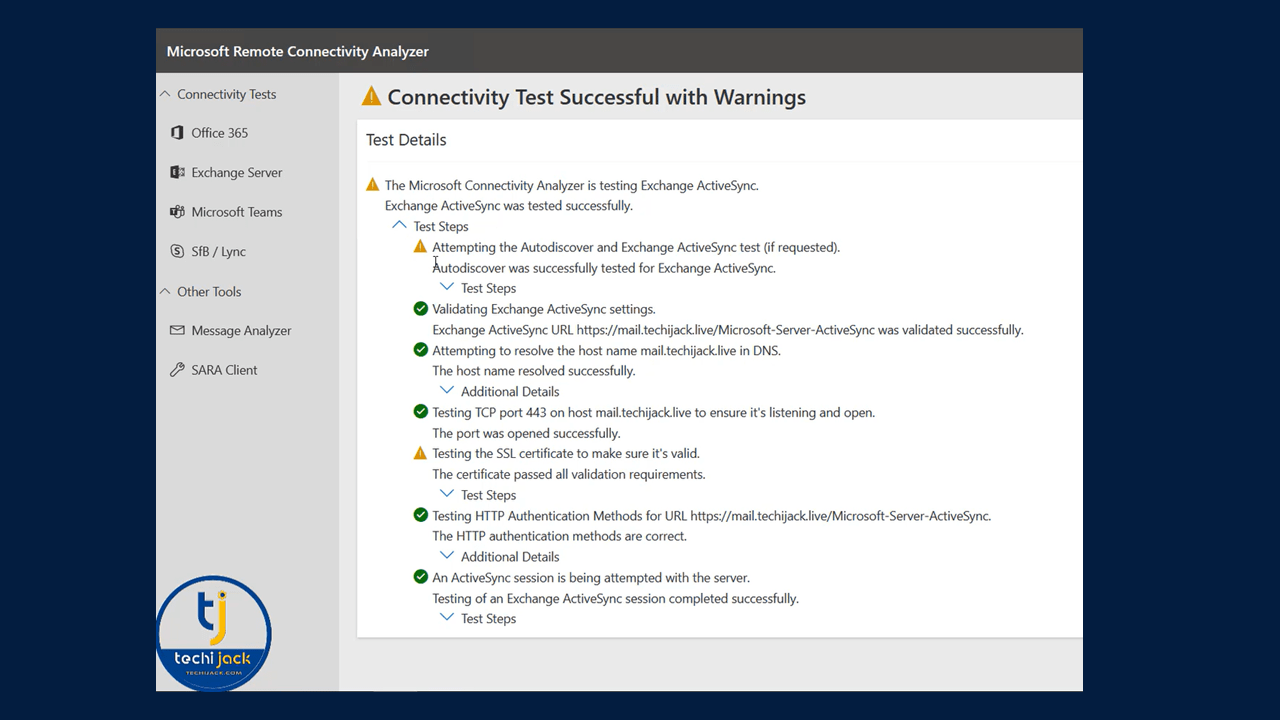
Moreover, try to test it with the Microsoft analyzer tool to check for Outlook connectivity, ActiveSync, Autodiscover, Inbound, and Outbound mail connectivity.
Result of Microsoft Remote Connectivity Analyzer
Testing result for ActiveSync on Microsoft analyzer tool
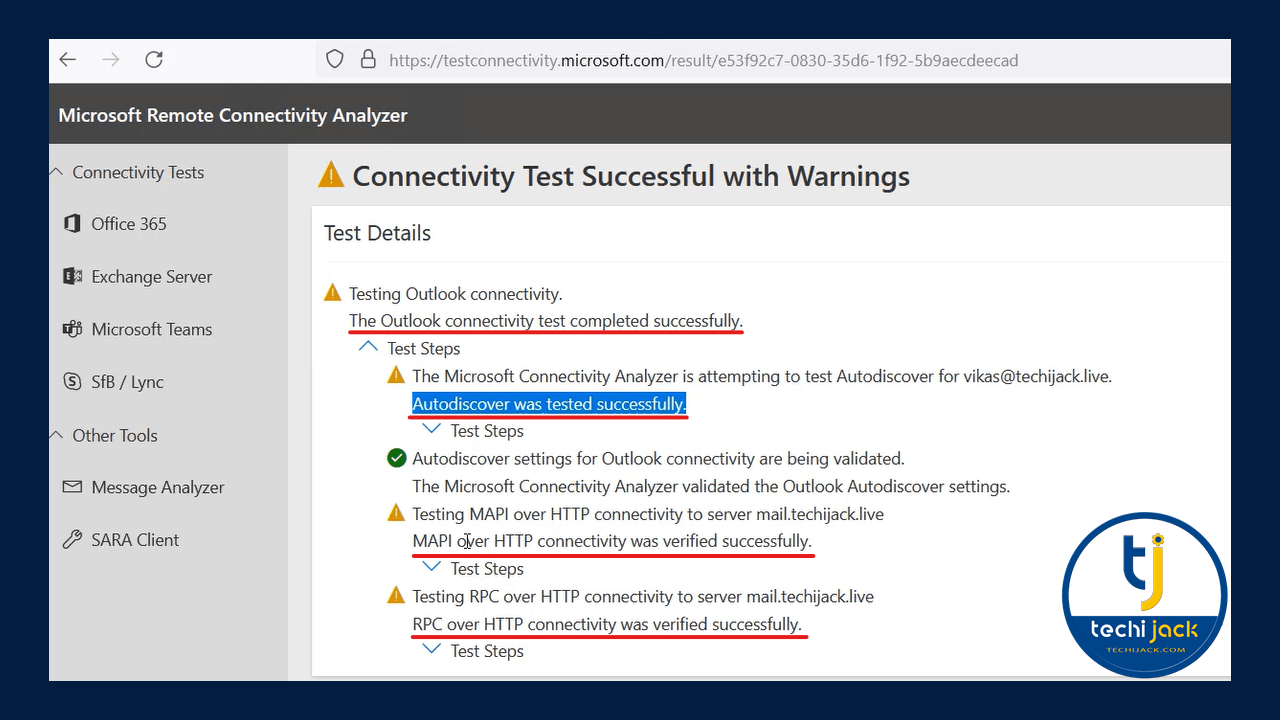
Testing Outlook Connectivity & Autodiscover on Microsoft remote connectivity Analyzer Tool
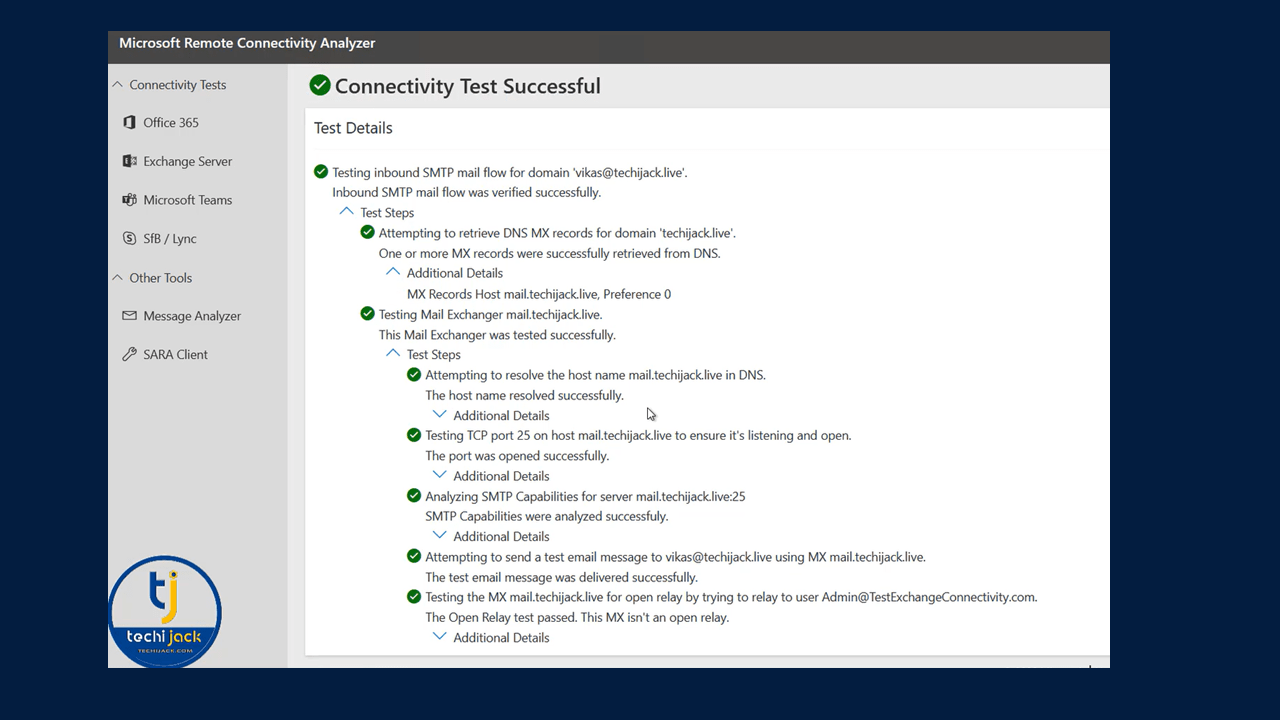
Inbound SMTP Test on Microsoft Remote Connectivity Analyzer tool
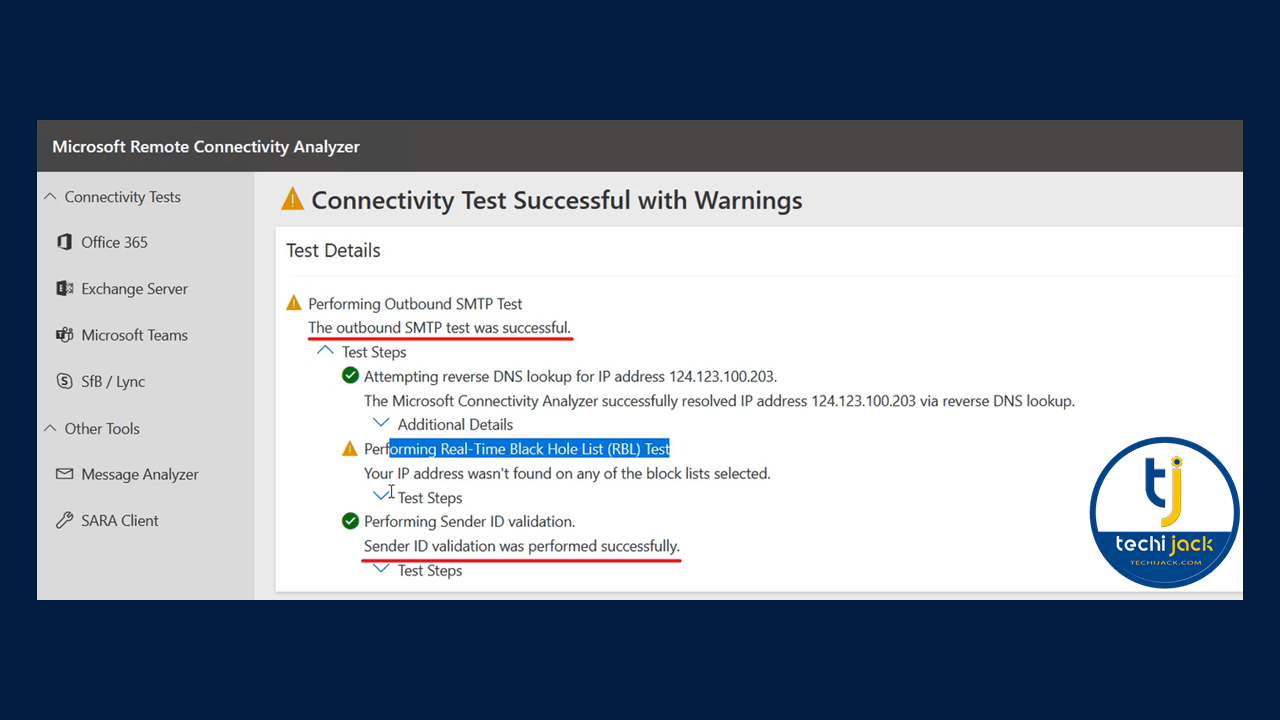
Outbound SMTP Test on Microsoft Remote Connectivity Analyzer
SSL Server test for Microsoft 365 service compatibility
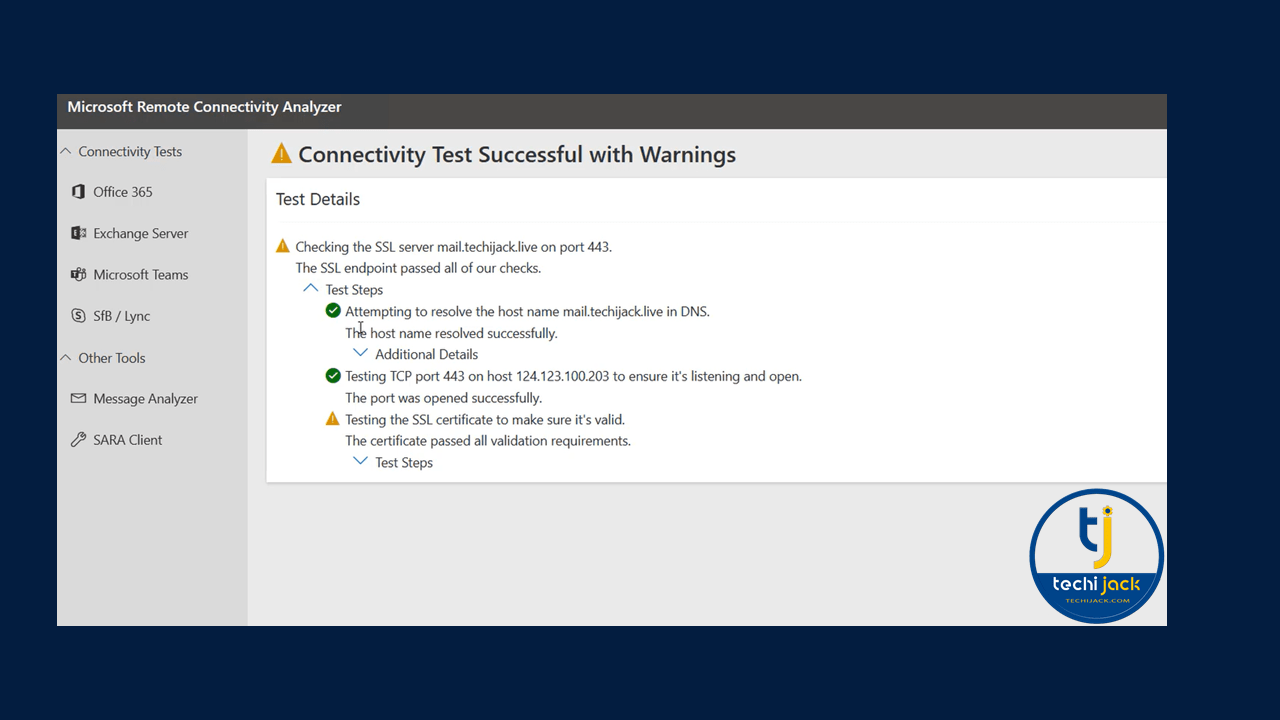
All the tests are in a pass state and inbound, and outbound mail flow is also working fine.
Finally, we have a successful migration from Microsoft Exchange Server 2016 to Exchange Server 2019
Register for the Exchange Server Administration Course at https://app.techijack.com
In case of any support, help, and assistance
Feel free to contact: info@techijack.com