How to Delete Teams Chat History Permanently
Permanently Deleting Microsoft Teams Personal & Group Chat
Table of Contents
How to Delete Teams Chat History Permanently
If you are using Microsoft Teams and want to know how to delete Teams chat history permanently.
So, here I would like to tell you that, there is no direct option to delete the entire team’s chat.
However, you can achieve this via the retention policy from Microsoft Purview.
In this article, we will see the requirement why we need to delete the entire chat history of Teams.
Also, we will explore how we can delete the team’s chat history permanently with the help of Microsoft Purview.
I have seen many articles about deleting the Microsoft Teams Chat.
Therefore, none of them explains clearly how to delete teams chat history permanently.
They explain how to hide the team’s chat or delete the personal chat but not the entire team’s group chat.
By default, Microsoft retains the chat for a long period.
So, the purpose of this post is to help those who need to delete their Teams Chat permanently.
Let’s begin.
Why to Delete Microsoft Teams Chat History
Sometimes it is required to delete the entire chat history from Microsoft Teams.
In our case, we have all the users using Teams chat for collaboration.
Therefore, users are interacting with customers and they may take some private information of users.
Such as email, phone, address, or payment information.
They may pass this information to other users in teams chat, which does not seem to be secure.
Also leaving a chat history behind for such details is harmful for any organization.
In this case, we just want to keep the chat history for only 24 hours.
That means the next day login will delete the previous chat with all the confidential information of any customer.
There can be other reasons to retain the chat, but here we are considering protecting the customer’s information for compliance reasons.
So, we need to delete the Microsoft Teams chat permanently after 1 day or 24 hours.
Steps to Permanently Delete Teams Chat
To delete the Teams chat history we have to create a new retention policy for the Microsoft Teams chat.
Our task is to delete the complete group chat history and the personal chat for all the users.
After creating the policy we can specify the time to retain the chat.
Therefore, after the retention period, the chat is deleted permanently.
Login to your Microsoft 365 admin center with the admin credential where you have permission to do the task.
Once you are logged in just click on compliance at the left side pane as shown in the image below.
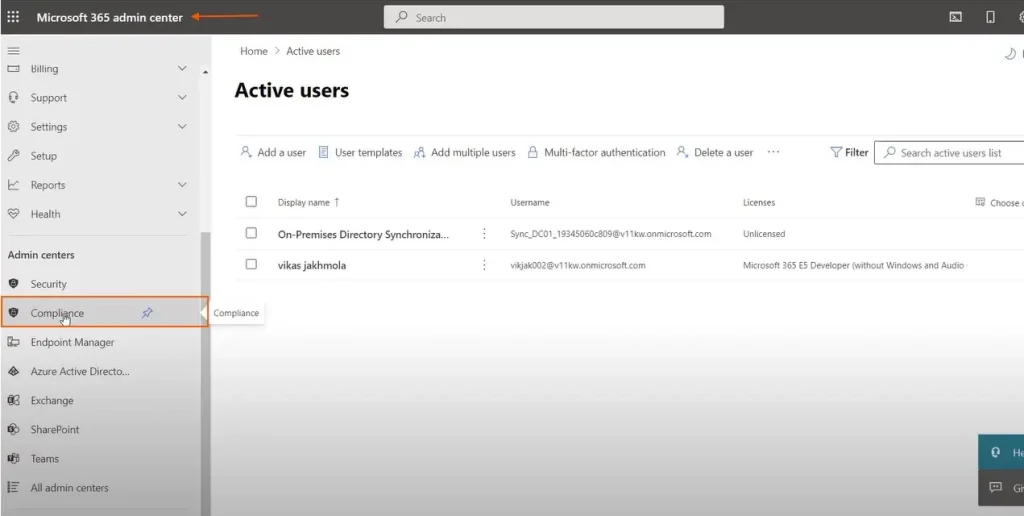
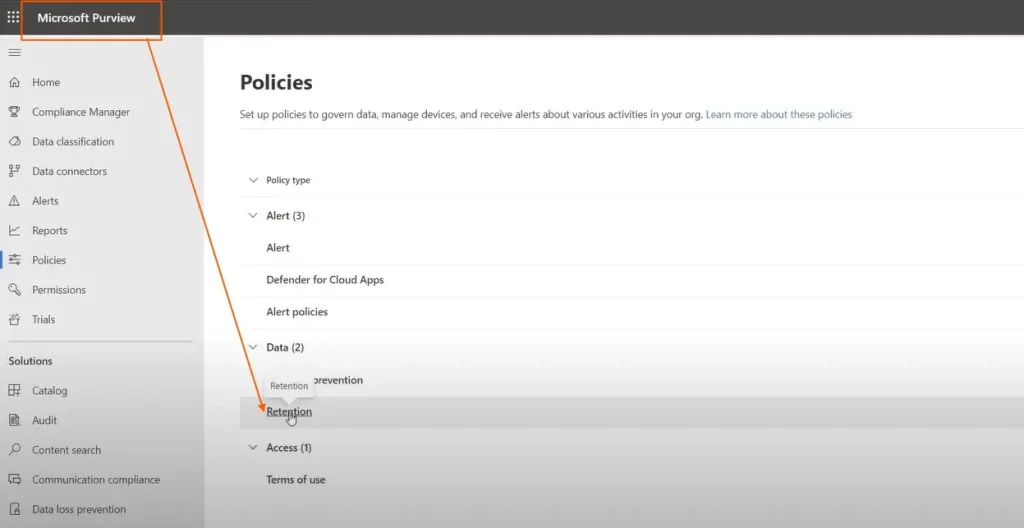
Once you click on the compliance, Microsoft Purview will be open.
Here you can see the retention at the right side pane
You need to click on the retention.
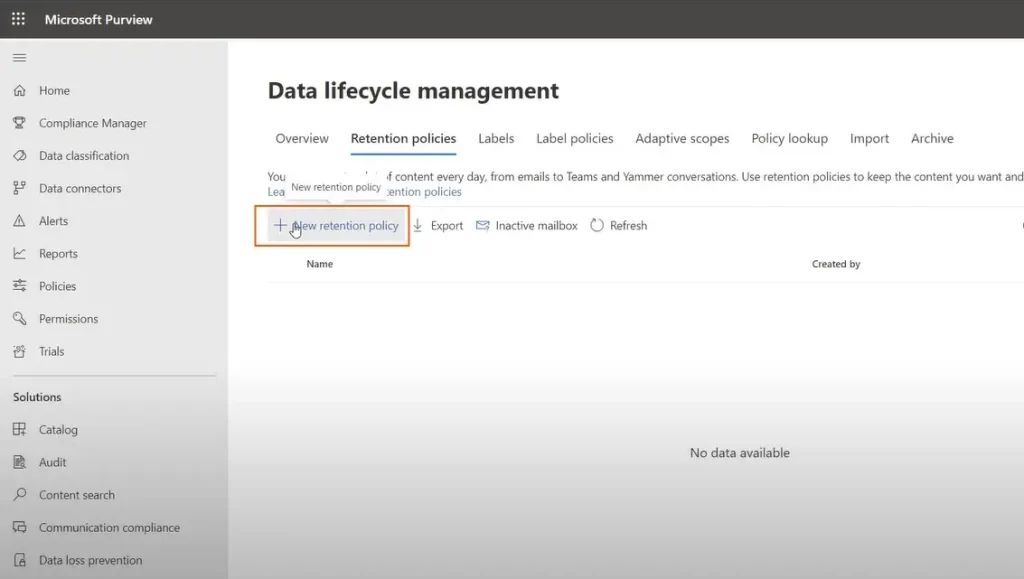
Once you are inside the retention, you will see by default there is no policy defined for the Teams chat.
So, we will create a new retention policy
How to create a Teams Retention Policy
Name your retention Policy and provide the description and click on the next
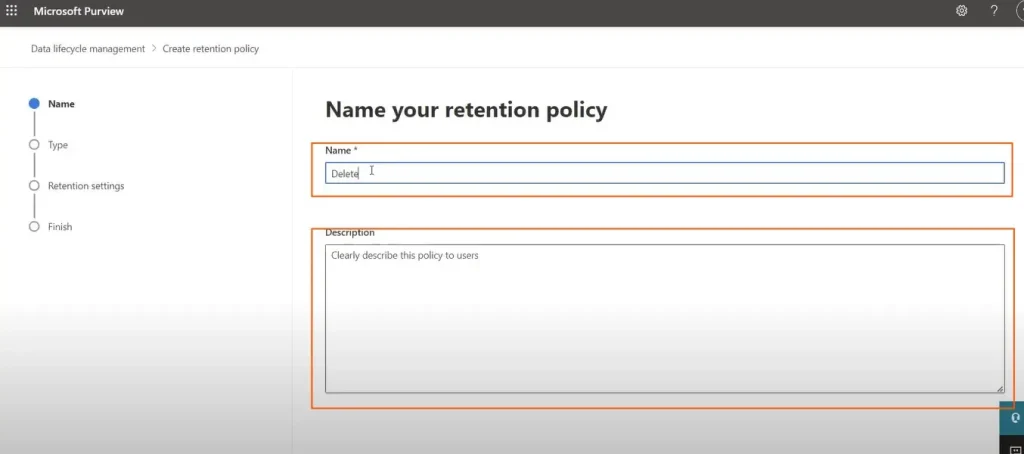
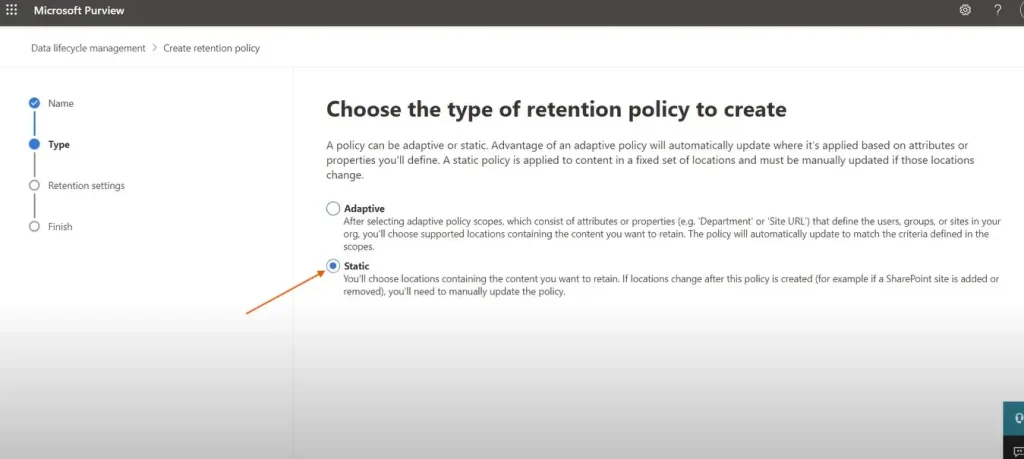
Now you will have an option to choose the type of retention policy
Here we have to select the Static option and proceed to the next.
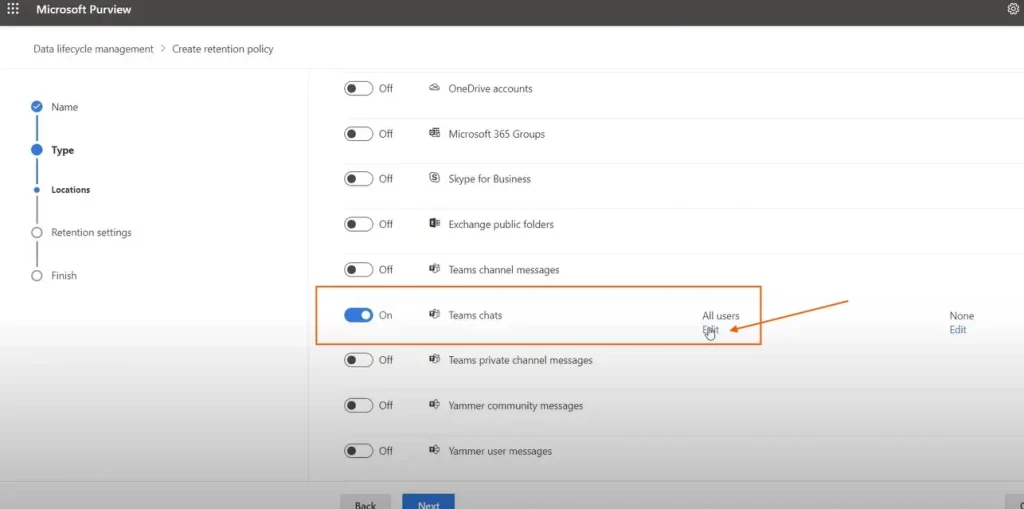
Once you proceed with next, you will see the policy for Exchange Mail, SharePoint sites, OneDrive, and Microsoft 365 groups are turned on by default.
Therefore, you will see no policy defined for the Teams channel Message and Teams chat.
So, here we will select the Teams chat or you can select the Teams channel messages as well and even you can select the user to include and exclude from the policy and proceed next.
Now it will ask you to decide how you want to retain your content.
By default, you will see the retaining time for 7 years and the option for retaining the items forever as shown in the image below.
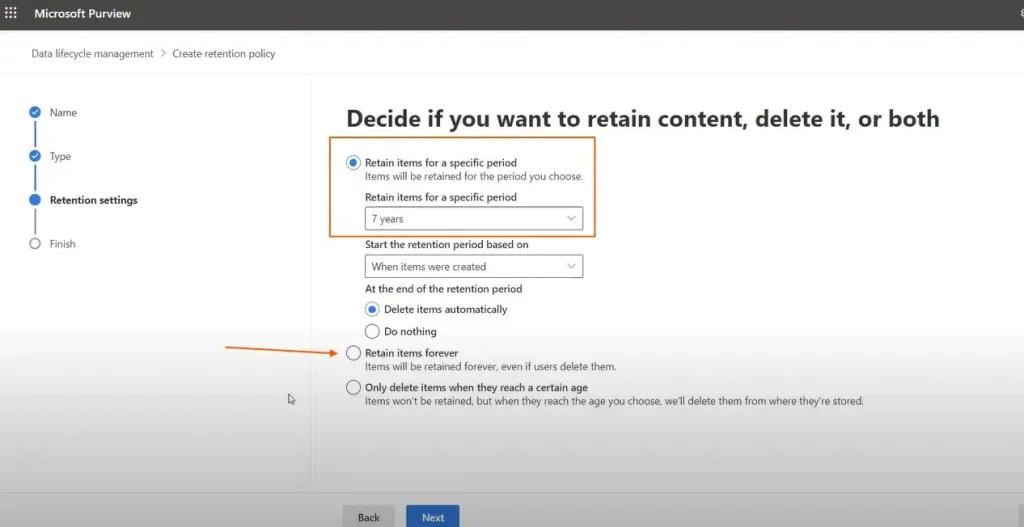
We have to choose the option only delete items only when they reach a certain age
Once you enter there, you will have the option to how to retain your content
You need to select the custom under “delete items older than” as shown in the image below
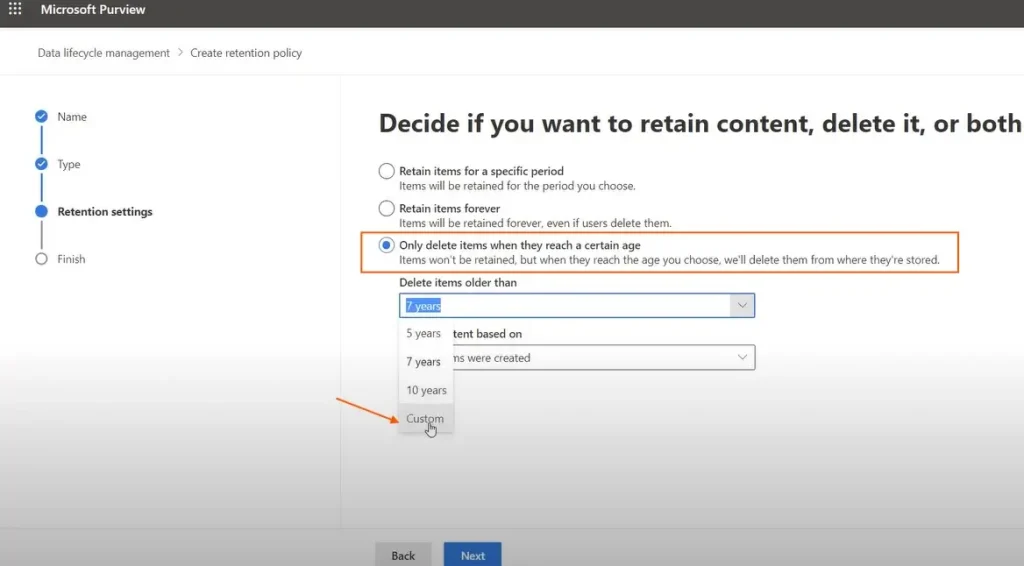
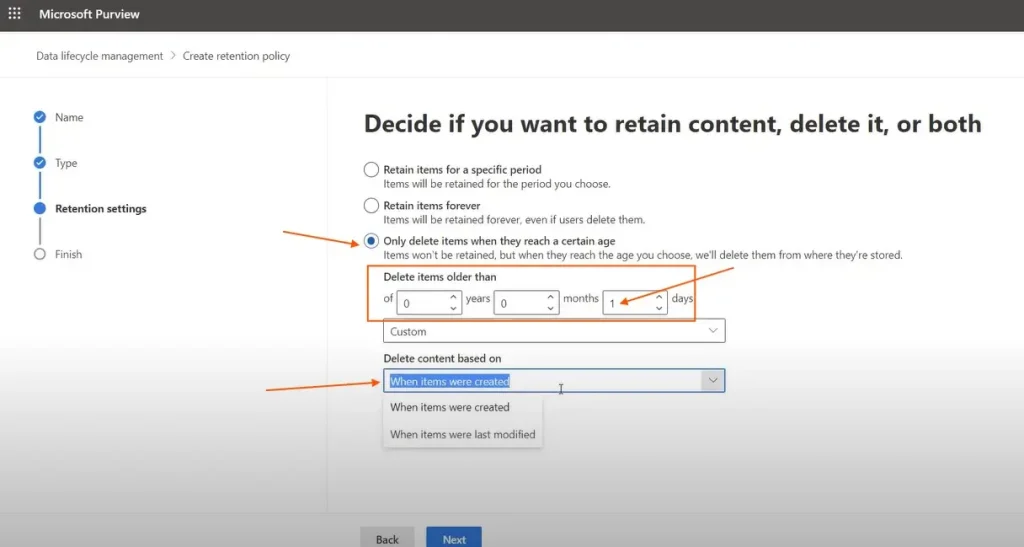
Now you can select the time period to retain your chat.
Here in our case, we are setting it for 1 day only.
Set your desired day for retention and also set the delete content based on when items were created and click on next as shown in the image below
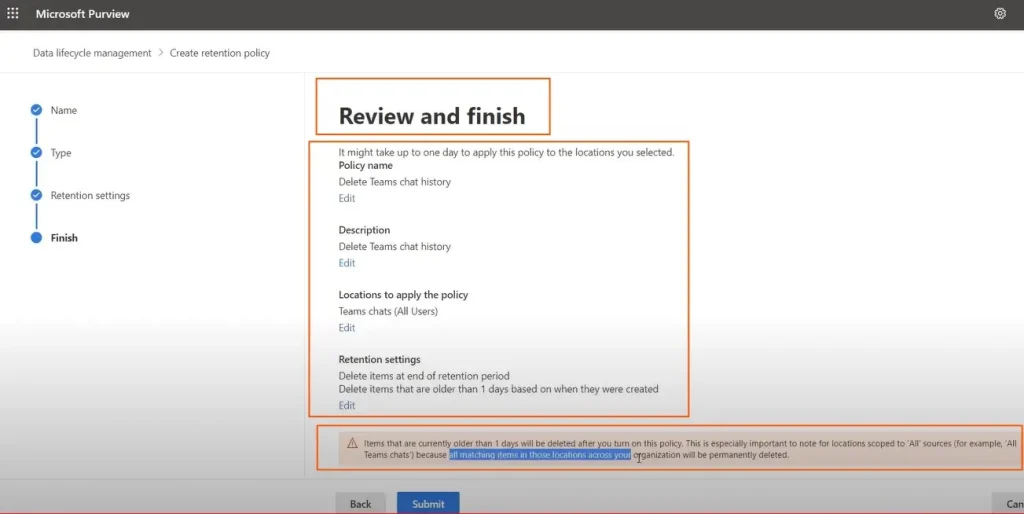
Finally, it will show you the review and finished screen
Review your policy and click on submit
After clicking on submit it, you will see the screen saying, “You successfully created a retention policy”.
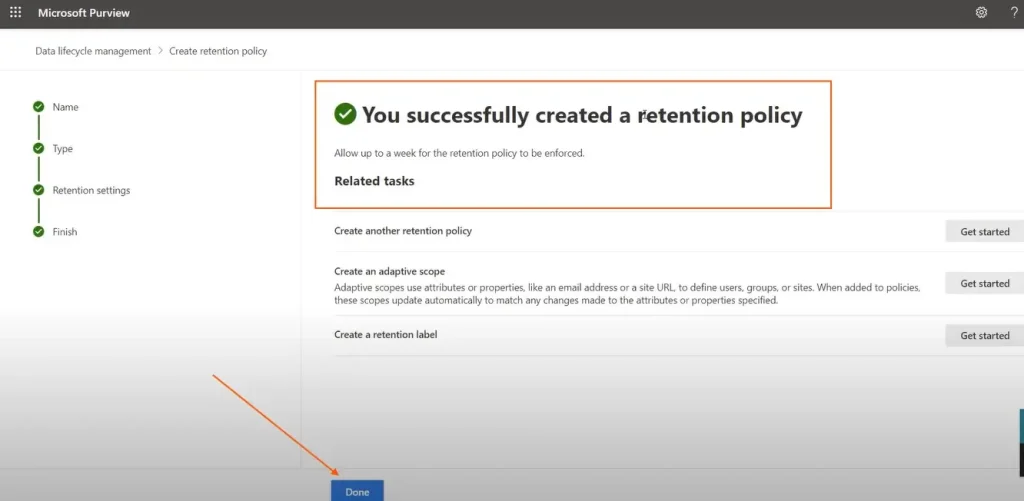
You just need to click on Done now and the Delete Teams chat history policy will be created.
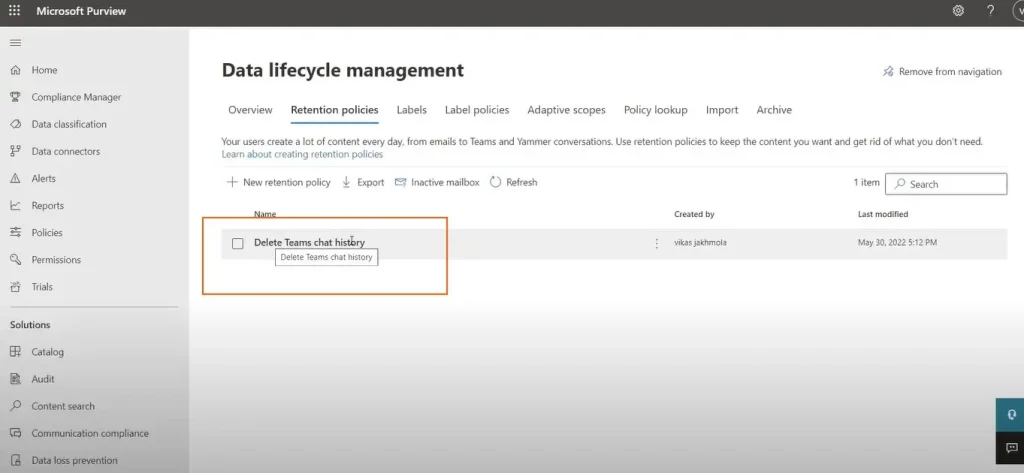
Checking Teams Policy Status & When It Will Apply
Retention Policy is now created.
To check the status of the policy you can just click on the policy and it will show the status.
As we have just created the Microsoft Teams policy, it will show the status as pending.
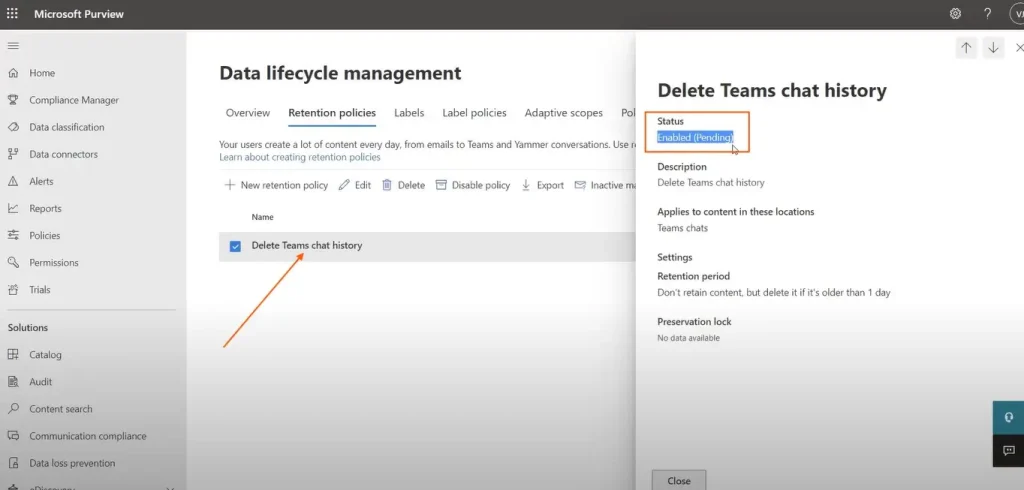
Whenever you apply this policy it will not take effect immediately.
It takes time, depending on the size of your chat history.
Though you see the status enabled after a few hours, therefore things may not work accordingly.
Note: It may take up to 4 to 7 days to apply completely.
Conclusion
In this article, we learned how to delete Teams chat history permanently.
You should only delete the Microsoft Teams Chat history if it fits your needs.
Decide if you want to delete the chat permanently or not.
If you feel that you need to retain the chat again, you can edit the policy settings and change the retention period according to your choice.
In case of any issue with this article, you can feel free to Contact Us
You may also like the other Microsoft 365 tutorials
To see the entire article in action, watch the video below to delete Teams chat history permanently.


