How to Map Network Drive | Windows Server 2025
Mapping a Network Drive For Specific Group In Active Directory 2025

Table of Contents
How to Map Network Drive in Server 2025 using Group Policy
If you are looking to map network drive for all your domain users
This article will help you step by step guide to map network drive in your Windows Server 2025
When you map the network shared drive to your users, it simplifies the secure access to the files by accessing data just as a local drive.
It enhances the user experience; all users get the drive to keep their data.
In this article, we will create a map drive for our specific user groups so that they can access it from inside their computers.
We will assign a drive letter to the map drive, which will be deployed to all the users in groups in a secure way.
Planning for mapping a network Drive
You should do proper planning before you map a network drive.
Though there will be several OU in your Active Directory structure.
We will create a network drive for a specific OU and specific groups.
However, if you want to assign it to all users, you can do that by applying the policy to the complete domain controller.
It will not be the case every time, so we are planning it for a specific OU.
Our Case
We have an Organizational Unit by the name of HR, and we are planning to provide MapDrive access to the users inside the HR OU.
So, first we will create a group inside the HR OU and add the HR OU members to that group.
In the image below, you can see that we created a User Group by the name of HR group
Group scope is global, and group type is security.
Also, we have added David and Mike to that group.

Creating a Network Share for Map Drive
To create a network share, open the server manager, click on File and Storage Services, and then click on shares.
Once you have the share on your screen, just right-click on the free space and click on New Share

Now select the option SMB Share – Quick and click on Next

The next step is to choose your drive volume, where you want to create a network share, and click on Next
As you can see image below, we have selected the C drive, you can choose any drive you want.

Now you have to provide the share name, which will automatically generate the local path and remote path
Note: Make sure to note down your remote path, as it will be used further.
So, in our case, we gave it a name as HRNetworkDrive, clicked on next, and next again.

Therefore, now it will ask for permission to control access
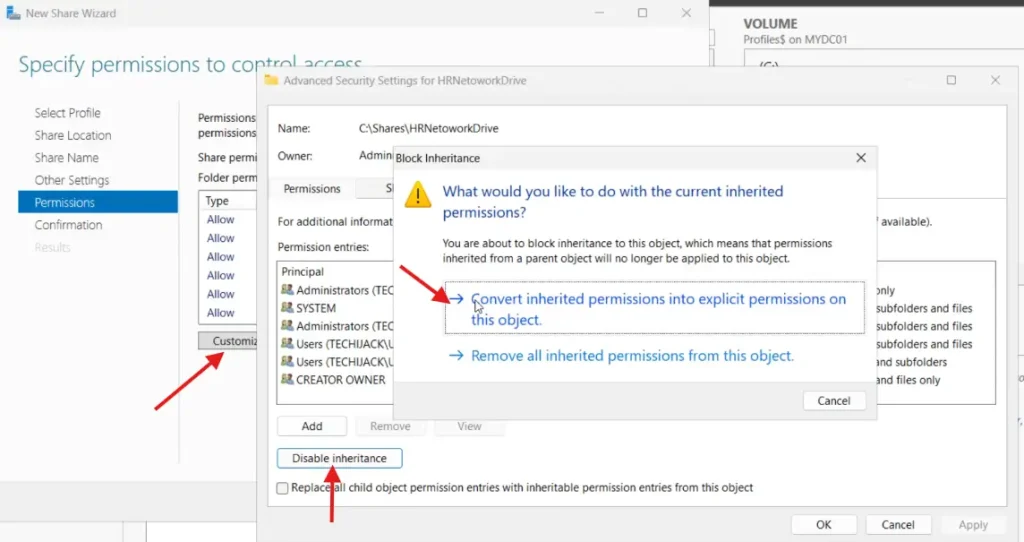
Click on Customize permission and click on Disable inheritance
It will prompt a message, and you have to click on Convert inherited permissions into explicit permissions on this object.
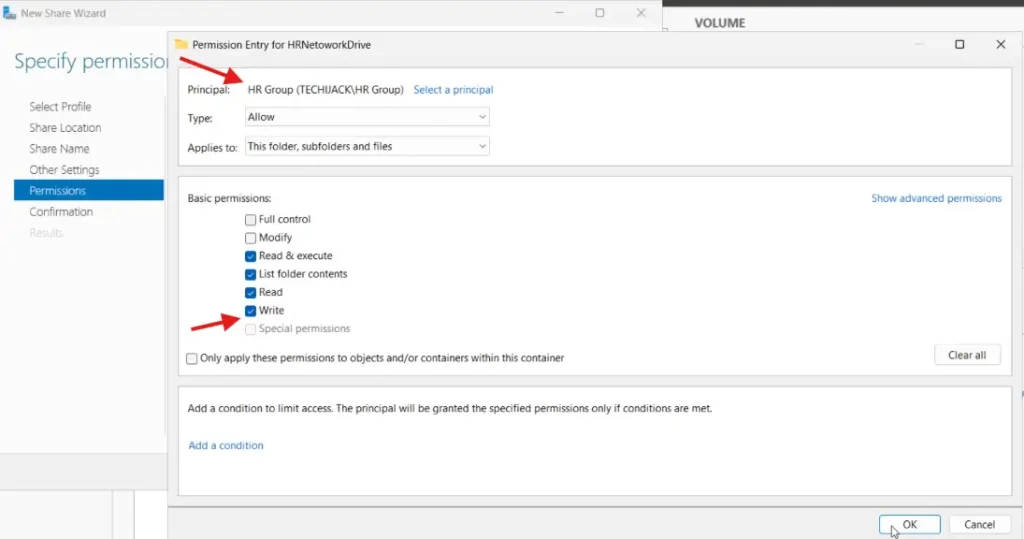
Now, click on Add and select a principal, and add the HR group to it.
Selecting the HR group here means, only HR Group users will have access to the share; other users will be restricted automatically.
Check the write permission and click ok.
To proceed further, just click on ok, apply, and ok again.
Once you do that, click on next, and finally click on create
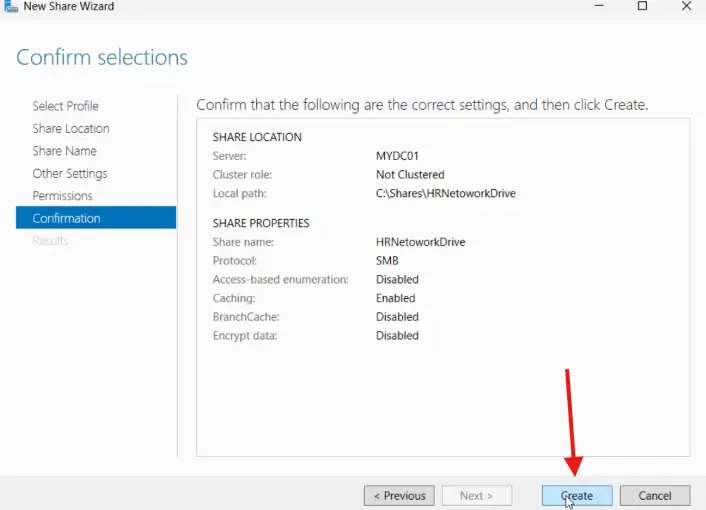
You will get a result as the share was successfully created, just close this now.
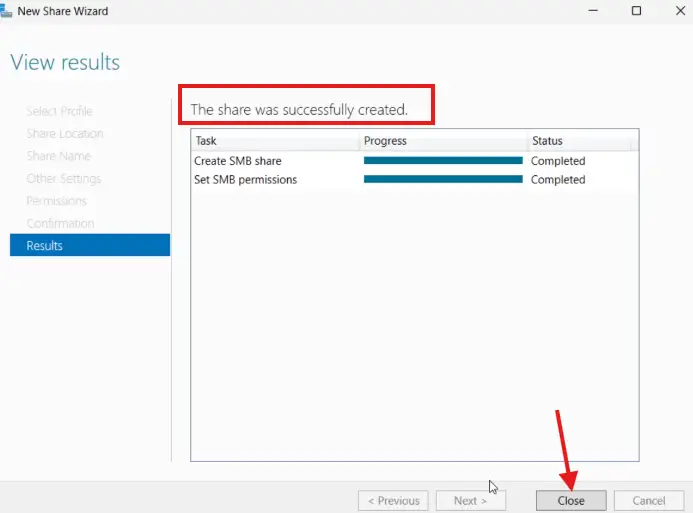
We have successfully created the network share.
Mapping Network Drive with Group Policy
To open the group policy management, open the server manager and click on tools.
Under Tools, you will see the Group Policy Management, just click on it to open it.
Once the group policy management is opened.
Expand your domain and navigate to the desired OU; in our case, it is the HR OU.
Just right-click on the HR OU and click on Create a GPO in this domain, and link it here.
Now you have to provide the name of the New GPO.
In our case, I gave it the name HRMapDrive
Therefore, you can give it any name of your choice.
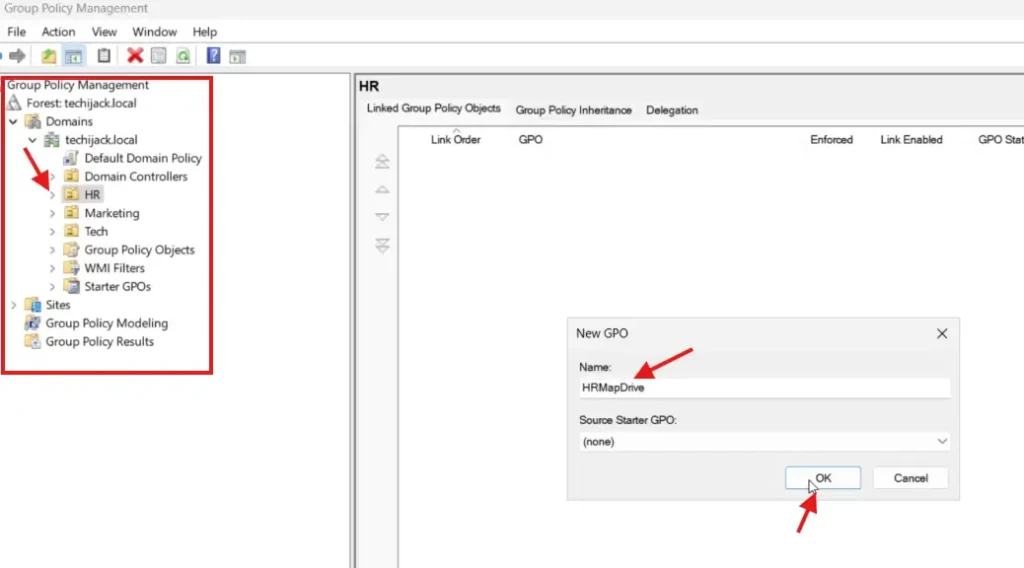
A new GPO has been created, and we have to edit it.
Just right-click on the newly created GPO and click on Edit.
A new window of the group policy management editor will open
Under the user preferences, expand the Windows settings, and you will see the drive map.
Right-click on Drive Map, navigate to New, and click on Mapped Drive.

After clicking on Mapped Drive, and new window will pop up.
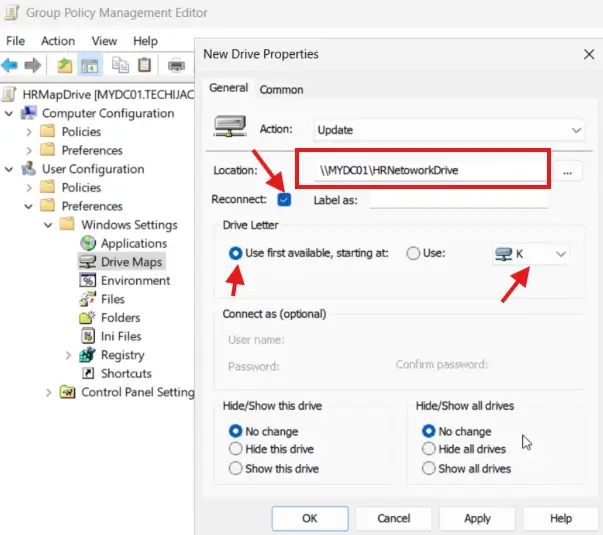
In the location field, put the remote path for the network share we have created.
Check the reconnect check box.
Under the drive letter, select the radio button for the use first available starting at, and also select the drive letter.
In my case, I select the drive letter as K, shown in the image below
After doing this, click on the common tab and select Item-level-targeting, and click on Targeting
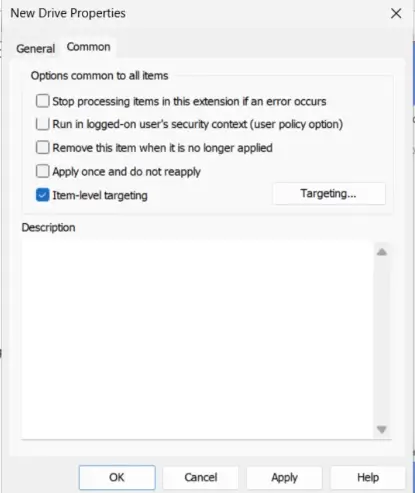
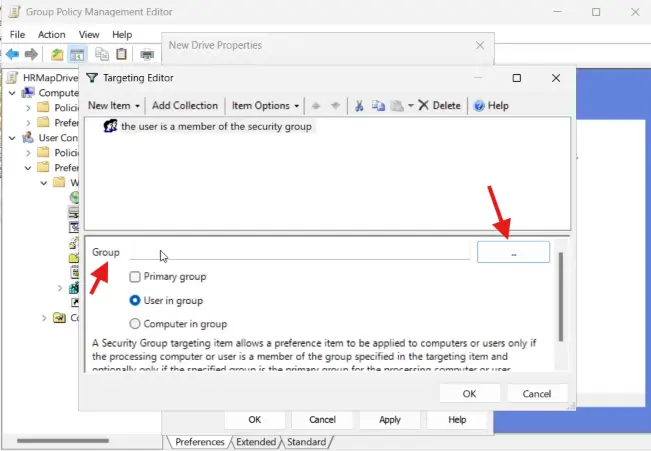
Once you click on Targeting, click on New Item and select a security group.  click
click
Therefore, now you have to select the security group that is the HR Group in our case
As you can see from the image below, we have selected our HR Group.
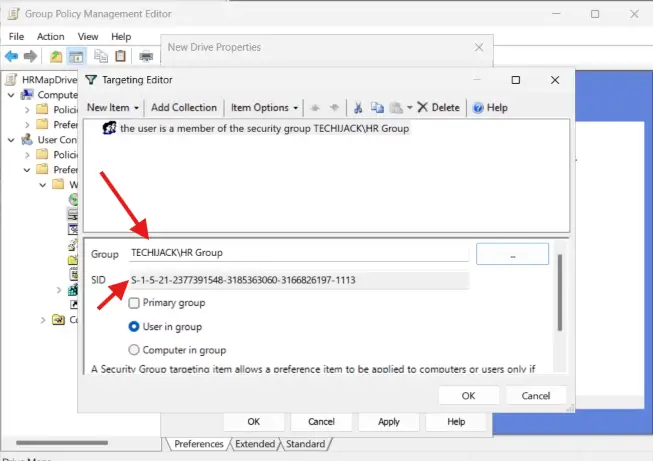
Now, click on OK, apply, and ok again.
MapDrive has been configured successfully.
Updating Group Policy
Now we have to update the group policy setting on our Server and client machines as well.
To update the group policy settings, we will run the following command in CMD on our server and client as well.
Gpupdate /force
Once the group policy has been updated successfully.
We can now test the network map drive for our user.
So, we are logging in as a user, David, a member of our HR Group.
After logging in, we open this pc and we have a network drive present there.
The name of our network drive is HRNetworkDrive with drive letter K, which we have set.
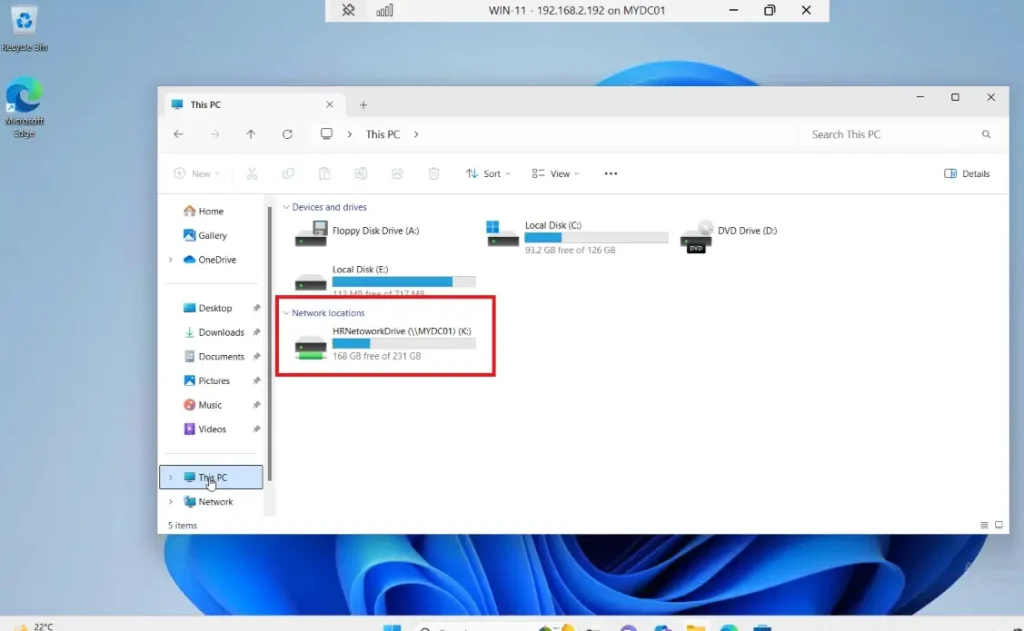
We have mapped our network drive successfully for our HR Group Users with the help of group policy.
Conclusion
Whenever you create a map network drive, make sure to assign proper permissions, so that only the user can access the resources for whom it is created.
Also, make a note of all the network shares you create in your organization.
Therefore, if you add any other user to this HR Group, that user will also get the map drive automatically.
If in case you have any queries or questions related to this article, feel free to contact.
I hope you will also like some other articles on Windows Server Active Directory tutorials
Moreover, if you want to see how to map network drive step by step, watch the video below.

