IIS IP Address and Domain Restrictions
Secure Your Internal Web Application or CRM With IP & Domain Restrictions
Table of Contents
Configure IIS IP Address and Domain Restrictions
Configuring IIS IP Address and Domain Restrictions is very useful when restricting your web application or internal CRM from outside.
Suppose you have an internal CRM running on the IIS Web Server and want only the office users to access it from the office or branch location.
In this case, you can use IP and Domain Restrictions to allow only your IP Address and block the rest of the IP’s.
This will secure your web application and allowed users can only open the website.
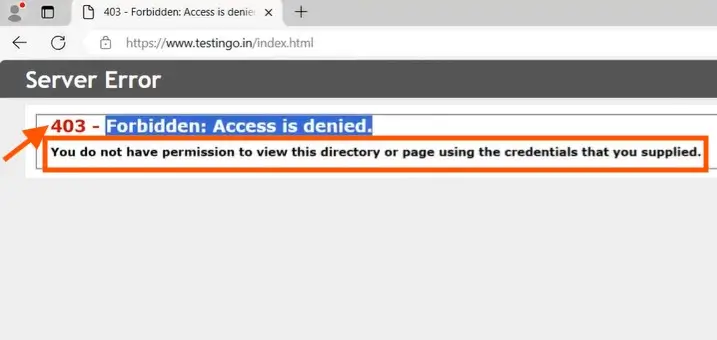
However, if other users open it. They will see the Forbidden or Unauthorized message on their screen.
So, here in this article, we will learn how to configure IIS IP Addresses and Domain Restrictions on our IIS web server.
Therefore, we will also know how to deny all the external IPs and allow only a few IPs for more security.
Note: The IIS Web server is configured with DNS and SSL. If you want to know more about IIS, you can see the IIS tutorials on Techi Jack.
We are going to demonstrate this with our demo site that is “testingo.in”
Things to know before configuring IP and Domain Restriction on IIS
Before proceeding with enabling IP and domain restrictions.
You must check whether it is installed or not.
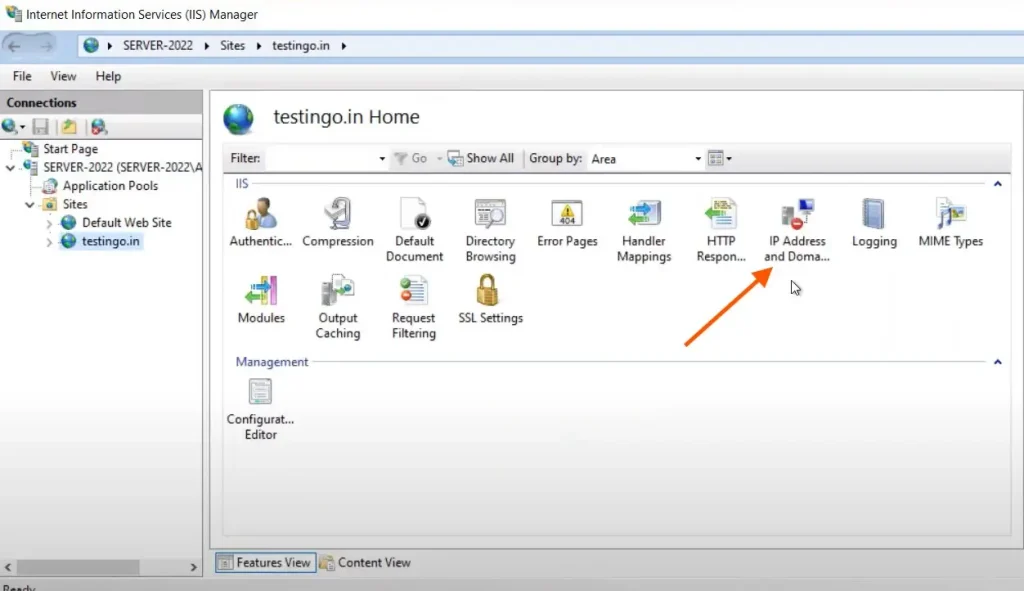
To check this feature availability, open the IIS Manager and click on your website.
Look for the IP and domain restrictions on the right side pane.
If it is available, that means it is installed and you can configure it.
Therefore, if it is not installed, we have to install the feature IP and domain restrictions.
As you can see in the image below, IP and domain restrictions are not present.
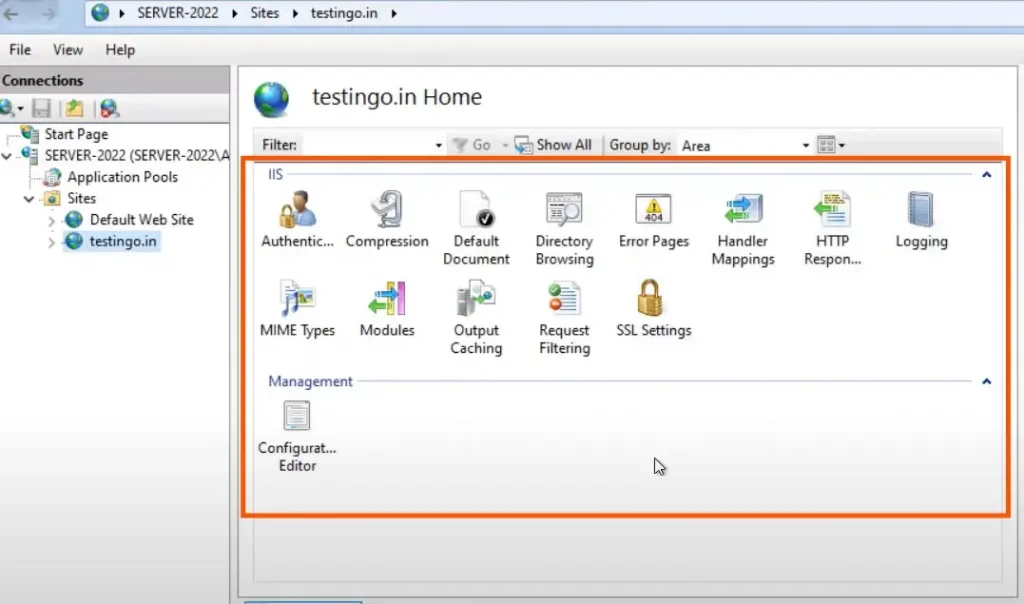
So, we have to first install this feature.
Installing IP and Domain Restriction on IIS Web Server
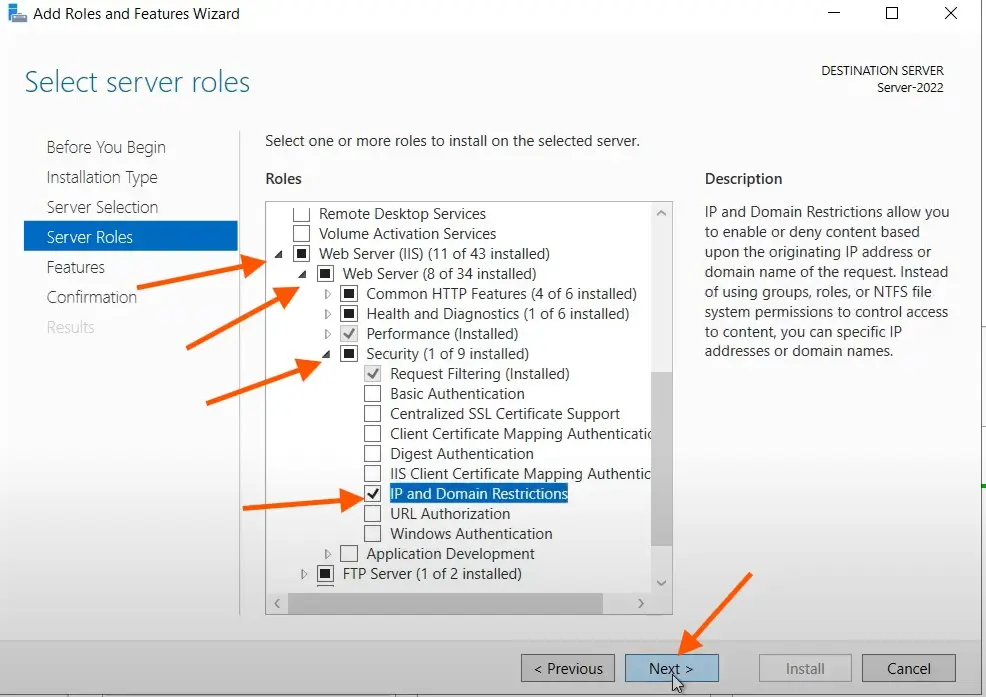
- To install this feature, open the Server Manager
- Click on Add Roles and Features and click on the next
- Now select the server from the server pool and click on Next
- After clicking on next it will show you the screen for Web Server (IIS)
- Expand the Web Server IIS and Web Server look for security and expand it as well.
- Now you will see IP and Domain Restrictions
- Check this box proceed with Next twice and click on Install
Now IP address and domain restriction feature will be installed on your IIS web server.
To make sure that it is installed and that we have the feature available in the IIS manager.
Open the IIS manager, click on your website, and look for IP and domain restrictions features available at the right side pane.
As you can see in the image below, now we have that feature available in our IIS Manager.
How to enable IP and Domain Restrictions
To enable and configure IP and Domain Restrictions
Open the IIS IP address and domain restrictions.
Click on the Add Allow Entry or Add Deny Entry to configure the rule of your choice.
Here in our case, we will try to deny all the IP addresses and will allow only a few IPs.
The benefit of doing this is to make your internal web application more secure.
By doing this, your web application will open in your organization or a branch office even if you publish your web application on the internet.
Note: The best practice is to configure routing between your branch office and head office to avoid publishing your internal web app to the Internet.
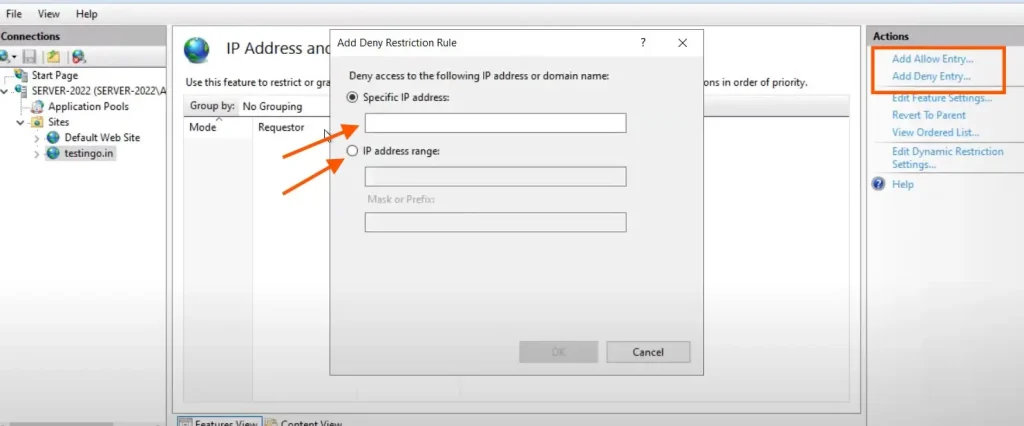
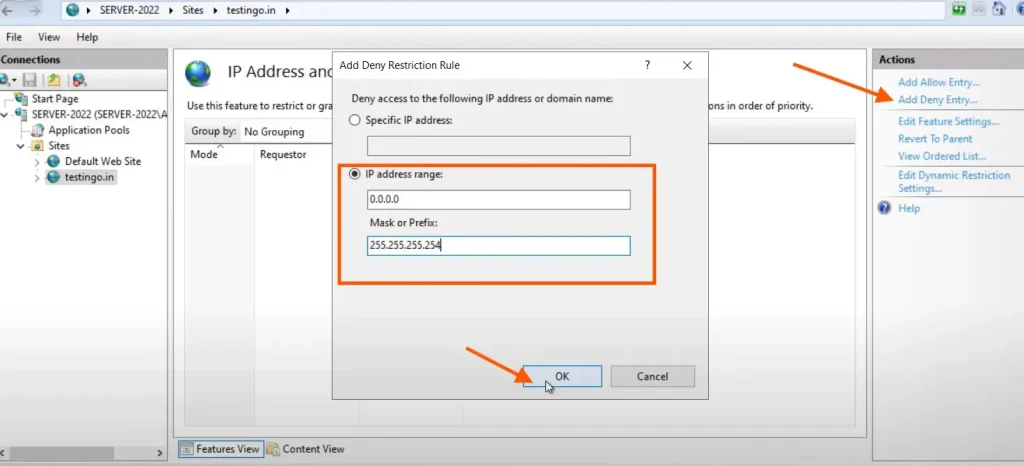
To deny all the IP’s, click on Add Deny Entry
Select the option IP Address Range
Enter the IP as 0.0.0.0 and mask prefix as 255.255.255.254 and click on ok
Once you add the IP and Mask prefix.
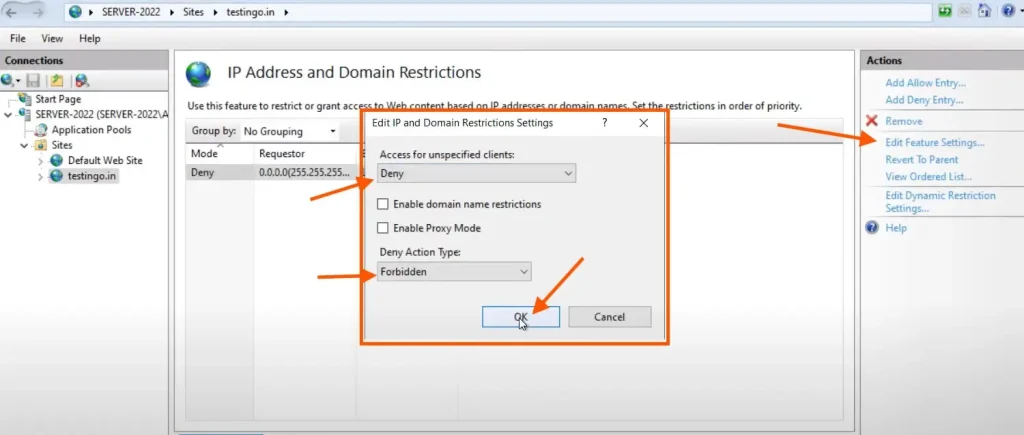
Go to Edit Feature Settings present at the right side pane.
Choose the action Deny from Access for unspecified clients.
Select the Forbidden in the Deny Action Type and click on OK
Now if you open your website. You will get the message that Forbidden Access is denied.
You can see the message in the image below for Forbidden.
That was the setting we did.
Therefore, this Deny entry blocks all the IP addresses to access the website.
But we want our head office and branch office to only open our Web application.
So, we have to allow our IPs to domain and IP restrictions, so that we can access it.
How to Add and Configure Allow Entry
As you know, now our website is blocked for all the IP Addresses.
So, let’s allow our Office IP to allow the Website, it can be a local or public IP of your choice which you want to allow.
To add the IP in an allowed list
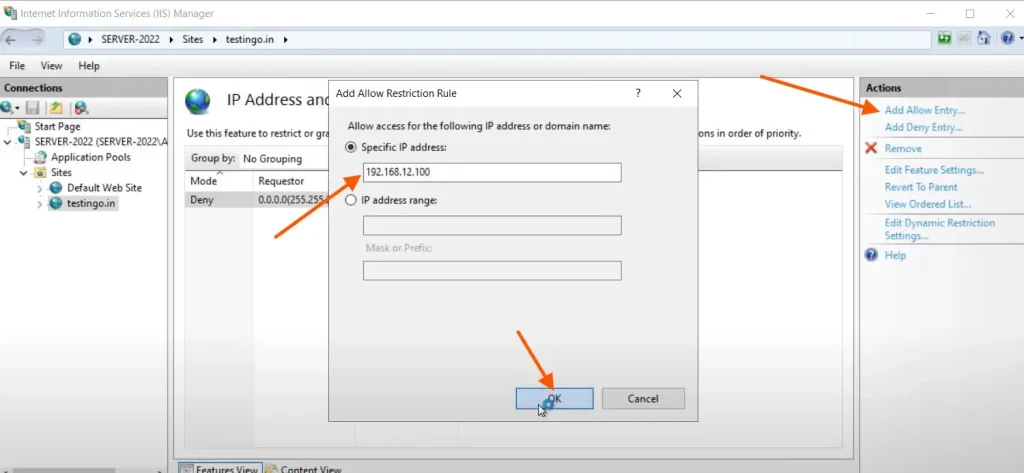
Again open IIS Manager select your website, open IP and domain restrictions, and click on Add Allow Entry from the right side pane.
Now enter your IP address which you want to allow under the Specific IP Address and click on OK
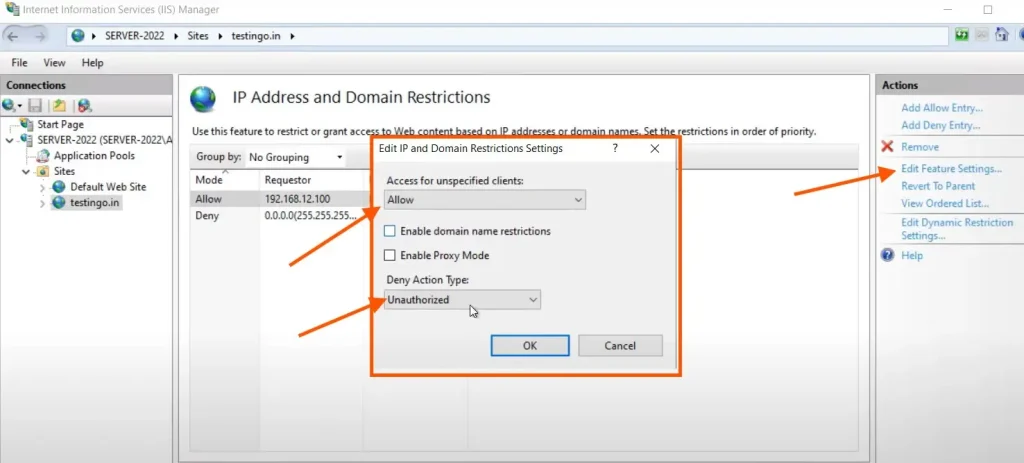
Also, click on edit feature settings
Choose the Access for unspecified clients as Allow
It’s your choice to select the Deny Action type.
You can choose Forbidden or Unauthorized according to your choice.
Note: Only doing this may not allow your IP to access the website.
Because there is an order list that gives priority to the denied entry first.
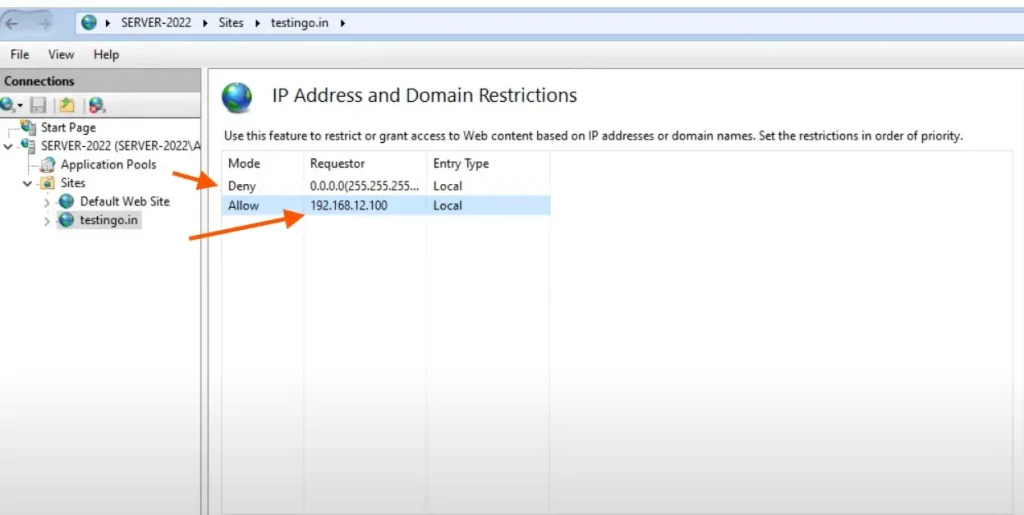
As you can see on the screen below, it denies all the IP has an order list as 1 and allow IP in order 2
Therefore, this will give preference to deny all rules and the website will not open from anywhere.
So, we have to set the order list, to move the allow entry to number 1 and deny entry to the number 2.
This will help us to apply rule 1 first, that is allow entry to open the website from our specific IP Address.
To set the order priority select the view order list from the right pane select the allow entry and click on Move Up from the right side pane.
We moved the allowed entry to the number 1.
Now you can see the image below to set the allow entry to the number 1.
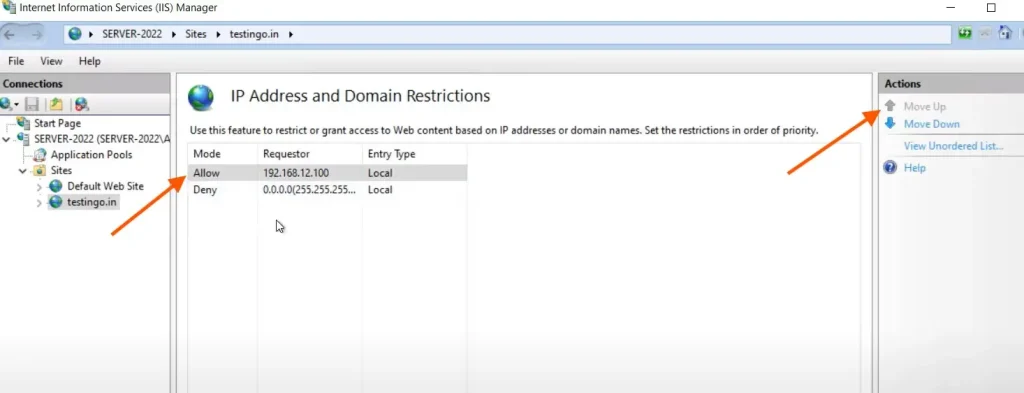
Once you do this, now your website will open from the specific IP address that is your office IP and will show forbidden or unauthorized to all other external IP’s
As you can see the testingo.in is now accessible from our local Internal IP, but restricted for all external IPs

Conclusion
We learned how to secure a website by configuring IP Addresses and Domain Restrictions on the IIS web Server.
It is best practice to deny all entries and allow only your office IP if you have any internal CRM or web application for office use only.
You may also like to know about free SSL Installation for IIS Websites.
If you have any queries related to this article, feel free to contact us.
Moreover, if you want to see the steps in action.
Watch the video below to configure IP Address and Domain Restrictions in the IIS Web Server.