PHP Installation on Windows | Install PHP For IIS
Manual Installation of PHP On Windows Without Web Deploy
Table of Contents
PHP Installation on Windows Server 2022/25
PHP installation on Windows is not as straightforward as installing other software.
It is an open-source scripting language that is very helpful for developing web application
With the help of PHP, you can create dynamic content that interacts with the database
If you are a web developer, you will see it installed on many Linux web servers such as cPanel, CWP, Plesk, Xampp, etc.
It comes with inbuilt installed with the above control panels.
What if you want to install it on IIS Windows Web Server?
Though Plesk can be installed on Windows that installs PHP automatically but it is a paid control panel for IIS servers on Windows.
Here in this article, we will learn PHP installation on Windows Server 2022, so that you can host your website on your Windows IIS Web server.
Selecting PHP Version for IIS Windows Web Server
Before you jump for PHP installation on Windows, it is very important to select the correct download version.
Also, you need to install the prerequisites before installing PHP on Windows.
Here, in our case, we are installing the latest PHP 8.3 (as of the current date) on our Windows Server 2022
First, we will download and install the Microsoft Visual C ++ 2015-2019/2022 Redistributable
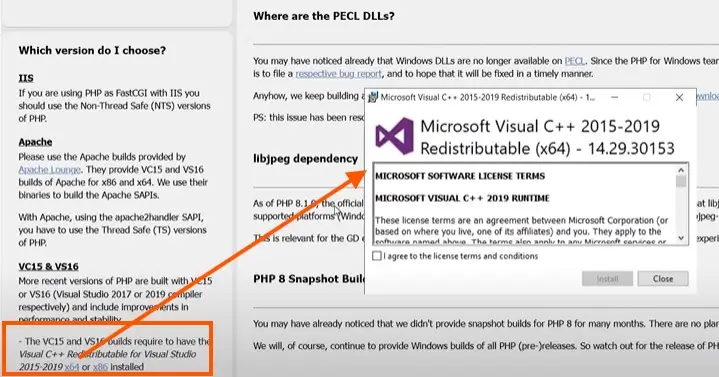
Now let’s download the latest php 8.3 the latest version at the point of writing this article.
But if you find the different versions of PHP and Microsoft Visual C++ redistributable package, you can download and install it, other steps of installation will be the same.
Note: If you are installing PHP on Windows, it is recommended to download the Non-thread Safe Version
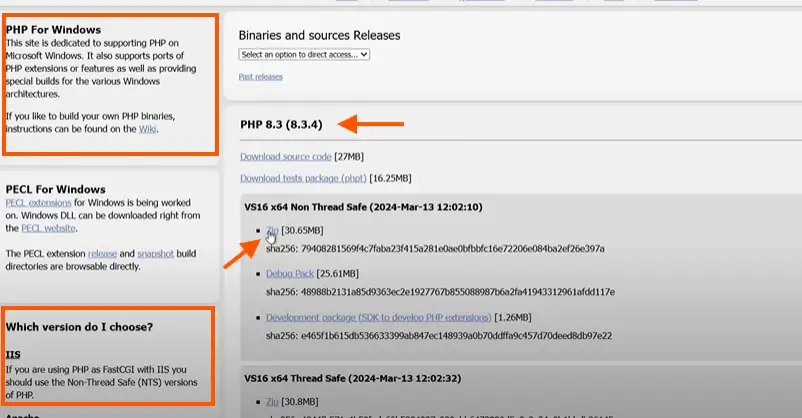
Once you download the php zip, you need to extract it, here we extracted it inside the php folder and moved the extracted php folder from downloads to C Drive.
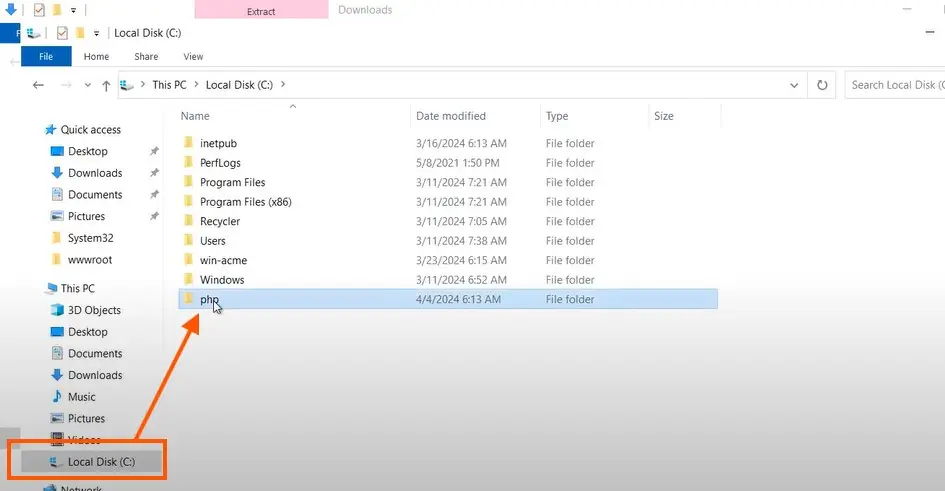
Setting Environment Variables For PHP Installation
Now you downloaded the PHP 8.3, Extracted and moved it to the C drive
Now let’s set the environment variables for our PHP 8.3
To set the environment variable you Go to the properties of the computer, and click on Advance System Settings.
Click on environment variables select the Path under System Variables and click on Edit.
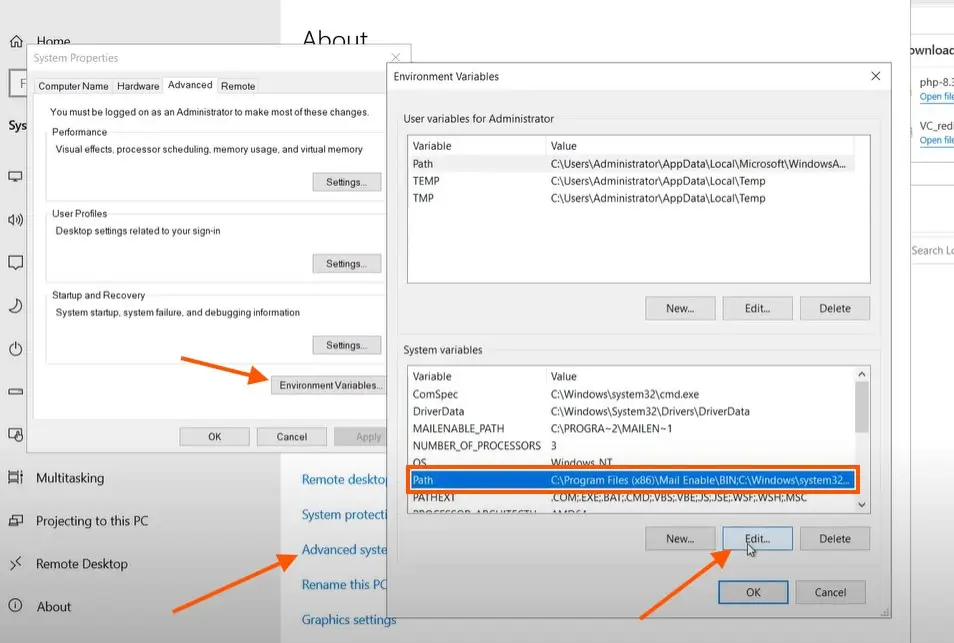
Once you click on the Edit button, it will open the edit environment variable.
you need to click on new and add the path for your PHP 8.3
As you already know we have our PHP inside the C drive.
Therefore, our path will be C:\php
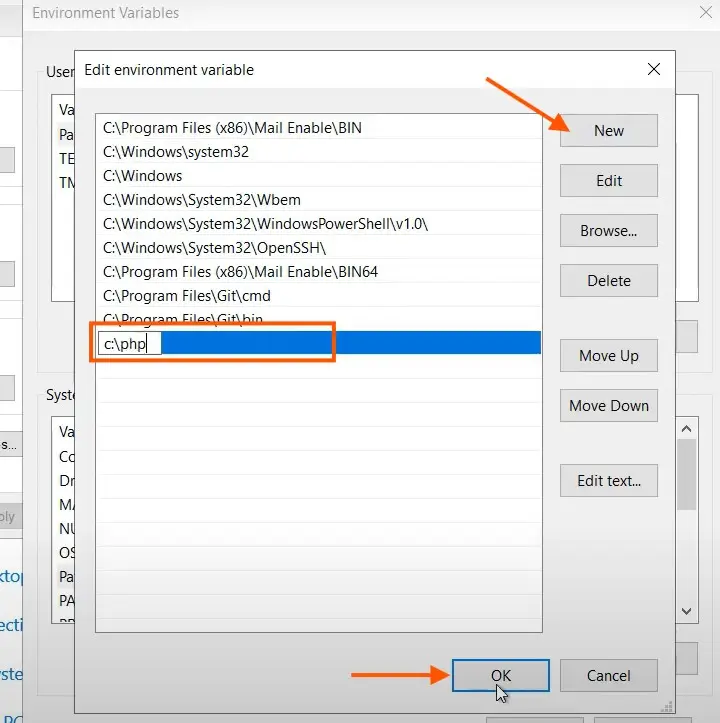
After setting the path just click on ok and close all open windows.
Configuring PHP.ini File
Now we need to configure our php.ini file.
To configure the php.ini file, go to the c drive open the PHP folder, and find the file php.ini production.
We need to rename this file as php.ini, so remove the production text from this file.
So, now your file will be php.ini instead of php.ini-production
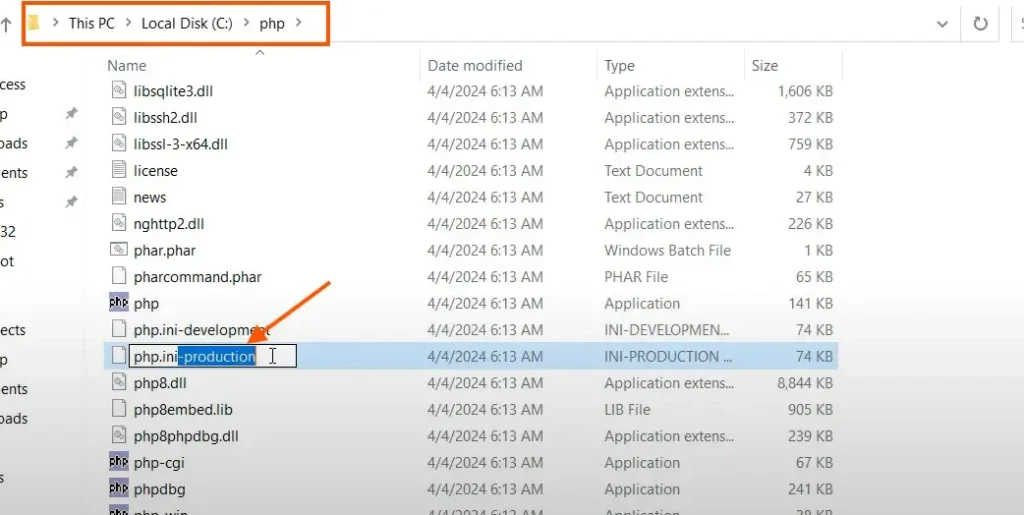
Now we need to edit this php.ini file.
Just right-click on this php.ini file and click on edit with Notepad.
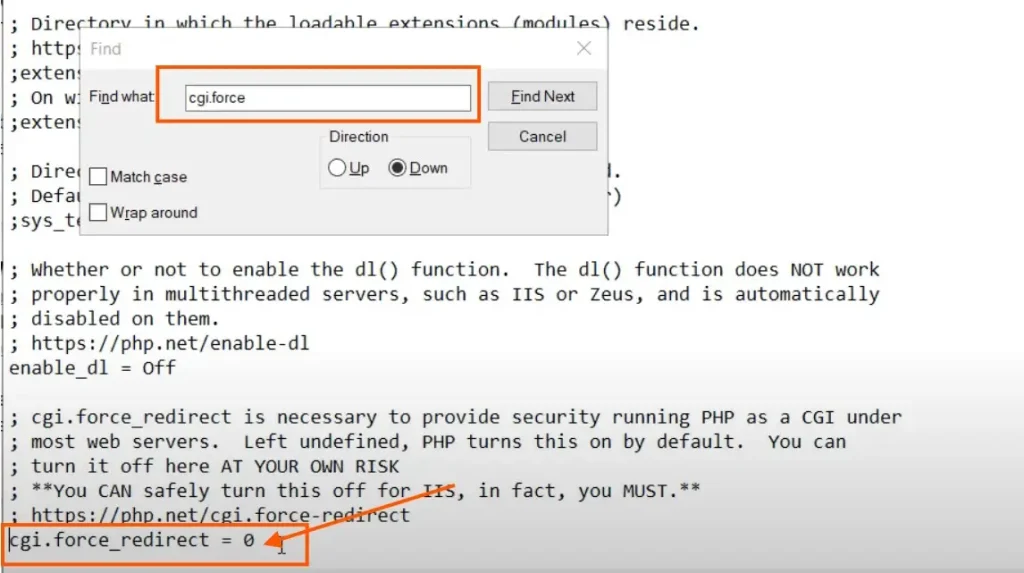
Search for the cgi.force_redirect
Therefore, you will get the cgi.force_redirect with value 1 with a comment applied. (“;cgi.force_redirect=1”)
Remove the comment and set the value 1 to 0 as shown in the image below.
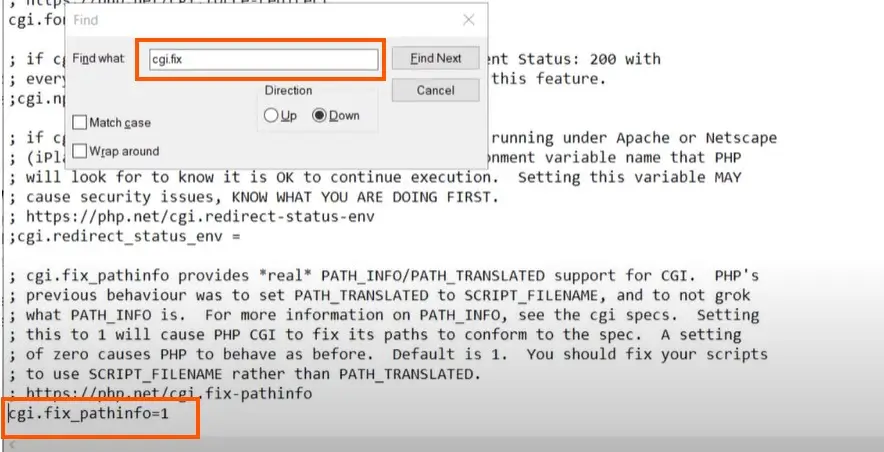
Next, you have to search for cgi.fix and you do not need to change the value.
To enable it, we just need to uncomment it. Same as the image below
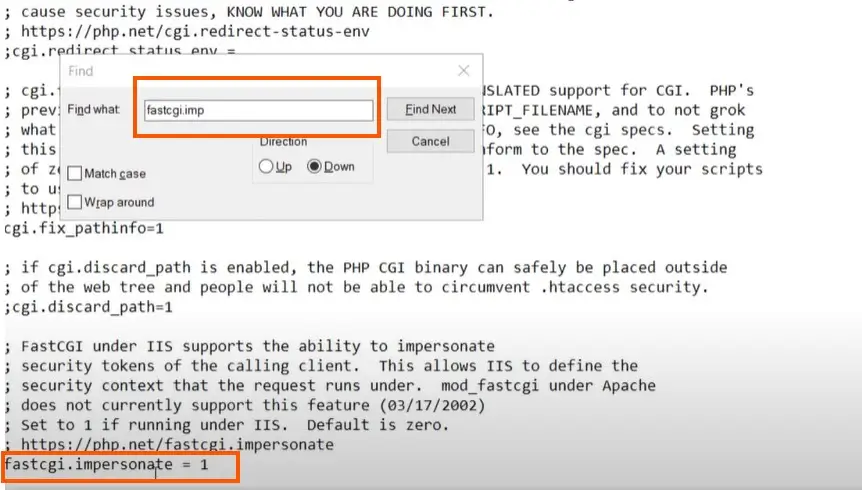
Also, we need to search for fast CGI impersonate, and in the same way, we will enable it by uncommenting it.
Same way uncomment the fast CGI logging to enable this extension.

We also need to enable the mysqli extension by uncommenting it.
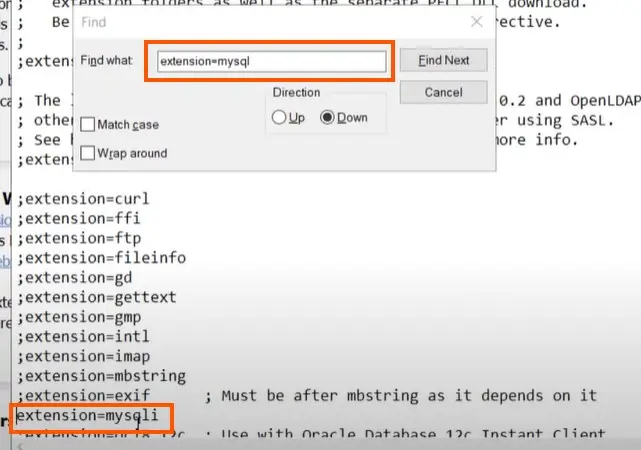
Finally, we have to enable the pdo_mysql extension by uncommenting it as well
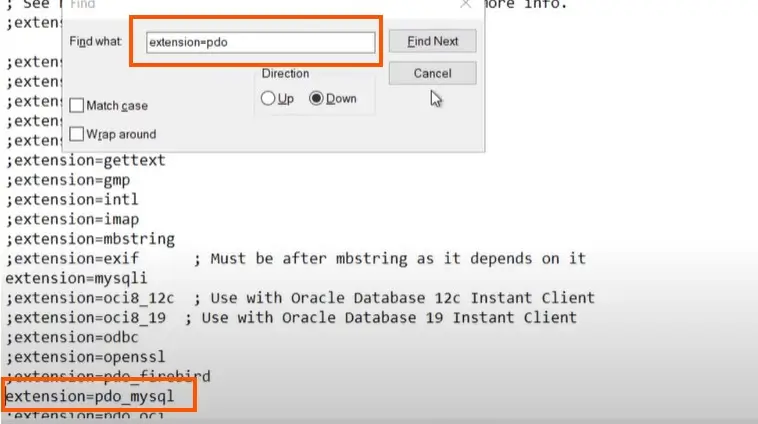
All the required extensions are now enabled in our php.ini file.
Just save the file and close all the open windows.
IIS Settings For PHP Installation
We have to set the handler mappings and default document in IIS
Therefore, to configure the handler mappings for the IIS Server.
Open the Internet Information Server (IIS) Manager then select the server from the left pane and open the handler mappings from the right pane.
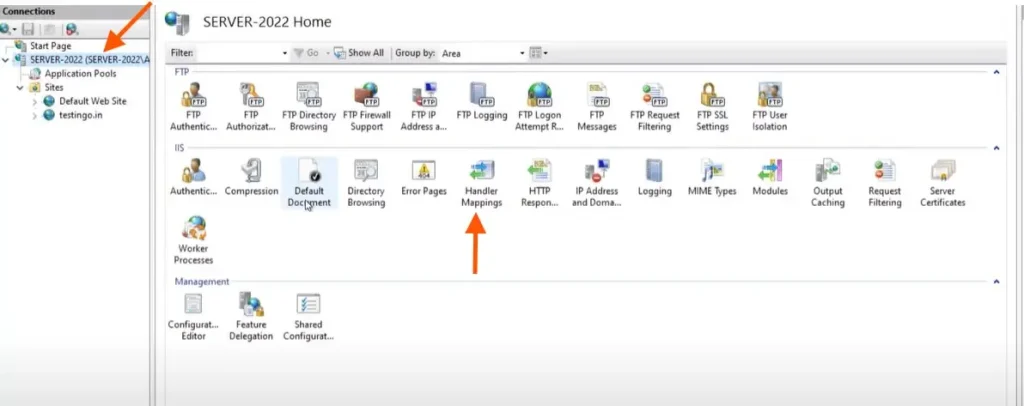
The next step is to add module mapping, you can click on Add Module Mapping from the Right pane
Set the request path as *.php, Module as FastCgiModule, Executable C:\php\php-cgi.exe, and Name FastCGI
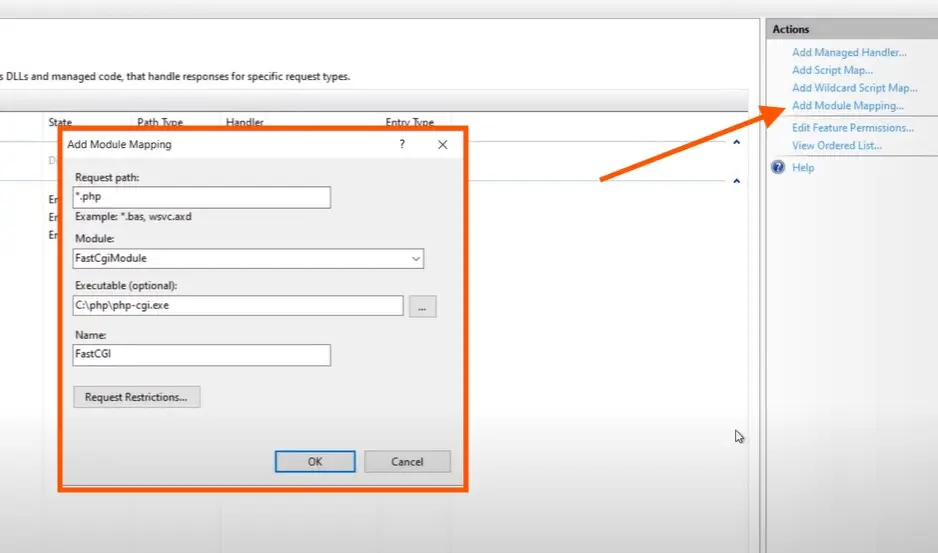
Also, click on request restriction, and under mapping select the radio button for file and folder.
Selecting the above option, click on ok to save the settings.
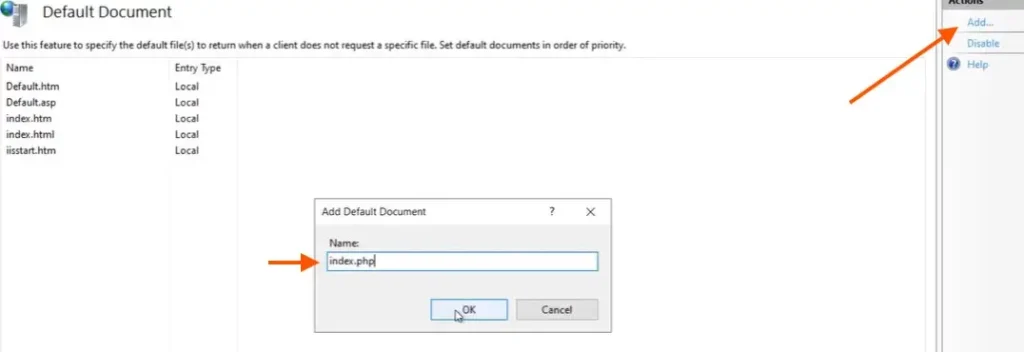
Now we have to set the default document for PHP, again navigate to the Server Name from the left pane and open the “Default Document“.
Add the default document as index.php and click on ok.
Verifying The Installation
We have completed the most common and useful steps to install PHP on a Windows machine.
Let’s try to test our installation.
You can create a Notepad file by the name of phpinfo.php type the following text and save it.
<?php phpinfo(): ?>
Copy this phpinfo.php file and paste it inside the C:/intetpub/wwwroot folder
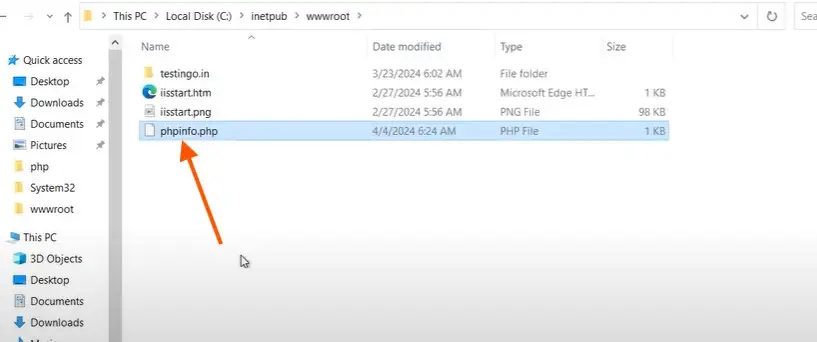
However to confirm your PHP installation you can just open the browser and type the HTTP://localhost/phpinfo.php
The installed PHP version will be displayed in the image below
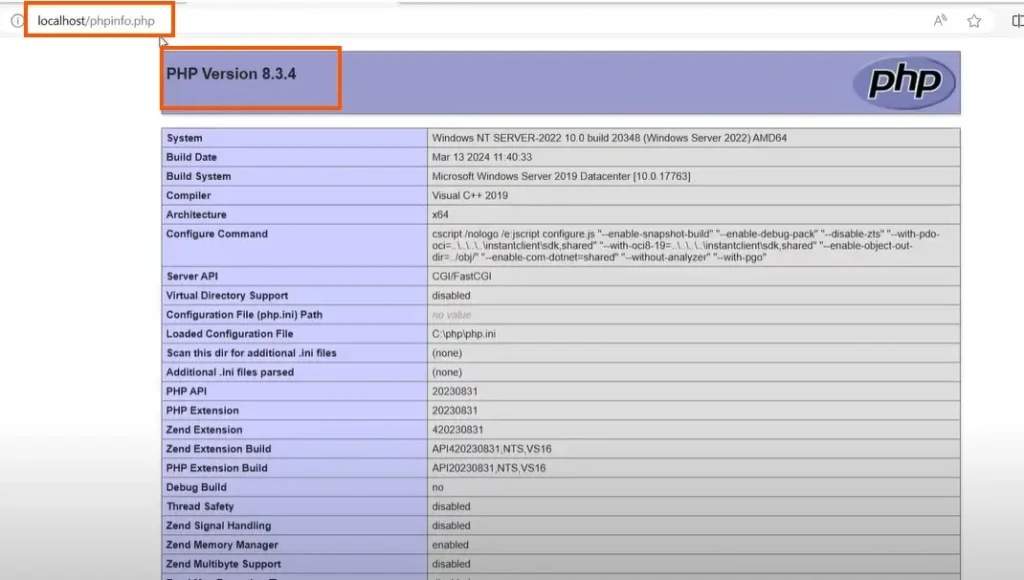
Now you can see our current latest version of PHP 8.3.4 has been installed on our Windows Server 2022
Conclusion
So, we learned how to install PHP in Windows, while installing PHP you have to be careful while enabling the extension and configuring the IIS setting.
Small mistakes can lead to the problem.
Moreover, if you wish to host a WordPress Website, you can easily install it now.
If you have any issues with this article or need any help.
Feel free to Contact Us.
If you would also like to learn more about the IIS Tutorials
Watch the Video below for the complete manual installation of PHP on Windows Server 2022

