OpenSSH For Windows Server | Installing OpenSSH
Step by Step Guide for How to Configure OpenSSH For Windows Server
Table of Contents
Get Started With OpenSSH for Windows Server
OpenSSH for Windows server is a remote sign-in connectivity tool to access the Server with SSH protocol.
Connecting the Server through Open SSH encrypts the traffic between the server and the client.
Therefore, it reduces the risk of connection hijacking, eavesdropping, and other attacks is helpful.
In this article, we will learn how to set up open SSH on Windows Server.
You can install it on Windows Server 2019, 22 Windows Server 2025, Windows 10, and 11.
It’s a new feature introduced in 2025 Windows Server and present in Server Manager by default.
So, we will see both options to install it on Windows Server 2019/22 and Windows Server 2025
Let’s first know the prerequisites for installing Open SSH
Prerequisites for Installing OpenSSH
Your computer must meet the following Requirements.
The device should be running at least Windows Server 2019 or Windows 10 (Build 1809)
The PowerShell Version should be a minimum of 5.1 or later. (Major Version 5 and Minor Version 1)
Permission on Account should be a member of the Built-in Administrator Group.
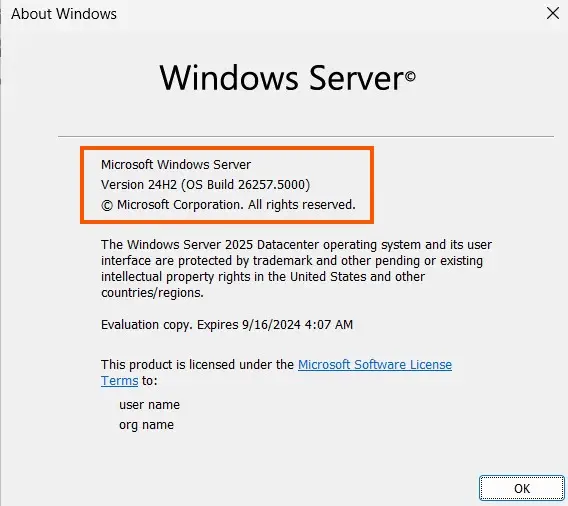
It is best to check your Windows version before proceeding.
You can check your Windows version by running the winver.exe in a run box or using PowerShell.
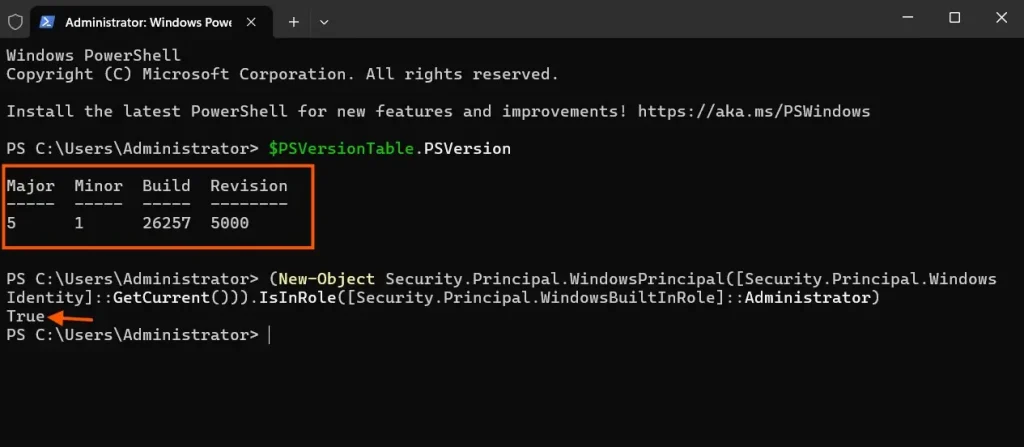
To check the version of PowerShell you are running. Run the following cmdlet in PowerShell.
$PSVersionTable.PSVersionTherefore, to check the administrator permission run the following cmdlet to make sure the admin permission results as True.
(New-Object Security.Principal.WindowsPrincipal([Security.Principal.WindowsIdentity]::GetCurrent())).IsInRole([Security.Principal.WindowsBuiltInRole]::Administrator)The screen below shows the output for both the cmdlet mentioned above.
If you have all the above settings in place. We are good to go for Open SSh Installation.
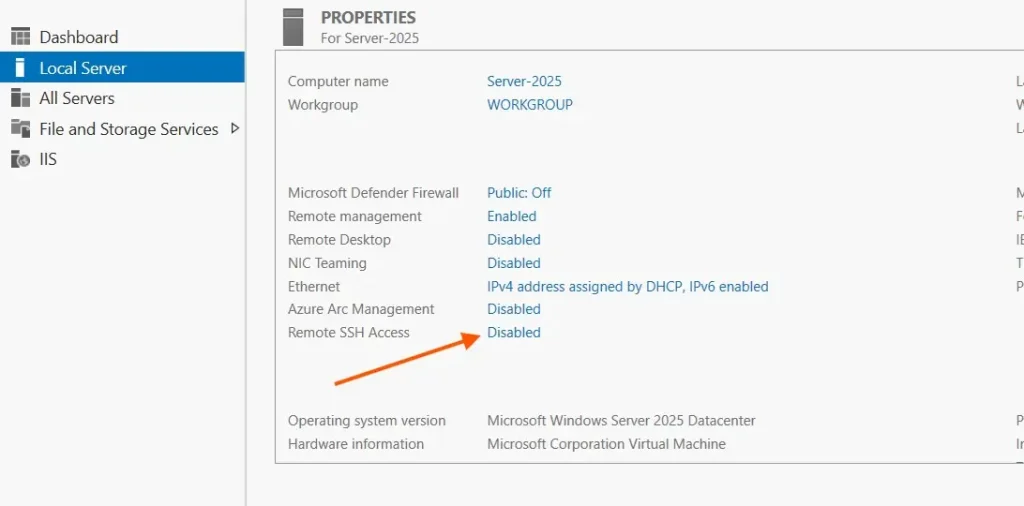
Enabling OpenSSH For Windows Server 2025
To enable the OpenSSH on Windows Server 2025
Open Server Manager.
Click on the Disabled button on OpenSSH Access to enable it.
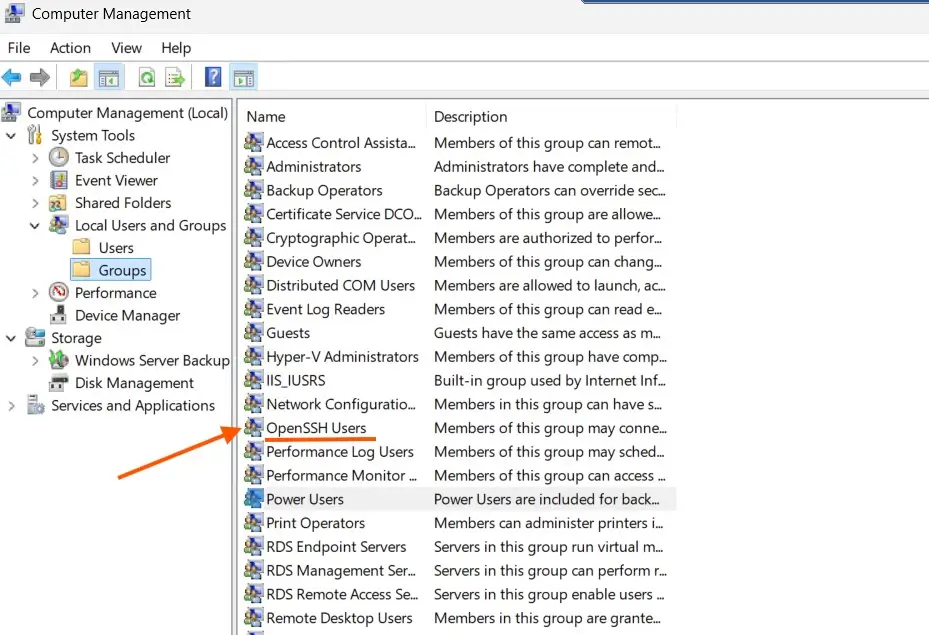
Note: If you want to allow specific users or groups to access your Server 2025 via OpenSSH, add those users to an OpenSSH Users group.
Now you can connect to the OpenSSH Server by running the following cmdlet
Ssh domain\username@servername
You need to Press Y for the authenticity of the host and you will be connected.
Note: You should start the sshd service and set it to start automatically on startup, and configure Windows firewall to allow the connection for OpenSSH on default port 22, we will see that, later in this article.
Installing OpenSSH on Windows Server 2019 via PowerShell
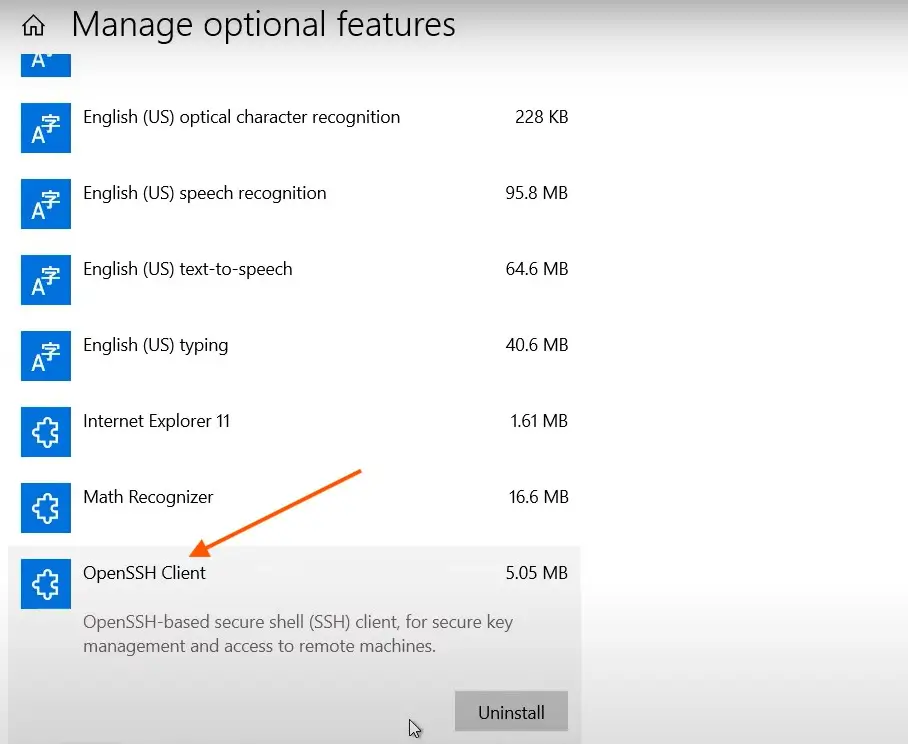
If you open the settings navigate to the system and search for optional features
You will see the OpenSSH client installed by default on Windows Server 2019.
However, OpenSSH Server is not installed by default, nor do we have a default option to enable OpenSSH from the Server Manager in Windows Server 2019
So, we need to install it via PowerShell.
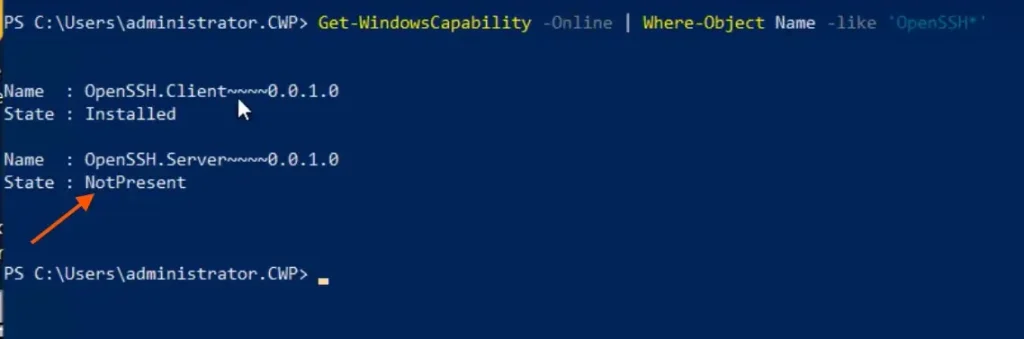
First, we will check the OpenSSH client and server on our Windows Server 2019
Run the following cmdlet
Get-WindowsCapability –Online | Where-Object Name –like ‘OpenSSH*’You can see in the below image that, OpenSSH in Not Present.
To install open SSH run the following cmdlet.
Add-WindowsCapability –Online –Name OpenSSH.Server~~~~0.0.1.0After adding this capability you can confirm the installation and you will get the following result
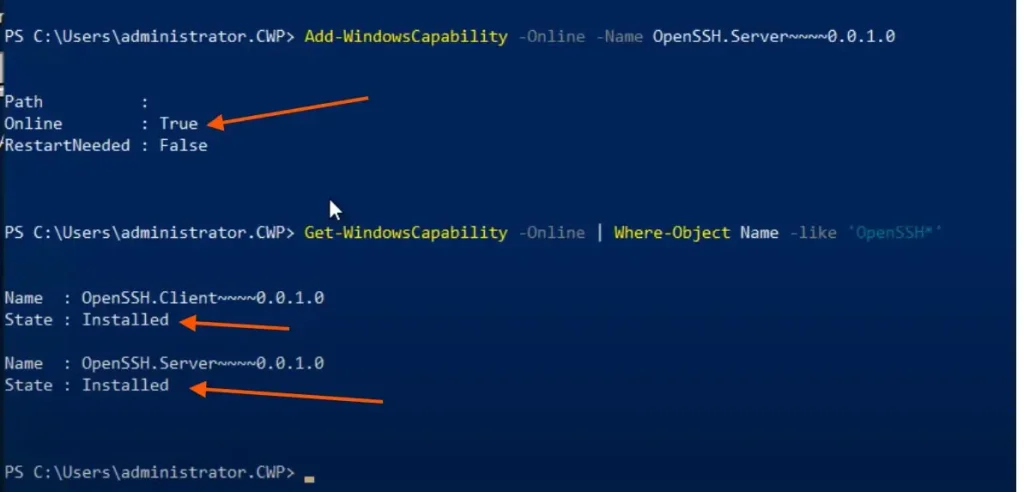
Now OpenSSH is installed on your server in 2019
However, services are not started yet. If you check the service of sshd and sshd-Agent, you will find it stopped state.
Get-Service sshd
Get-Service ssh-agent
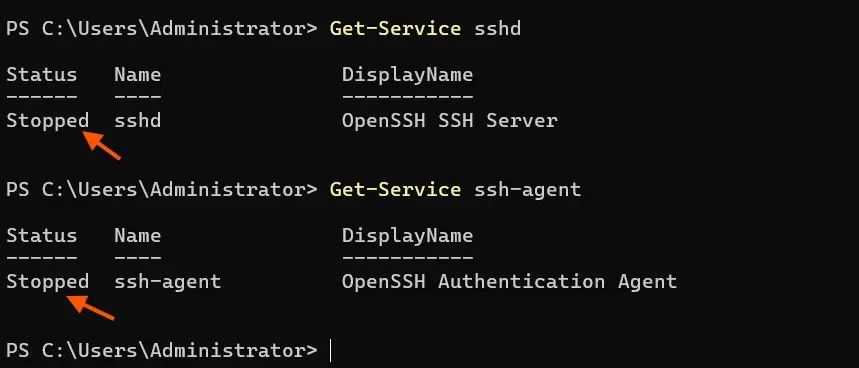
Therefore, we have to start these services and set them to start automatically on startup.
To set the services to run automatically at startup run the following cmdlet.
Set-Service –Name sshd –StartupType ‘Automatic’
Set-Service –Name ssh-agent –StartupType ‘Automatic’

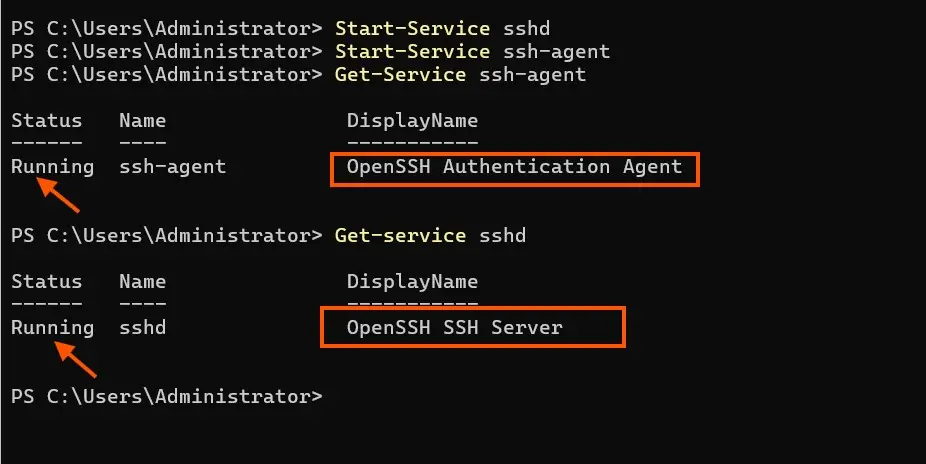
Now we need to start the service and check the result by running the cmdlet below.
Start-Service sshd
Start-Service ssh-agent
Get-Service ssh-agent
Get-service sshd
After enabling the services. You will see the result that, now both the services are in running state.
Therefore, we also have to add the allow rule in our Windows firewall for port 22 so that we can connect with OpenSSH.
Configure Firewall Allow Rule For OpenSSH
Once you configured all the above settings.
It is necessary to set the allow rule on the Windows firewall to make a successful connection.
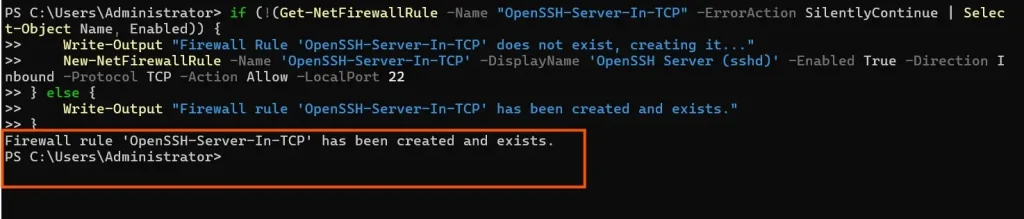
To set the firewall rule run the following cmdlet.
if (!(Get-NetFirewallRule -Name "OpenSSH-Server-In-TCP" -ErrorAction SilentlyContinue | Select-Object Name, Enabled)) {
    Write-Output "Firewall Rule 'OpenSSH-Server-In-TCP' does not exist, creating it..."
    New-NetFirewallRule -Name 'OpenSSH-Server-In-TCP' -DisplayName 'OpenSSH Server (sshd)' -Enabled True -Direction Inbound -Protocol TCP -Action Allow -LocalPort 22
} else {
    Write-Output "Firewall rule 'OpenSSH-Server-In-TCP' has been created and exists."
}
How to connect with OpenSSH Server with PowerShell
To connect with PowerShell, Open the PowerShell
Type ssh domain\username@servername
You may get the message for the authenticity of the host, you need to Press Y to add the server to the list of known SSH hosts.
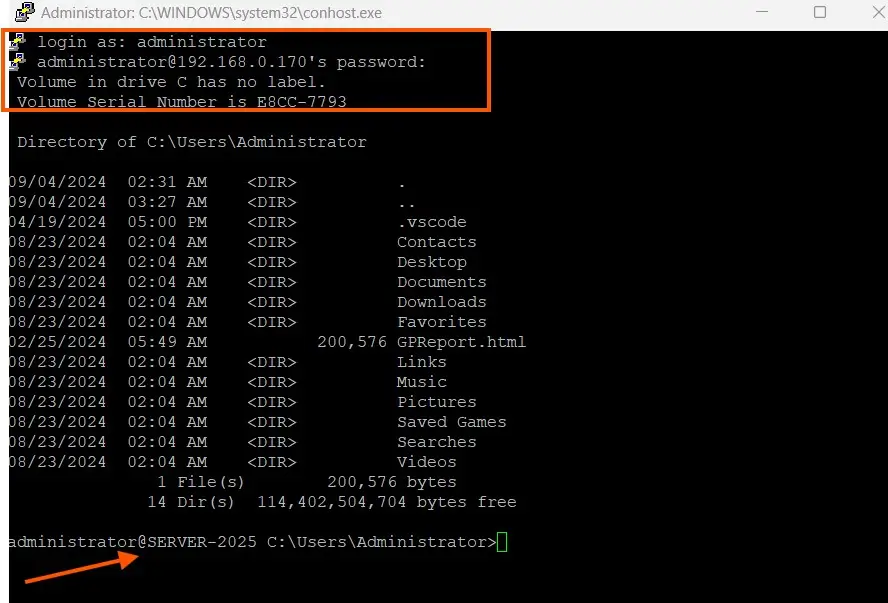
Once you do that, you will get connected and will see the command prompt below.
domain\username@SERVERNAME C:\Users\username>
Connecting Windows OpenSSH With Putty
However, you can also connect your server with the help of Putty software.
Download and install the putty from the official website.
Open Putty type the IP address of your server and click on open.
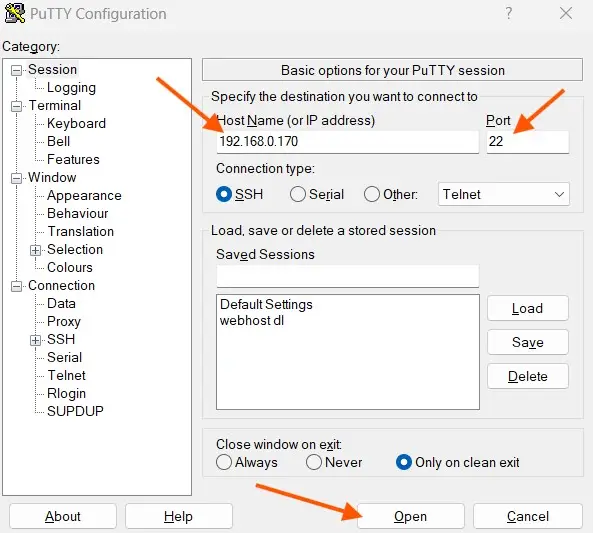
You will be connected to the server.
The below image shows the open SSh connection via putty.
Finally, we are connected to our OpenSSH Server with putty as well.
Uninstall OpenSSH From Windows
There may be a chance when you want to uninstall OpenSSH from your Windows server.
You can remove OpenSSH in two ways, graphical from option features and via PowerShell as well.
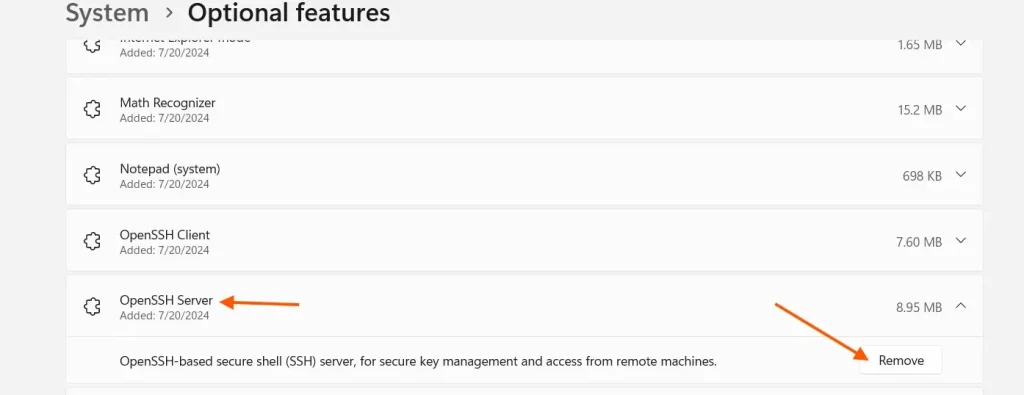
To uninstall OpenSSH Graphically.
Open Setting, search for Optional Features as we did above, select the OpenSSH Server, and Click on Uninstall or Remove.
Therefore, Uninstall it via PowerShell Cmdlet. Run the following cmdlet
# Uninstall the OpenSSH Client
Remove-WindowsCapability -Online -Name OpenSSH.Client~~~~0.0.1.0

# Uninstall the OpenSSH Server
Remove-WindowsCapability -Online -Name OpenSSH.Server~~~~0.0.1.0
Once you run the above cmdlet, the OpenSSH client and server both will be removed from your Windows machine.
Conclusion
In this article, we learned about how to install OpenSSH on Windows Server 2019 and Windows Server 2025.
Whenever you are configuring OpenSSH, make sure to allow the firewall rule on port 22 to make a successful connection.
Therefore, if you have any queries related to this article, feel free to contact us.
Moreover, watch the below video for how to install OpenSSH on a Windows Server.