Table of Contents
How To Make Facebook Avatar Step by Step
How to make Facebook Avatar, now available – A new way to express yourself
Have you been noticing those cute animated Avatars all over the Facebook feed?
From Apple’s Momoji to Snapchat’s Bitmoji, Avatar’s have become quite a common way to express emotions.
After launching Avatars in the UK and other regions, finally, Facebook has announced the Avatar feature in India too.
This feature enables users to create a cartoon-like version of them by choosing from a variety of faces, hairstyles, outfit options, and more.
![]()
The whole process of creating Avatars on Facebook is very easy.
After creating Facebook Avatars, users will be able to use them in comments, stories, messenger, and even the profile picture.
Additionally, they can even export their Facebook Avatars to third-party apps like Twitter, Snapchat, or Instagram, and more.
So, make your own animated cartoon version with the Facebook Avatar feature and express yourself on the social media network.
The avatars can express themselves in a variety of ways which means you can something different than posting the emojis for love, laugh, angry, or cry reactions.
Steps To Make Avatar on Facebook
If you want to create your own Facebook avatar, go through the below simple steps on how to create an avatar and start sending it to your friends:
-
Login or set up a Facebook account
The very first thing that you will need to do to create an Avatar is to log in to your Facebook account via the Android or iOS app.
Before proceedings, make sure to update your Facebook app with the latest version.
But, if you don’t have the account, get the app downloaded from the Play Store or Apple store.
Now, set up the Facebook account.
-
Open the Facebook app menu and select Avatars
On the Facebook app, tap on the menu icon in the lower right-hand corner or swipe right a few times to access the menu option.
Once you are in the Facebook app menu, you will see a suite of options.
Now scroll down and tap on the see more tab where you will see the option for “Avatars”.
![]()
3. Start creating your Facebook Avatar
Once you are in the Facebook Avatar maker section, the rest of the process of creating the Facebook Avatars is very simple.
Follow the on-screen instructions and get it done easily.
![]()
4. Choose Your Facial Features
When creating your own version of Facebook Avatar, you can get super specific with some details to make sure that it looks just like you.
There is a built-in handy dandy feature in the app that allows you to pull the selfie camera.
This allows you to compare your Avatar to your real self simultaneously.
First, you need to select your skin tone before moving on to other facial features.
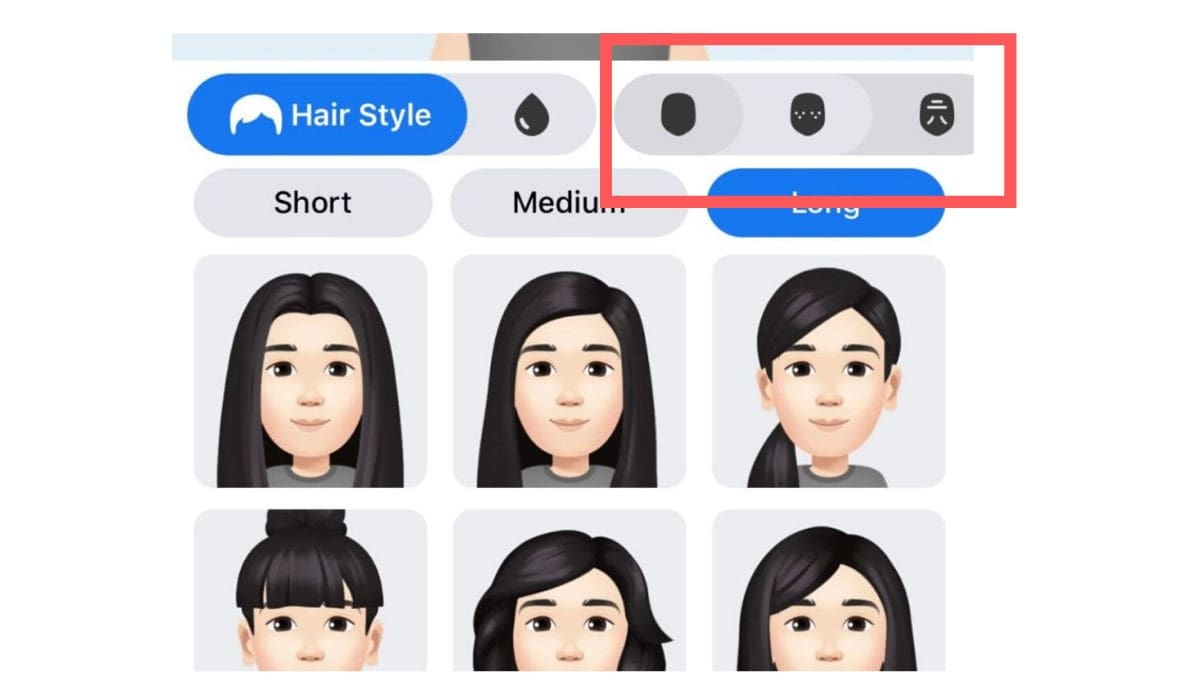
Then it’s time to pick from different hairstyles, eyes, nose, face shapes, and more.
Additionally, you can even customize the eye color, makeup, facial hair, etc.
The customization option allows you to add features like adding beauty marks, or forehead and mouth lines.
5. Pick your outfit
To give a finishing touch, pick from different body types and outfits.
Here, you will find a range of different apparel styles like casual, formal, athletic, or more.
Facebook Avatar maker will allow you to add some headwears to choose from like a baseball hat, hijab or beret, etc.
You may even add a headband with cat ears to add more style.
![]()
6. Send it away
Once you are done, just click the checkmark icon in the corner of the screen to save your avatar.
From there, you can access different versions of yours under the sticker icon via the comment box.
Just click on the one that matches your mood at that moment and send it.
Isn’t it simple? There is no need to upload any photos or give Facebook access to your data.
![]()
How to use your Facebook Avatar?
Now you know how to make Avatar on Facebook? It’s time to use them!
So, you have created your Facebook Avatar now and it’s smiling at you proudly.
Now, it’s time to use it. To use your Avatar while making comments, simply tap on the smiley face next to the GIF icon, and then click on the Avatar icon at the bottom of your screen.
Initially, you can even spread your Facebook Avatar by sharing it on Facebook where it will appear simply on all your friends’ news feed.
Your Facebook Avatars will come in the form of some pre-determined reaction stickers set and you can use these to express your feelings and sentiments towards any post.
Using Facebook Avatars in the comment section
Whenever you want to use Facebook Avatar to express your thoughts to any post, click on the comment button, and then the emoji/smiley button where you will present with some of your avatar stickers.
Using Avatars in messenger
Just like the comment section, you can also use avatars for the chat messages on the web version of messenger.
Whenever you have the chat window open in messenger chat, just click on the sticker button which will present a suite of stickers to use.
Now, click on the icon showing your Facebook avatar maker.
Here you will find out the custom avatar stickers to use.
And, to add the avatar reaction on messenger, tap on the emoji button on the chat bar, go to the stickers menu, and swipe right to access your Avatar stickers.
In case of any disconnect. Feel free to contact Techijack.com