Install MySQL For Windows | Step-By-Step
Install MySQL On Windows Server To Create & Manage Databases
Table of Contents
How to Install MySQL For Windows Server
Learn how to install MySQL for Windows to host websites with databases such as WordPress.
It is an open-source database management system that helps to store and manage data.
Many businesses use MySQL Server for critical data storage and processing.
Therefore, if you plan to host a WordPress Website on Windows Server.
You need to install MySQL for database management.
Here in this article, we will see how to install MySQL on Windows Server 2022.
Therefore, we will also create a Database and user with MySQL command line.
There are different versions of this software depending on your operating system.
Note: Whenever you are trying to install it on Windows, you must choose the Microsoft Windows version of MySQL.
Why to Install MySQL
- It is easy to install and you can manage the database easily.
- As per the security concern, MySQL is secure for storing the data.
- Therefore, if you configure the cluster service for MySQL it provides you excellent performance and high availability.
- It is easy to start and stop remotely.
- Runs without specific user interaction.
- The speed and security of MySQL servers provide the benefit of accessing your databases over the internet.
Installing MySQL on Windows
Before proceeding with the Installation, we have to download the MySQL.
Download MySQL from the official Website for Microsoft Windows.
You may see a different updated version of MySQL at the time of this post MySQL 8.0.36 is the latest one.
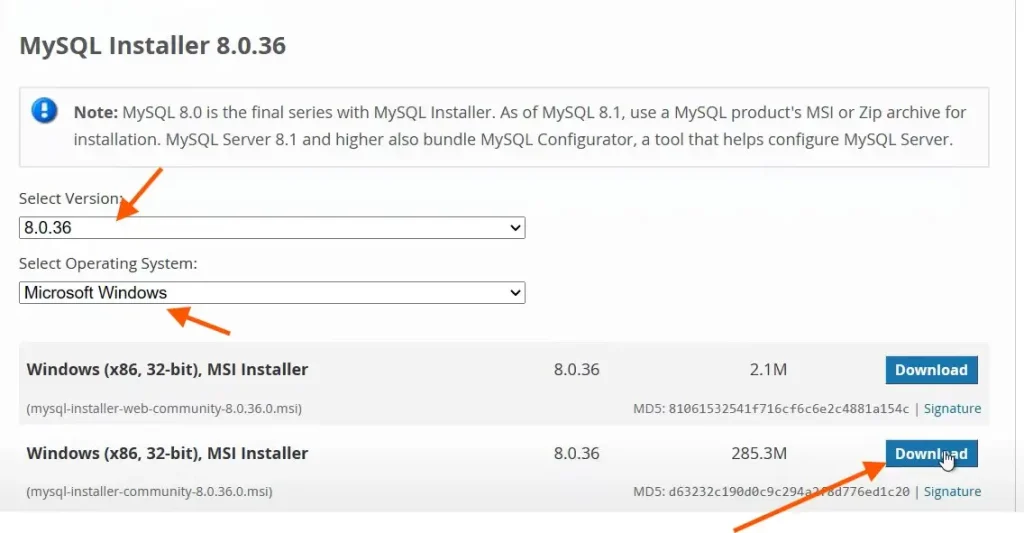
Once you download MySQL run the MSI installer.
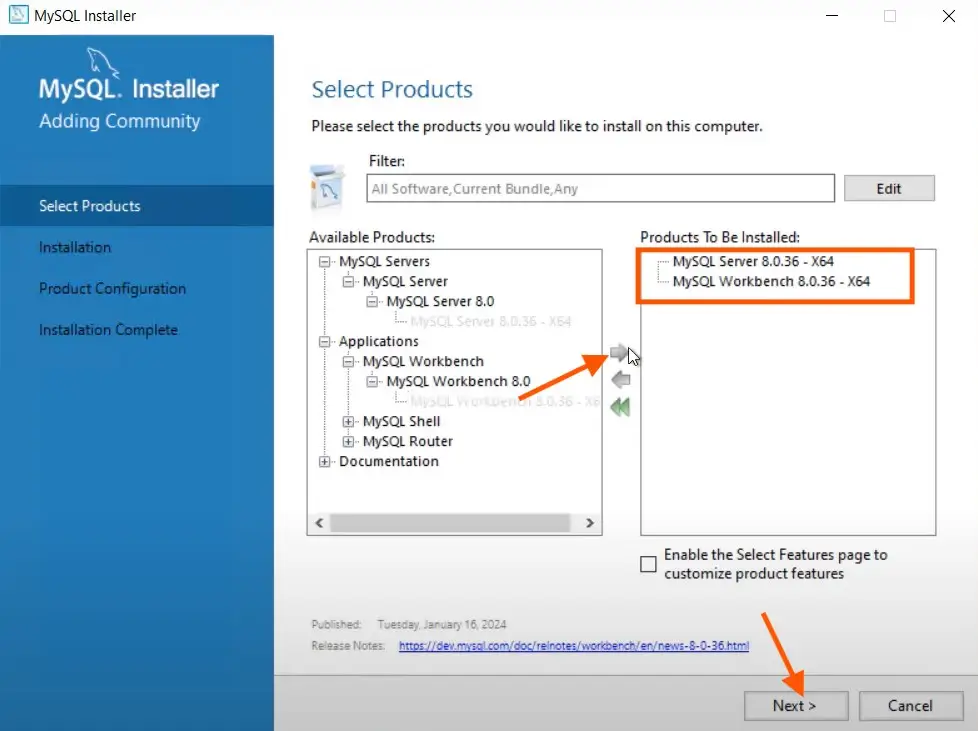
MySQL installation wizard will open add the MySQL Serer 8.0.36 and MySQL Workbench 8.0.36 – X64 and click on Next
On the next screen click on Execute and you will see the screen as below.
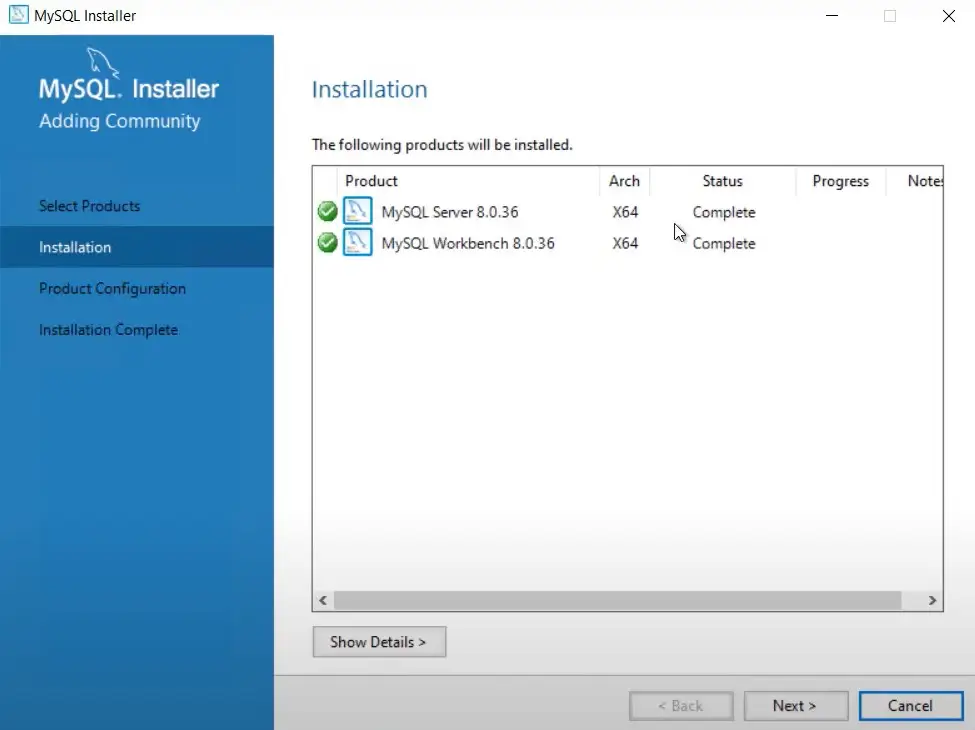
To proceed further again click on Next and Next twice.
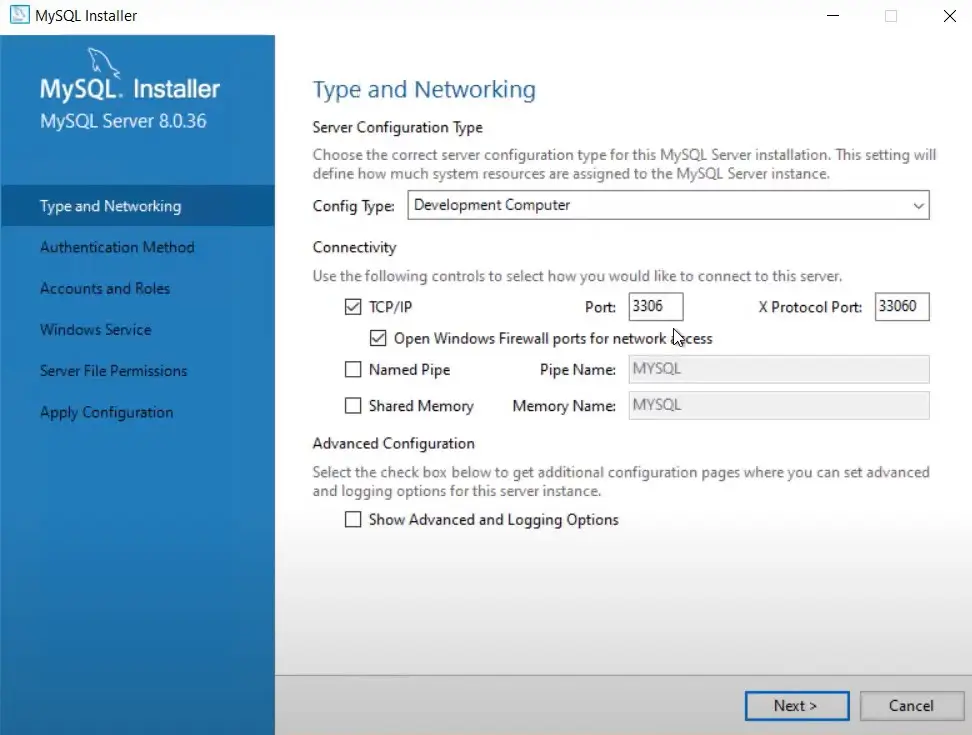
Now it will show the type of networking and port details.
Do not change the port, keep it as default on port 3306 and proceed with Next.
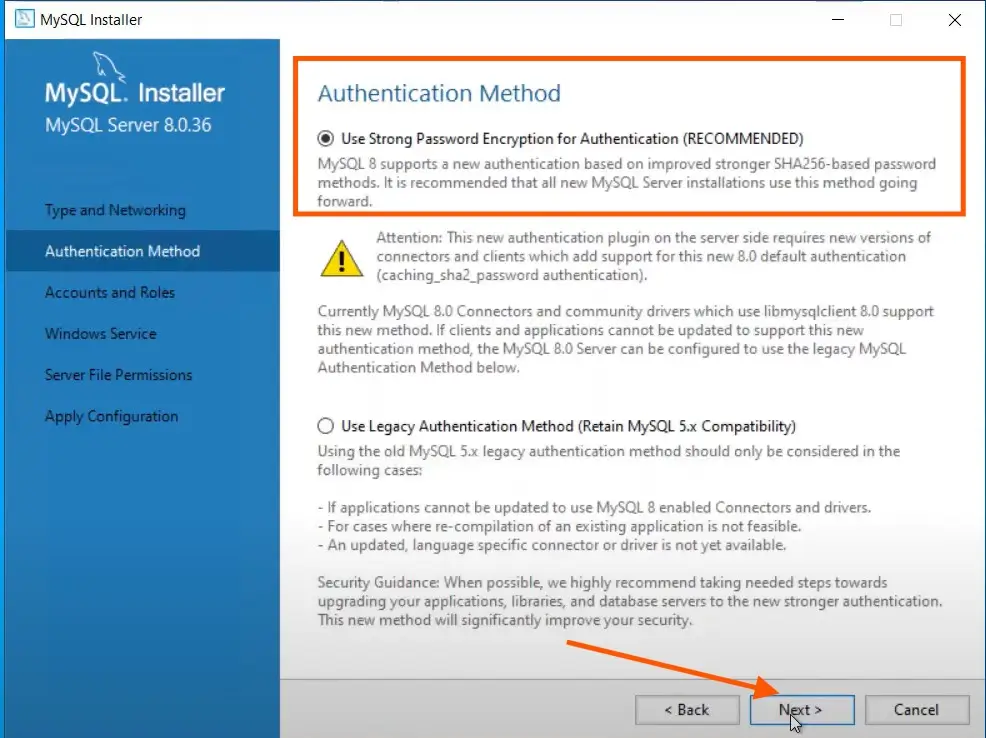
The next screen will be for the Authentication Method, use the strong password encryption Authentication and proceed with the Next
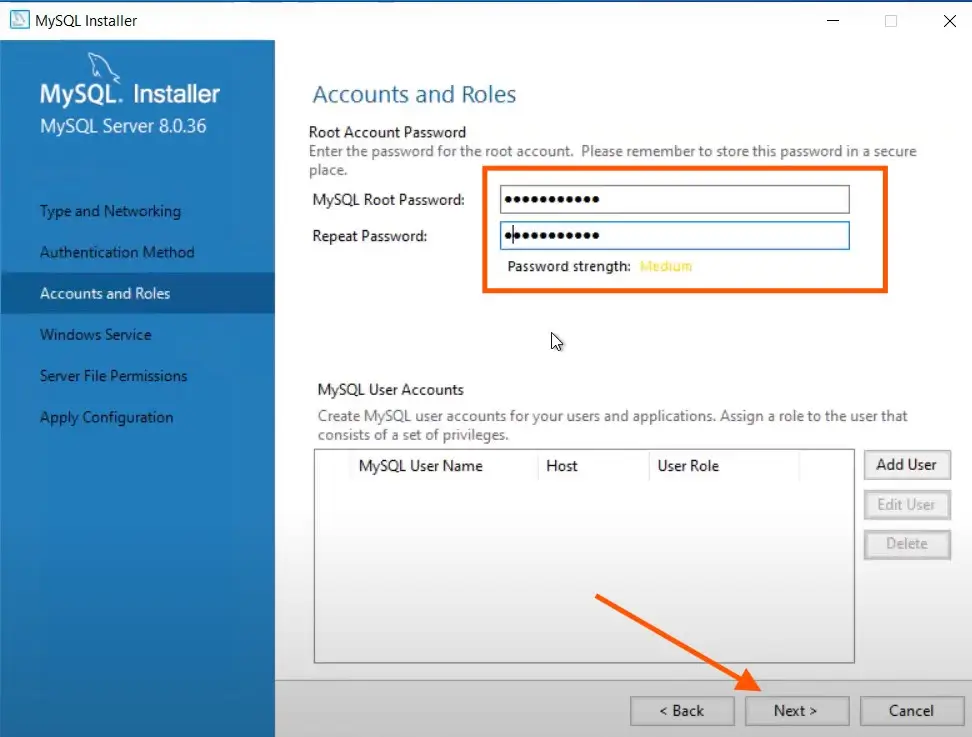
Now, set the password for the MySQL root password and proceed to the next step.
Proceed with Next twice on the default selection to get the Apply Configuration settings.
To apply the configuration setting, click on Execute and finish once done.
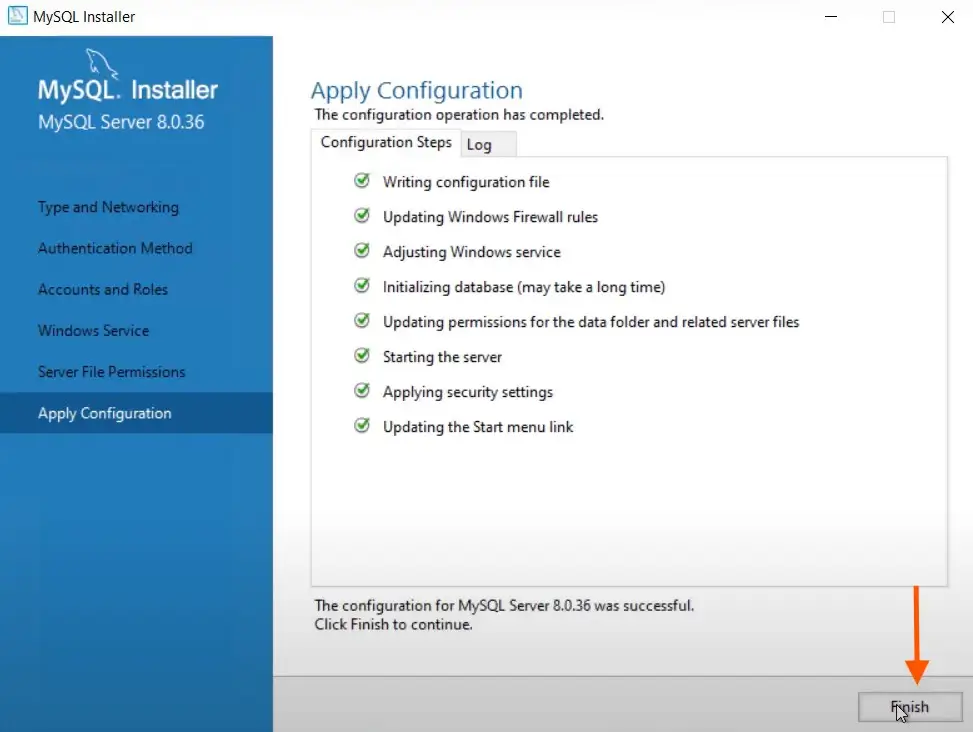
After clicking on finish, click next on the product configuration and click on finish again to start MySQL Workbench.
Workbench will be opened automatically and you can test it by logging in with your root password that was set during the setup wizard.
Installation of MySQL is now completed
Creating User & Database In MySQL
To create a user and database open the MySQL command line tool.
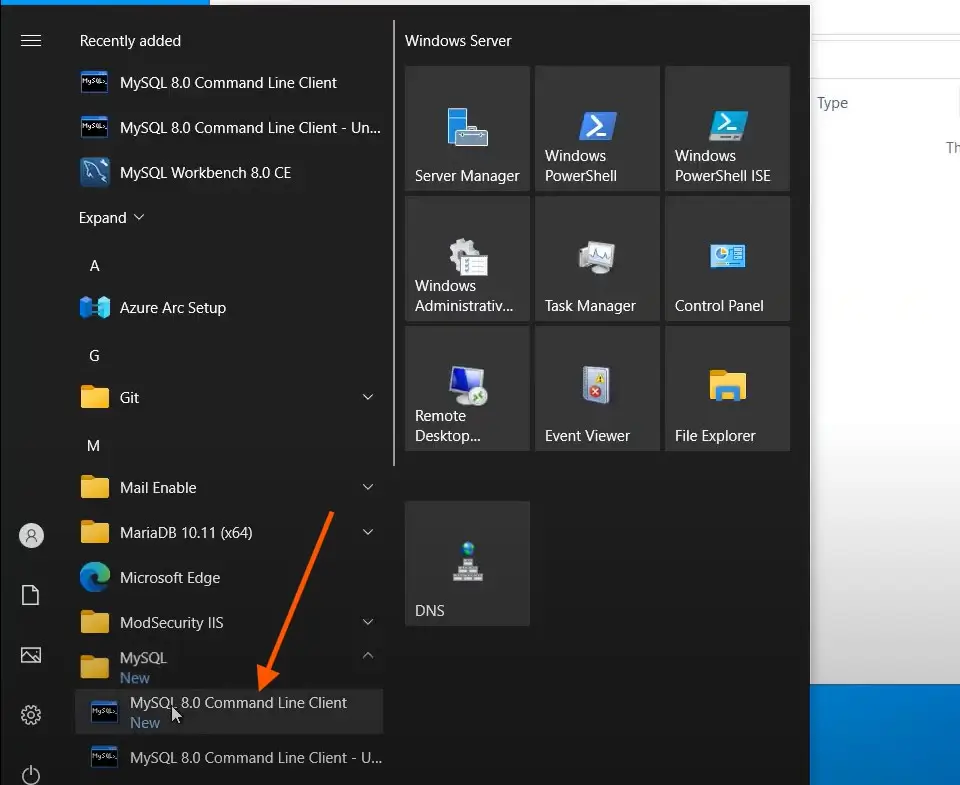
Once you open the MySQL command line client enter your password to log in.
Therefore, to create a database type the below command and hit enter ”
create database wordpress;Now type “use wordpress” and hit enter. you will see the option Database changed.
To create a user type the following command
create user 'wpuser'@'%' identified by 'password';We have to grant permission for our newly created database and user i.e. WordPress and wpuser in our case.
To grant the permission type the command below
grant all on wordPress.* to 'wpuser'@'%';Also, flush the privileges by running the command below
flush privileges;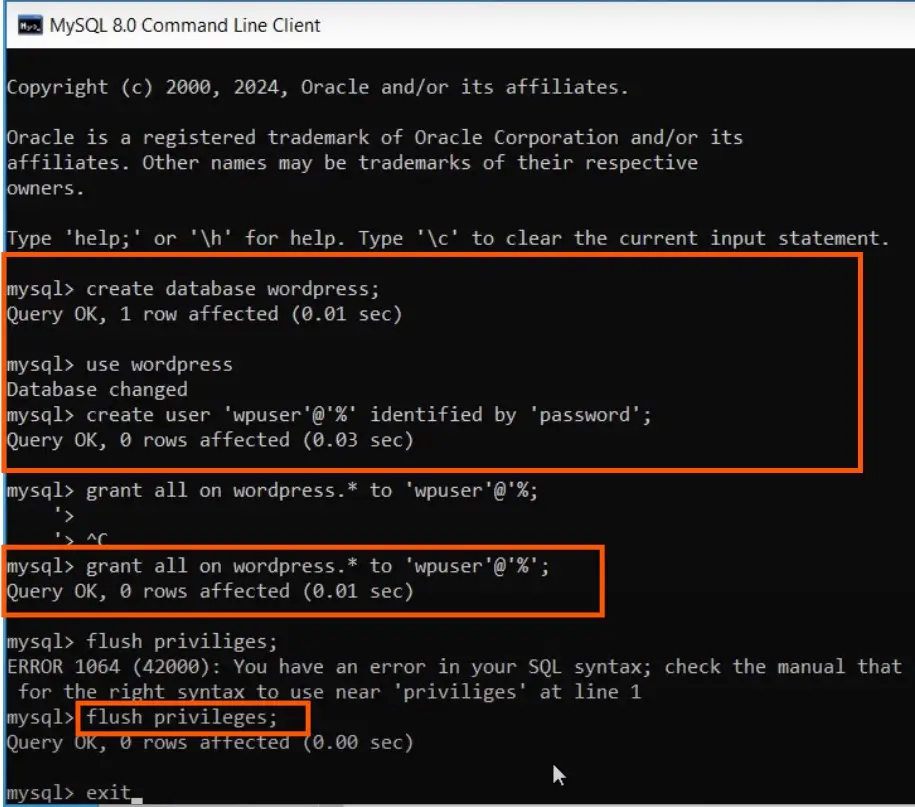
Now database and user are created and we can exit from the MySQL command line tool by simply typing exit.
We created a sample user, database as WordPress suitable for WordPress Installation on a Windows Server.
Conclusion
After installing MySQL and creating users and databases, you can now host your application on your Windows server that supports databases such as WordPress.
In this article, we learned how to install MySQL on a Windows server and how we can create users and databases through the MySQL command line.
If you may also like to know how to install PHP on Windows or more tutorials about the IIS Web Server
Therefore, if you have any queries related to this article, feel free to contact us.


