Remove Exchange From Active Directory with ADSIEdit
Manually Uninstall Exchange Server 2013/16/19

Table of Contents
Remove Exchange From Active Directory with ADSIEdit
Remove Exchange From the Active Directory with the help of ADSIEdit is a task that needs to be handled carefully.
However, it is not a recommended method of Exchange Server Uninstallation.
But sometimes it is only the option left for the administrator to use ADSIEdit.
Our first choice to remove Microsoft Exchange is a clean Uninstall by migrating mailboxes and system mailboxes to another server.
Whenever you plan to uninstall the Exchange server, first choose the correct method with the proper removal guide.
Let’s see the scenario when we need this useful tool to remove Exchange From the Active Directory
Scenario To Remove Exchange From AD with ADSIEdit Tool
Suppose you have a DAG with 2 Exchange Servers and one fails due to Hard drive failure or any other issue.
Therefore, you are not able to recover the DAG member server, or you are not able to login to cwp.
Also, if the Exchange server is not able to start anymore, or you have an Exchange with incomplete install or uninstall.
Or accidentally Exchange is not able to start and you remove it from Active Directory.
There, might be some other reason why you do not have access to ECP or Exchange is in the offline state.
For all the above reasons you are not able to remove the exchange correctly.
In this situation, you can use the ADSIEdit tool carefully to remove the exchange.
Our Scenario
We have two Exchange Server 2019 in a DAG configuration.
One of the Exchange installation Drive c:, has been failed
We are not able to log in to ECP even after setting SSL certificates.
We plan to remove the complete Exchange from Active Directory.
After removal, we will install a new exchange server and will recover the mailboxes with the Recovery Database as we have full backup.
In this article, I will go through only the removal process of Exchange from Active Directory.
However, If you do the same with your Exchange organization.
You will be able to install the Exchange Server as a fresh environment, for your organization.
Steps to Remove Exchange Server from Active Directory with ADSIEdit
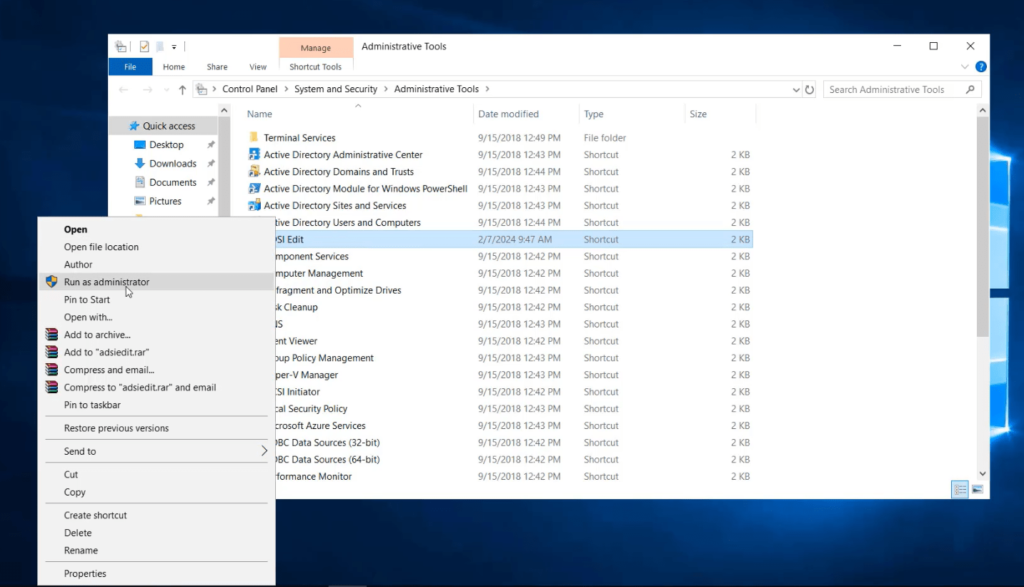
First log in to the domain controller with Domain Admin Rights.
Then go to Administrative Tools and run the ADSIEdit tool as Administrator.
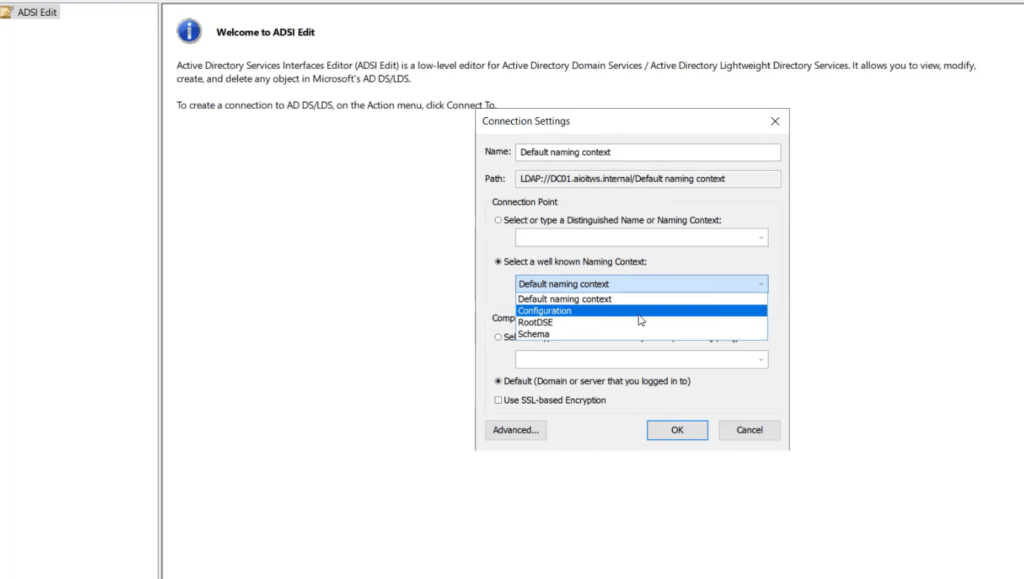
Now once the ADSIEdit has been opened, you need to select the configuration option to delete the Exchange Attributes
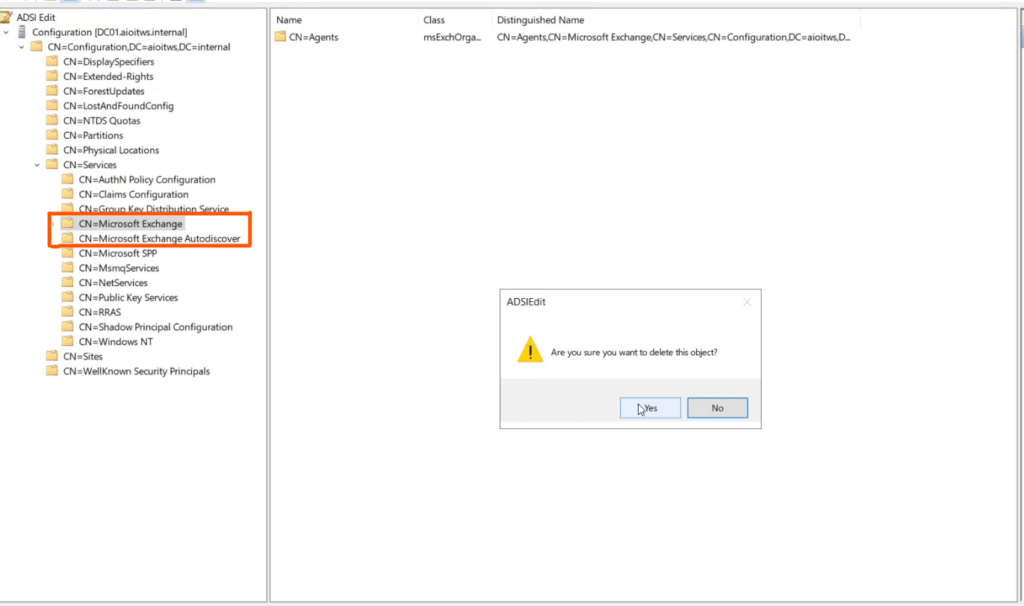
After this Expand the CN=Configuration, DC=YourDCName and expand CN=Services
Look for the entry CN=Microsoft Exchange Delete it and confirm the warning as well.
Also, delete the CN=Microsoft Exchange Autodiscover as well.
Now Remove Exchange Server Security Groups & System Objects Attributes from Active Directory.
You can delete it from Active Directory or the ADSIEdit Tool
In this case, we are doing it with ADSIEdit
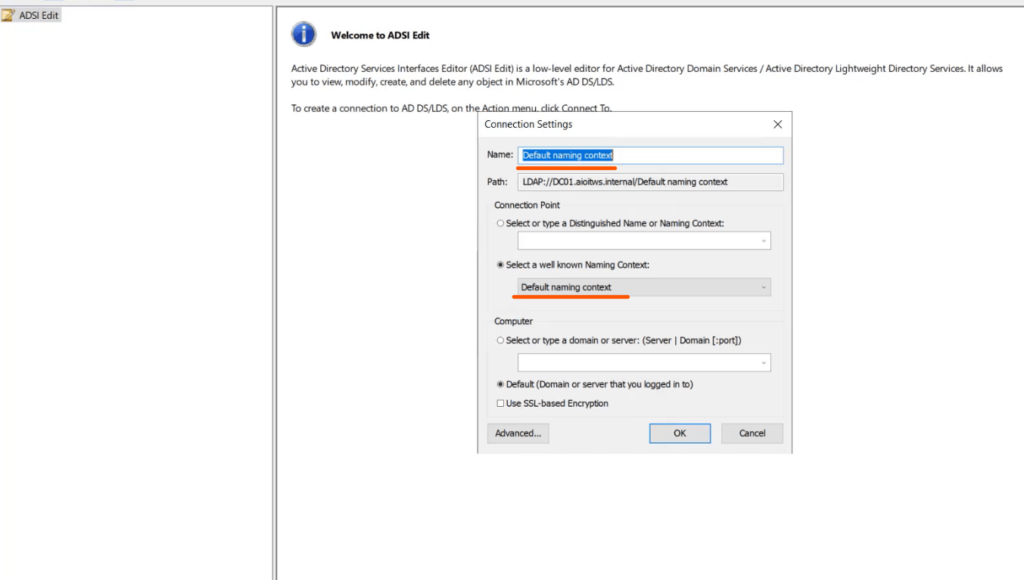
Reopen the ADSIEdit Tool or this time connect to the Default naming context
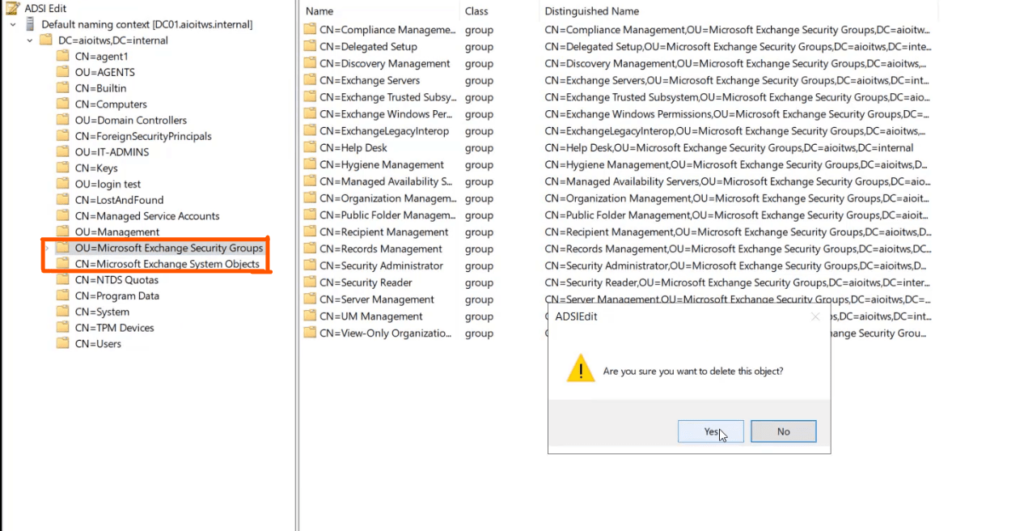
Now go ahead and delete the OU=Microsoft Exchange Security Groups and CN=Microsoft Exchange System Objects
Now we have removed Exchange attributes from ADSIEdit and also we removed the Exchange Security Groups and system objects.
Remove Exchange From Active Directory Computers
It’s now time to remove the Exchange computer accounts from the active directory.
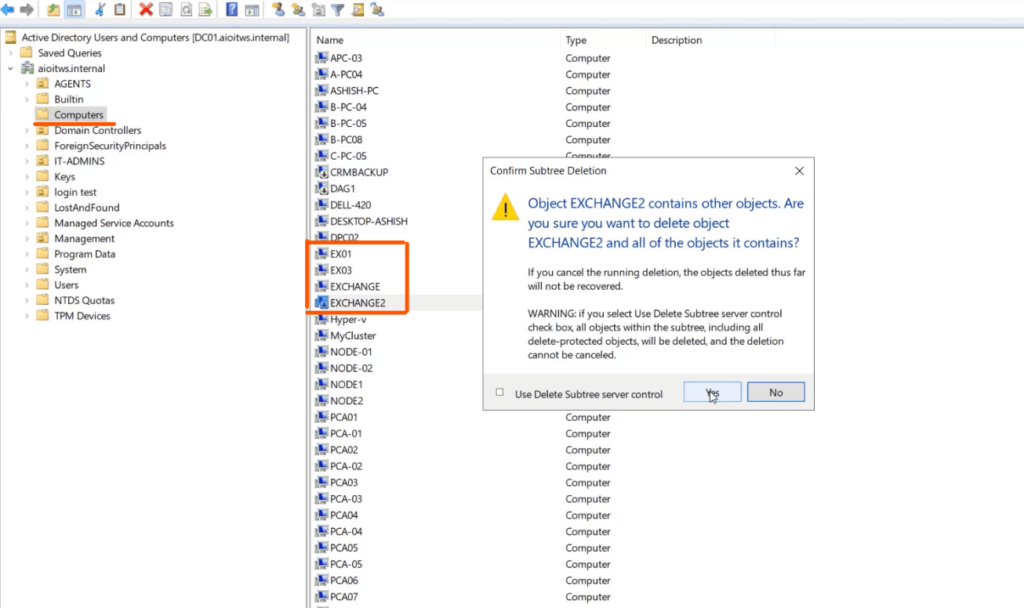
Go to Active Directory Users and Computers.
Select the Exchange server computer accounts and delete them all.
In our case, we have four Exchange servers, so we are going to delete them all.
Now our Exchange server computer account is also removed.
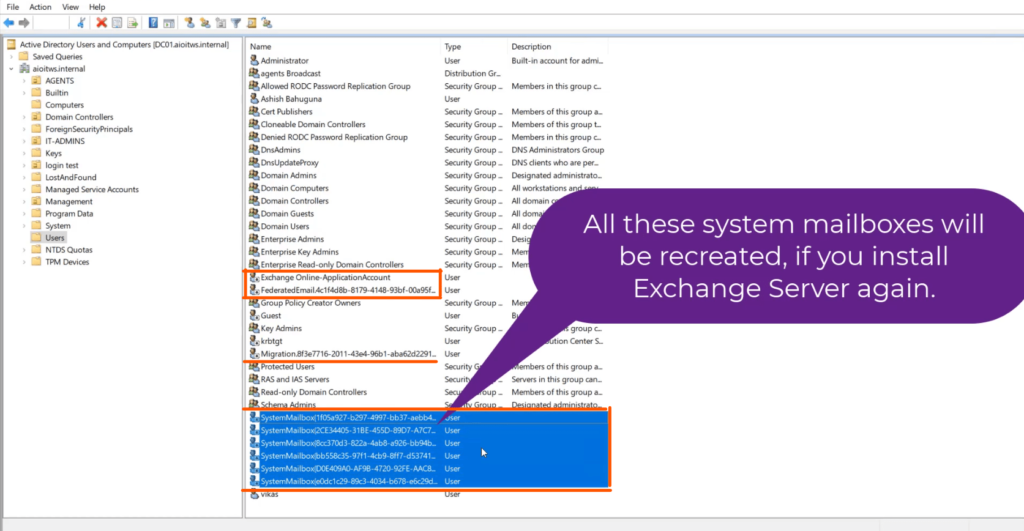
Therefore, we still have the default-generated Exchange user accounts and system mailboxes in our Active Directory under Users OU
We need to delete them as well, so that, we can install Exchange from scratch.
Again go to Active Directory Users and Computers, navigate to users, and try to delete the system mailboxes.
Search for the below mailboxes
System Mailboxes
DiscoverySearch Mailbox
Exchange Online-Application Account
FederatedEmail
Migration
Remove Exchange Server DNS entry
After you do all the above steps
our last step is to remove the Microsoft Exchange entry from the DNS
Go to the DNS manager select the zone local or external and delete the Exchange entry
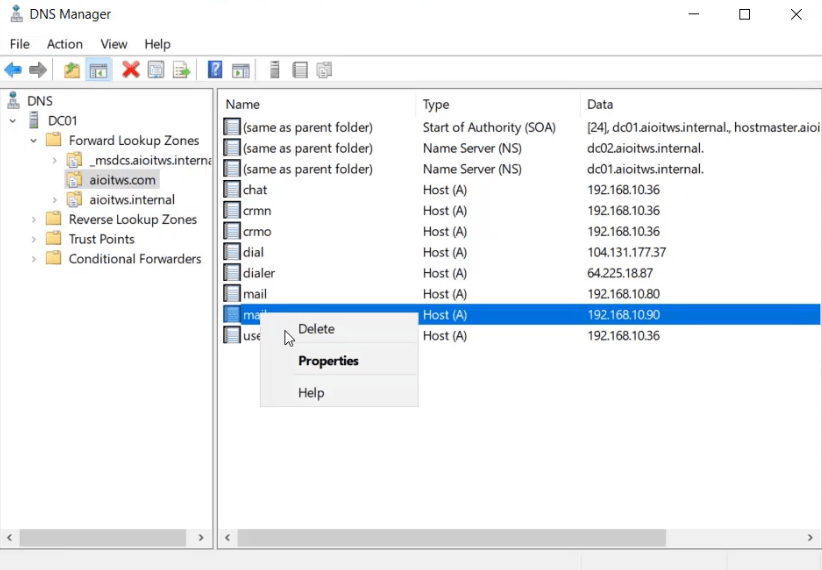
After deleting the DNS entry, the Exchange Server will be completely removed from the Active directory.
Now, if you want to install the Exchange server you need to install Exchange prerequisites for a fresh installation.
You can do that, without any issue.
Conclusion
Whenever you want to remove Exchange from your organization, try to remove it with the uninstall wizard available in the add-remove programs.
But as we discuss above there may be some cases when you have to follow the above steps.
First of all, you should try to recover the exchange server with the recommended steps.
Make sure the ADSIEdit tool is an option when all the other options are not working at all.
If you want to see more about exchange recovery visit How to Recover Lost Exchange Server
In case of any doubt or issue, feel free to contact me for Exchange Server Support at info@techijack.com or watch the YouTube Channel Techi Jack
Furthermore, for more clearance, you can watch the video, on how to remove the Exchange Server from Active Directory with ADSIEdit