Shared Mailboxes In Office 365 & Exchange 2019 | Techijack
How To create Shared Mailboxes in Office 365
Table of Contents
What is Shared Mailboxes In office 365 & Exchange Server
If you want to know about how to create shared mailboxes in office 365 & Exchange.
first, you have to understand, what is shared mailboxes?
Let’s take an example
You have a customer service or info email address on your public website
These mailboxes have heavy email flow and you want to assign multiple people to respond promptly to your customers.
Instead of assigning a particular user to respond to these emails.
It’s better to create a shared mailbox and assign it to multiple users.
However, shared Mailbox feature was not available to the exchange prior to version 2013
Starting with the exchange server 2013, the process was simplified with the use of shared mailboxes.
Shared Mailbox is a unique kind of user mailbox
Therefore, the disabled account is created with the associated user.
In order to gain access to this mailbox, users are granted permission.
However, the user needs to sign in to their own mailbox and then accessing the mailbox via outlook on the web or Microsoft outlook.
How to create Shared Mailboxes In Exchange 2019
In the Exchange server, you can create a shared mailbox in a single step.
By using the Exchange admin center (EAC) or by Exchange Management Shell (EMS)
when a user is granted full permission to a shared mailbox
The delegated user can log on to the mailbox.
However, he can view and manage all messages in the mailbox.
But granting full access permissions does not grant the delegated user the right to send mail as the selected mailbox.
So, to allow a user to send mail from the delegated mailbox.
You must also assign send as permissions.
When a recipient with send as permissions sends an email from the delegated mailbox.
Any email sent from the shared mailbox will appear as if it is sent by the mailbox owner.
Note: You can also use delegated users to access the user mailbox instead of creating shared mailboxes.
Understanding Shared & Resource Mailboxes – Exchange 2019

Steps To Create a Shared Mailbox
Logon to the Exchange admin center with Admin Credentials
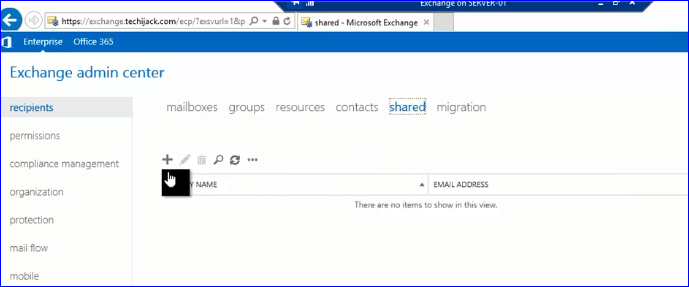
Go To recipients and create a new shared mailbox
Provide a name and alias to the shared mailbox, In my case, it is customer service
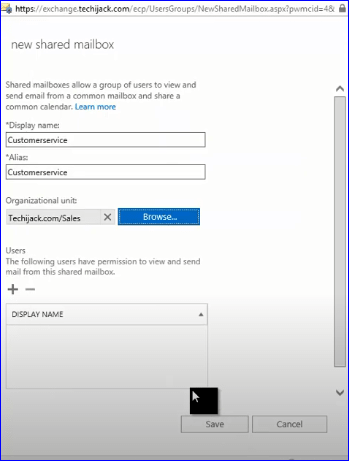
Choose the organizational unit, where you want to put the mailbox.
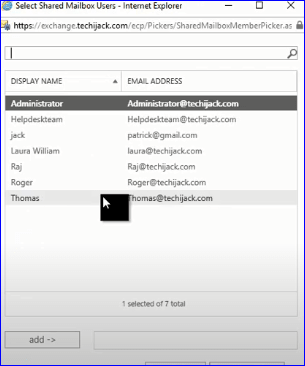
Select the users to assign permission to this particular shared mailbox.
Select the mailbox database where you want to save this mailbox.
Shared Mailboxes in office 365
If you want to create shared mailboxes in office 365 and your company is using a hybrid exchange environment.
In this case, you have to create and manage a shared mailbox from an on-premises exchange.
Therefore, it is easy to create shared mailboxes in office 365 so that multiple users can access the same mailbox.
When someone replies from the shared mailbox, it appears as it was sent by the mailbox owner.
Steps Of Creating Shared Mailbox in Office 365
Try to sign in with the admin credential to your Microsoft 365 admin center.
Navigate to the group in an admin center.
Select Add a mailbox and provide the name of the mailbox.
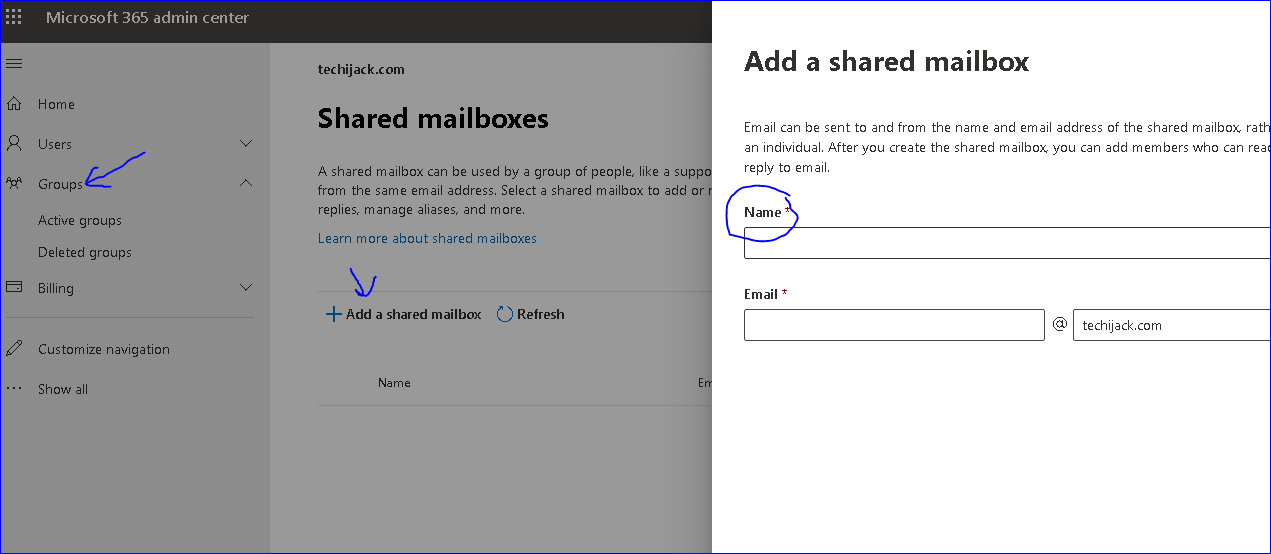
Click on add or save.
Wait for a few minutes before you can add members to it.
In the next step add the members, to whom you want to allow access to this mailbox.
Once the members are added, click on save.
Now you can add a shared mailbox to outlook or outlook on the web.
For Exchange online, you can just right click on the folder at the left pane and choose to add a shared folder.
On-premises Exchange Owa right-click on your user name and choose to add a shared folder.
In order to add a shared folder in outlook
Choose File Tab>Account Settings> Email Tab> Change> More settings> Advanced> ADD
Note: As shared mailbox user is disabled by default, so no one can directly logon to the shared mailbox.
There is no password for this mailbox.
That’s why it is assigned to multiple users with secure access.
Migrate Your Mailboxes to Office 365


